

Volunteer Natasha says:
This quick and easy little crochet shell is a brilliant way to use up those leftover scraps of yarn and would look great as a decorative addition to any crafty project, like on a cosy blanket or hanging on a mobile!
You can use any fibre/material yarn of your choice but be aware that thicker yarns will produce larger shells and the opposite with thinner yarns, so it is a good idea to up- or down-scale your hook size too to match the yarn thickness.
You will need:
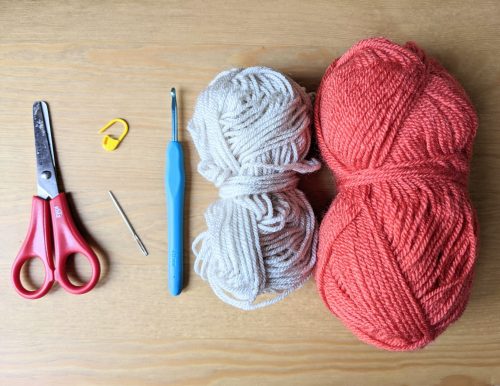
- DK (double-knit) yarn in 2 colours
- 4mm crochet hook
- Stitch marker: Not essential but can be REALLY helpful to keep track! You can use anything that will clip onto the yarn, like a safety pin, if you don’t have stitch markers.
- Tapestry needle
- Scissors
This pattern uses US crochet terms.
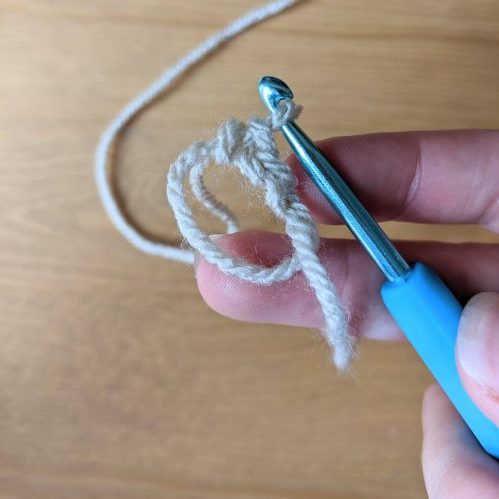
1. Create a magic circle and chain 1:
A magic circle is a great crochet skill to learn as almost all circular patterns will begin with a magic circle.
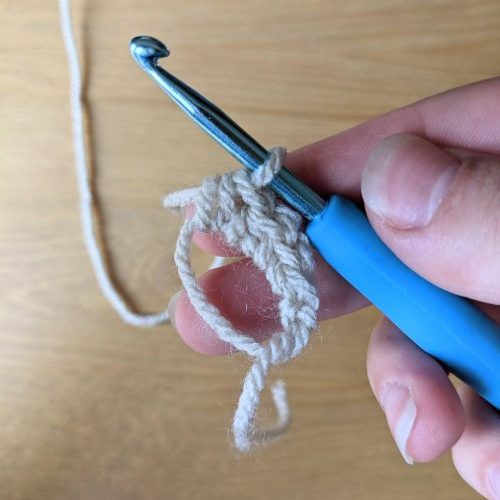
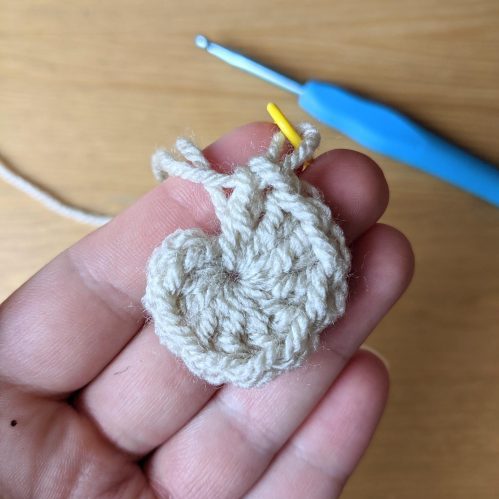
2. Work a single crochet (SC) into the centre of the circle.
Follow this video again to work a second (SC) into the centre of the circle. Your shell will now look like this:
3. Work a half-double-crochet (HDC) into the centre of the circle.
Follow this step again to work a second (HDC) into the centre of the circle and your shell will look like this:
4. Work a double-crochet (DC) into the centre of the circle.
Work another 7 (DC)s into the centre of the circle so you have 8 (DC)s in total. This is how your shell will look now:
5. Tighten the circle by pulling the loose yarn end (not the bit of yarn you have been actively crocheting with) nice and tightly.
Once you have closed the circle, your shell will start to take shape and will look like this:
6. Using the same technique as step 4, work 2 (DC)s into the same next stitch
This is actually the first (SC) you worked into the centre of the circle in step 2.
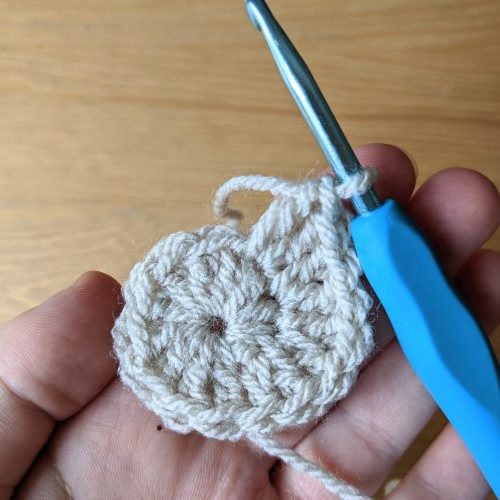
7. Follow the same technique to work 2 (DC)s into the next 3 stitches.
This means you will have worked 2 (DC)s into 4 stitches (8 (DC)s in total).
Your shell will now look like this:
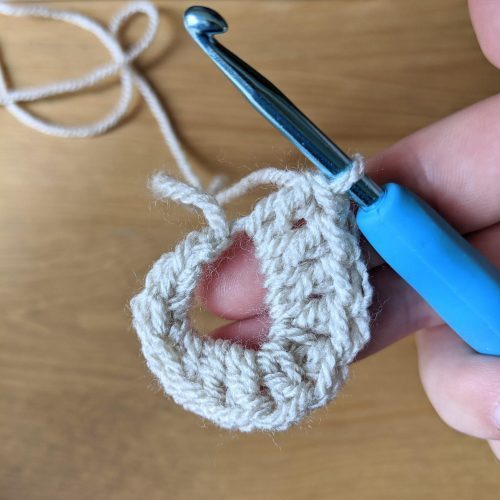
8. In the next stitch work a Half-Triple-Crochet, followed by a Triple-Crochet (TC)into the same stitch.
9. Work 2 (TC)s into the next 5 stitches (total of 10 (TC)s in this step).
Your shell will start growing significantly in size now and will look like this:
10. In the next stitch work a Half-Double-Triple-Crochet (it sounds scary but isn’t any different to what you have already been doing!), followed by a Double-Triple-Crochet (DTC) into the same stitch.
11. Work 2 (DTC)s into the next 7 stitches (total of 14 (DTC)s in this step).
You have finished crocheting your shell now – yay! It will look like this:
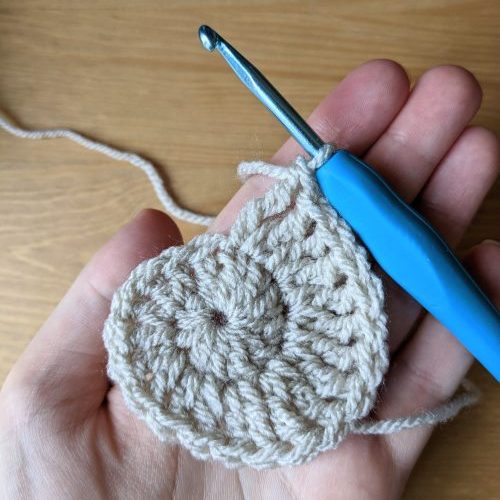
12. Finally, the finishing touches.
Fasten off your yarn like so:
And weave in the 2 remaining loose yarn ends with your tapestry needle (or keep a long yarn end if you want to use it to sew your shell onto something):
There is no ‘correct way’ to weave in your loose yarn ends. You just want to make sure that they are secure and hidden so your lovely shell looks neat and does not unravel.

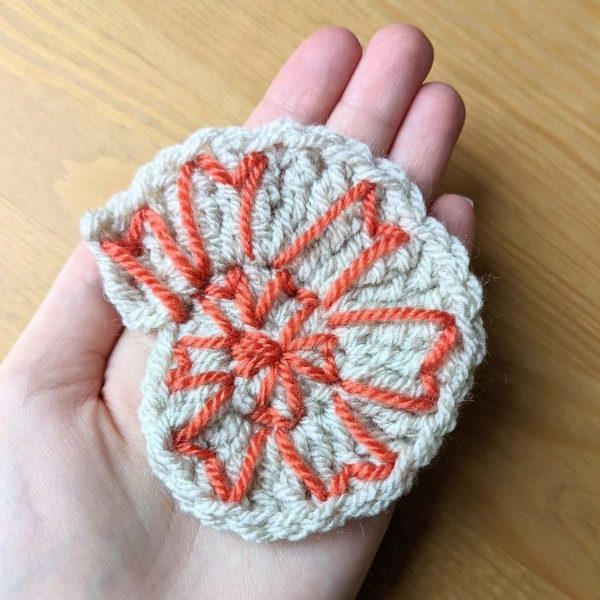
Ta-da! Your nautilus shell is ready.
Decorate: After weaving in your loose ends, this is a good time to add decoration to your shell if you would like. I used a 2nd yarn colour and decorated simply by cutting a long length of yarn and using my tapestry needle to weave it into the shell.
There was no rhyme or reason for this – I just found nautilus shell images for inspiration and weaved the yarn in by eye. Get creative with it!
Why not try reusing any plastic bags to make your own yarn? It’s a perfect way to get involved in our summer Protest Plastics Challenge and reduce, reuse and reject plastics!
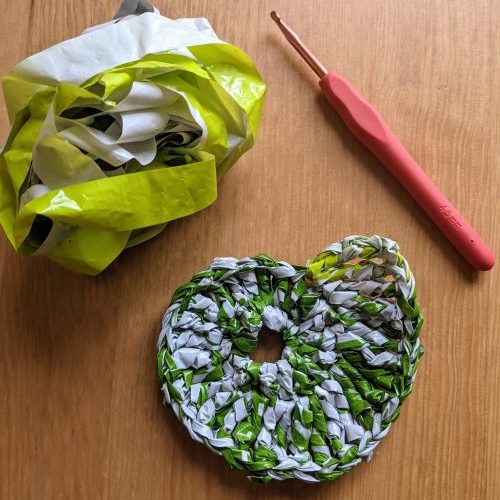
Follow this yarn making tutorial before creating your nautilus: kitchentableclassroom.com/plarn-plastic-bags-into-yarn/
Note: when crocheting with your homemade reused plastic yarn, be careful not to pull too tightly when closing the circle in step 5 as it can stretch and snap!
Find out more about National Marine Week from the Wildlife Trusts
We’ve got plenty of Crafty Creatures to keep you busy! Try our Create a Bumblebee or Recycled Make Challenge for more.
Discover more about creatures of the ocean in Whales!
Get investigating in our Nature Classroom: Shell Detective
