


Have you ever picked up a shell on the beach and wanted to know more about it? Have you turned it over in your hands, looked inside, wondered what the animal that lived in there was like? Well, now is your chance to be a true Shellock Holmes as this Nature Classroom is all about shells. We will be looked at what shells can tell us about adaptations, growth and more, with hands on activities and makes. So take a look around your home and your garden, see if you can find a shell and join us as we become shell detectives for the day.
These activities support learning in the following areas:

Identify and name a variety of common animals, and describe and compare their structures.
Give reasons for classifying plants and animals based on specific characteristics.
Explore and compare the difference between things that are living, dead, and things that have never been alive.
Identify that humans and some other animals have skeletons and muscles for support, protection and movement.
Identify how animals and plants are adapted to suit their environment in different ways and that adaptation may lead to evolution.
Sorting Shells
The sea shells you find on the beach used to contain animals. The shells we are looking at in this nature classroom belonged to a group of animals called molluscs. The shell was a part of these animals – you can’t separate a mollusc from its shell when it is alive. The shell is hard because it contains a mineral called calcium carbonate. It protects the squidgy animal living inside. Being hard also means that after the animal is gone, the shell can remain for some time, in some cases for millions of years, becoming fossils.
Task: Finds some sea shells at home and try sorting them into different groups.

If you don’t have any shells at home, you can download our Marvellous Mollusc to print and cut out to sort.
Take a close look at the shells (or pictures) you have. What features will you use to sort them into groups? Shape? Colour? Pattern? Ridges?

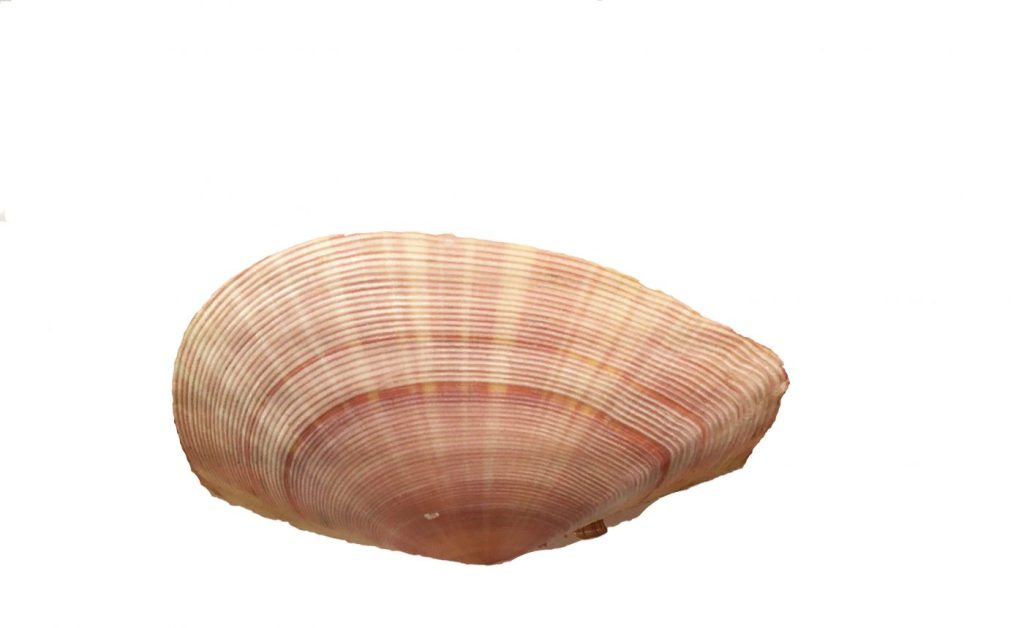
Here is a selection of bivalve molluscs (the type with two shells) found around the house. 
Our shells sorted by colour – browns, pinks, yellows, whites and greys 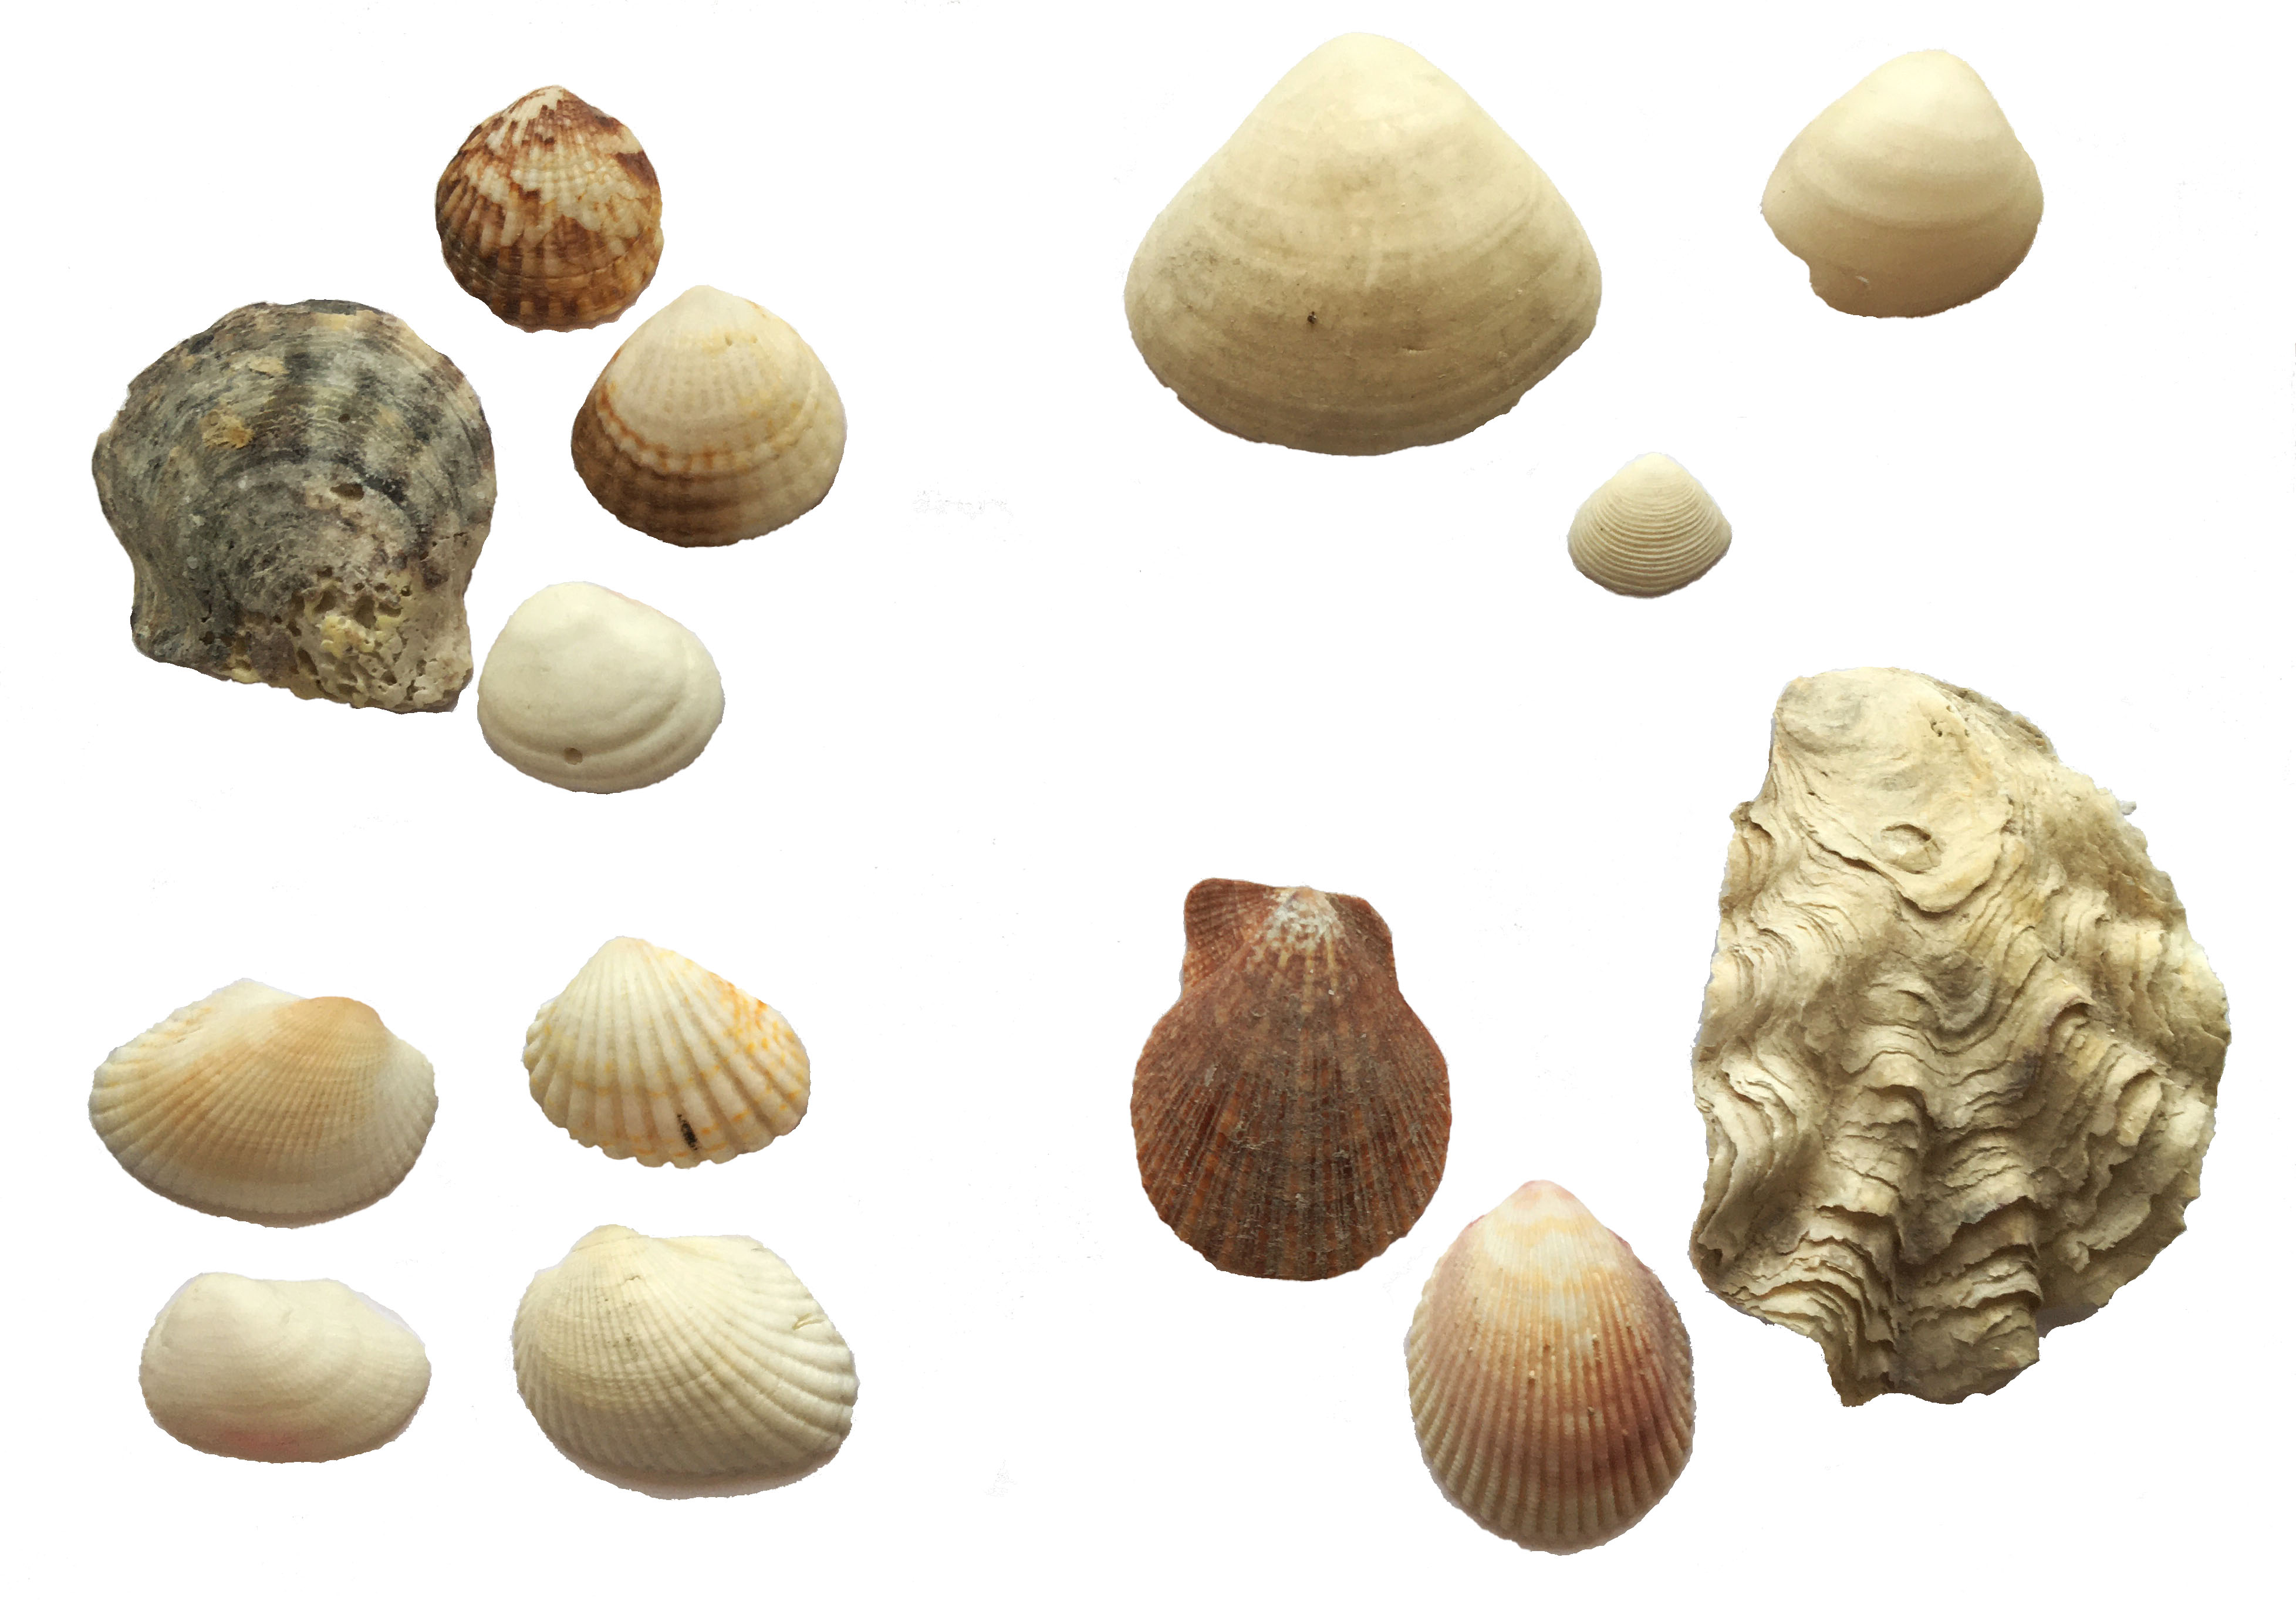
Our shells sorted by shape – (clockwise from top left) round, triangular, oval and longer than wide, rectangular and wider than long 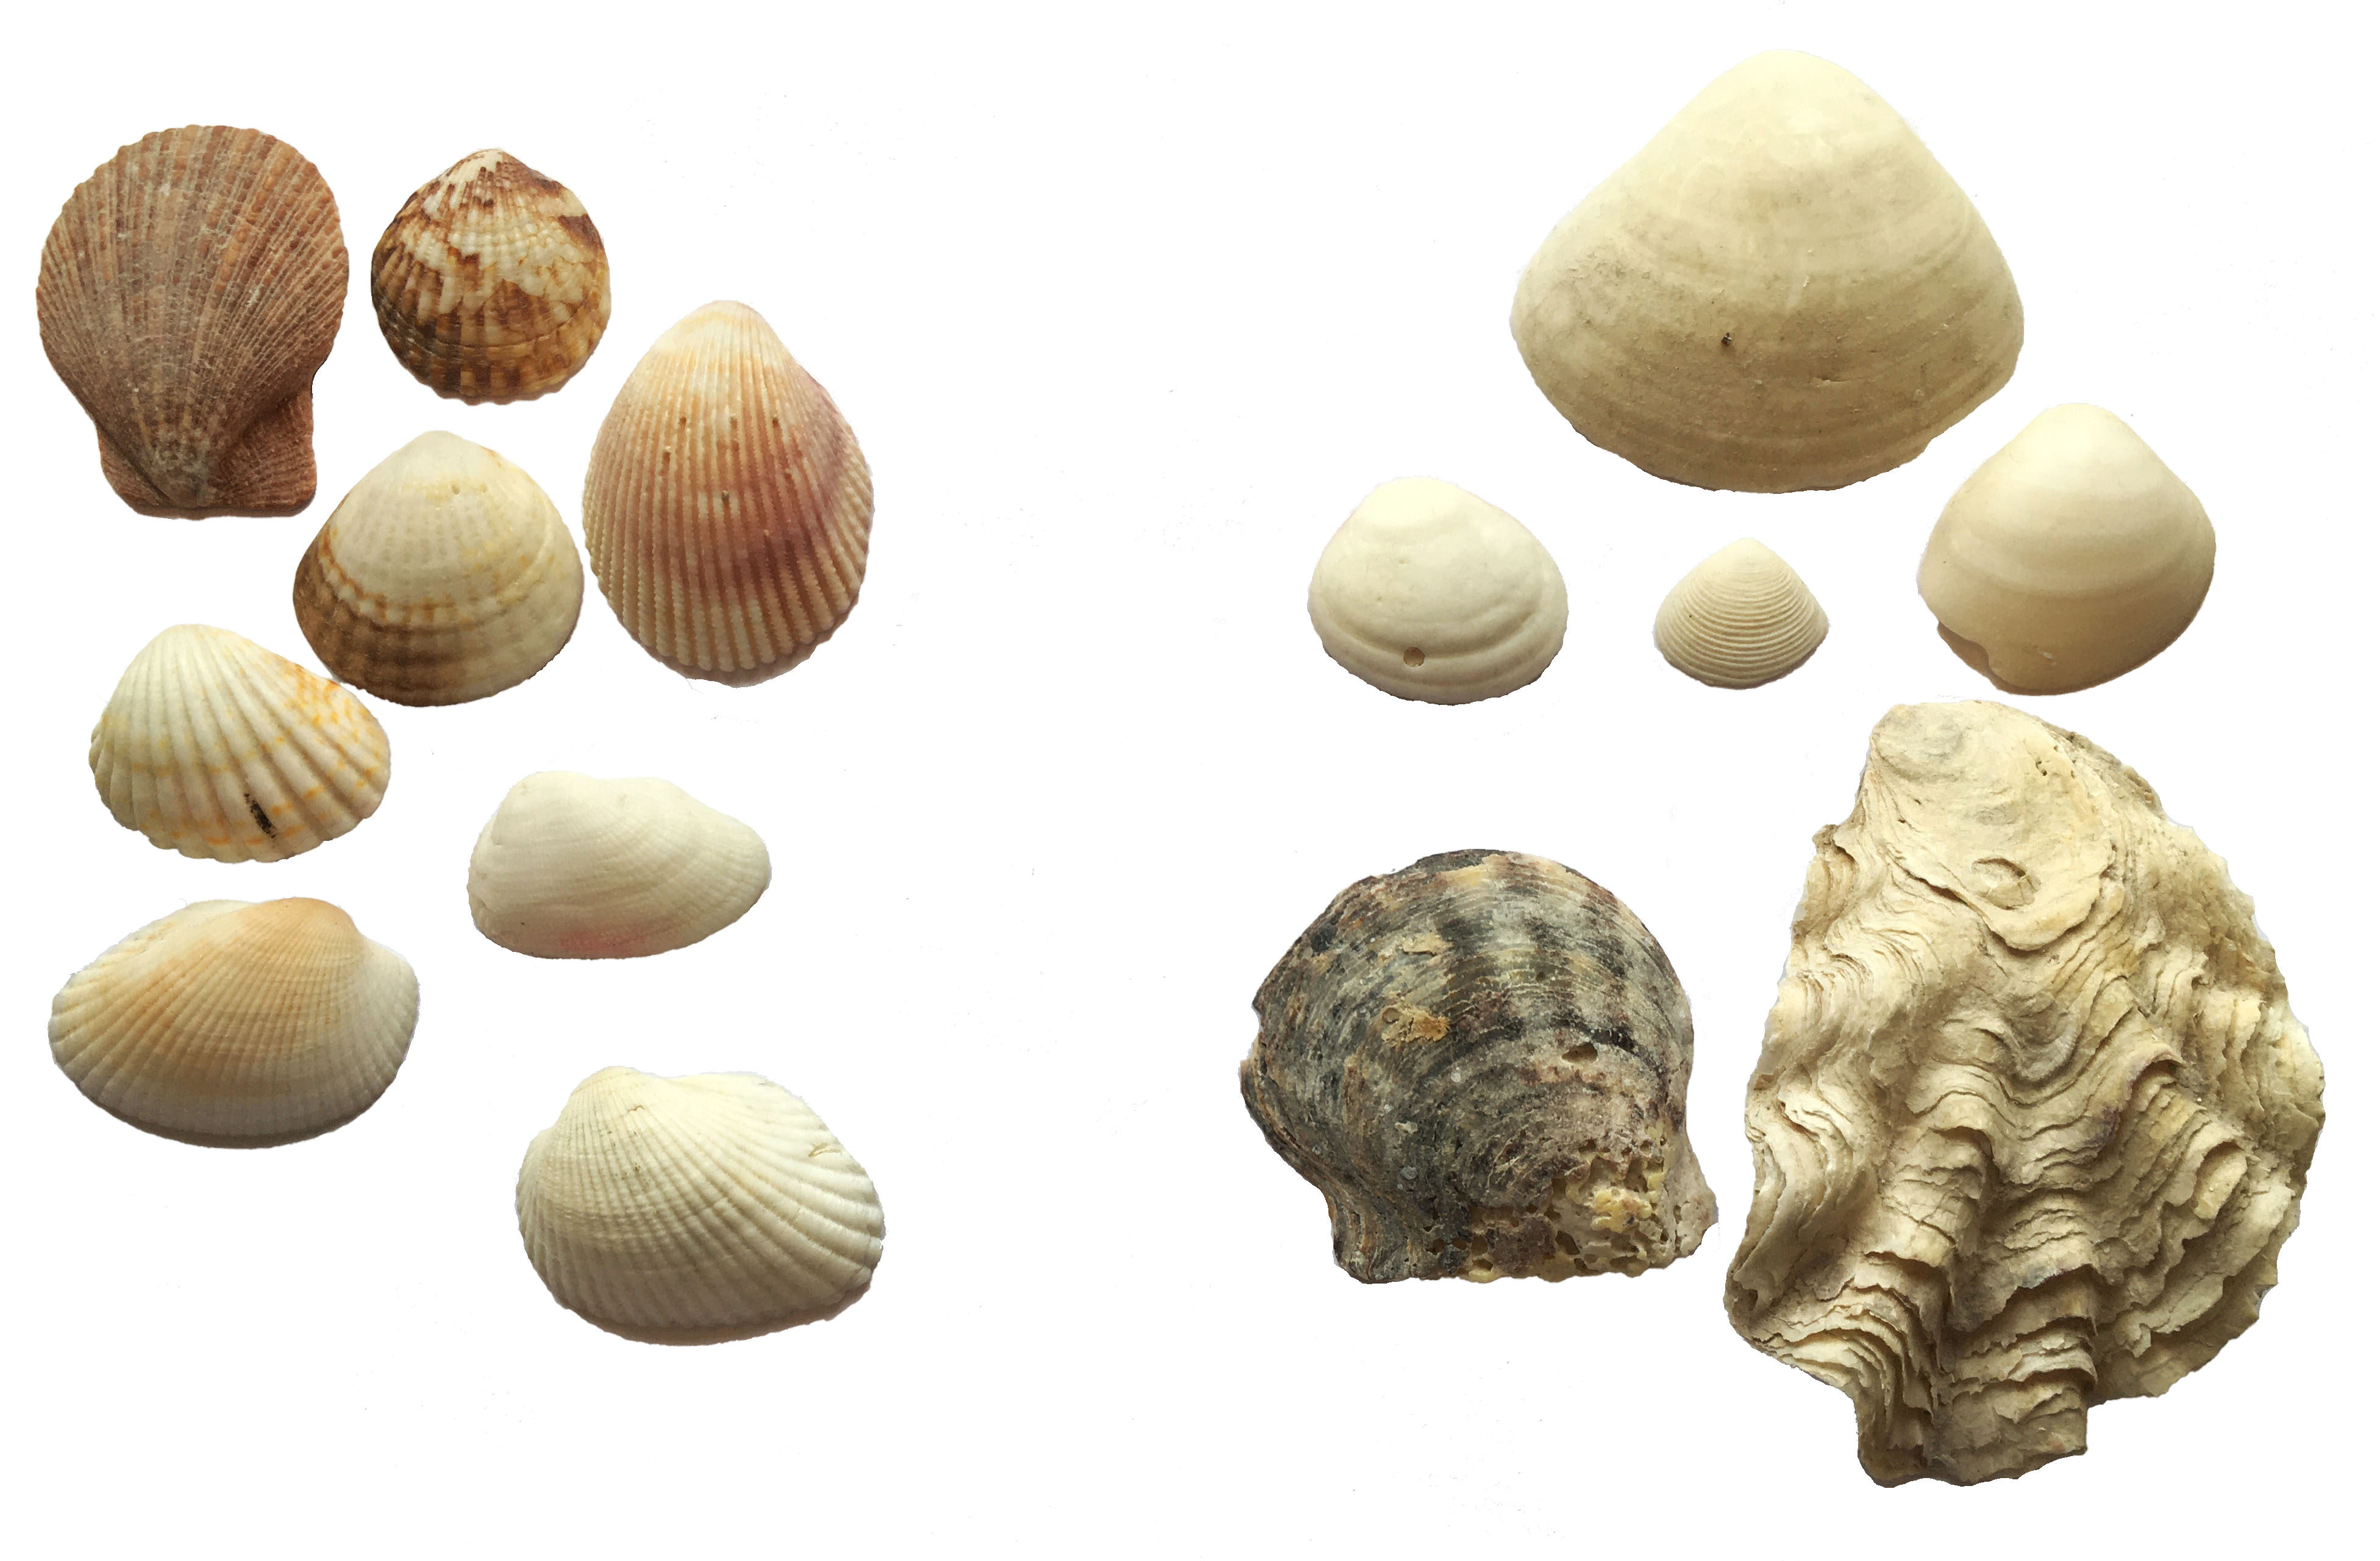
Our shells sorted by the pattern of ridges – radial (i.e. coming out from a point) on the left, concentric (following the outline of the shell) on the right
Scientists try to group together animals in a way the reflects their family tree, and so helps us to understand how they evolved. They might use physical features as we have been, but more and more today they look at the code held within the genes of the animal to see which are most similar and so most closely related.
If you want to have a go at working out what type of shell you have, National Museum Wales has a great key on its website.
Evidence: what lies inside?
We can learn a lot by looking inside mollusc shells. The shell is laid down by the animals living inside, and is important for protection but also movement. Molluscs have muscles that have to attach to the shell, and structures of feeding that can also leave their mark. Here we’re going to look inside a bivalve molluscs and see what we can learn from the lines and imprints we see there.
Task: Chose a shell to investigate. What can you deduce from what you can see?
You can use a picture of a shell if you don’t have one to hand. Download our Shell Detective sheet, and use it to draw and label up diagrams of your shell to help with your investigation.
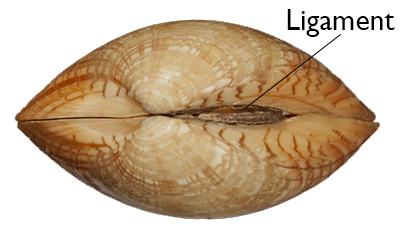
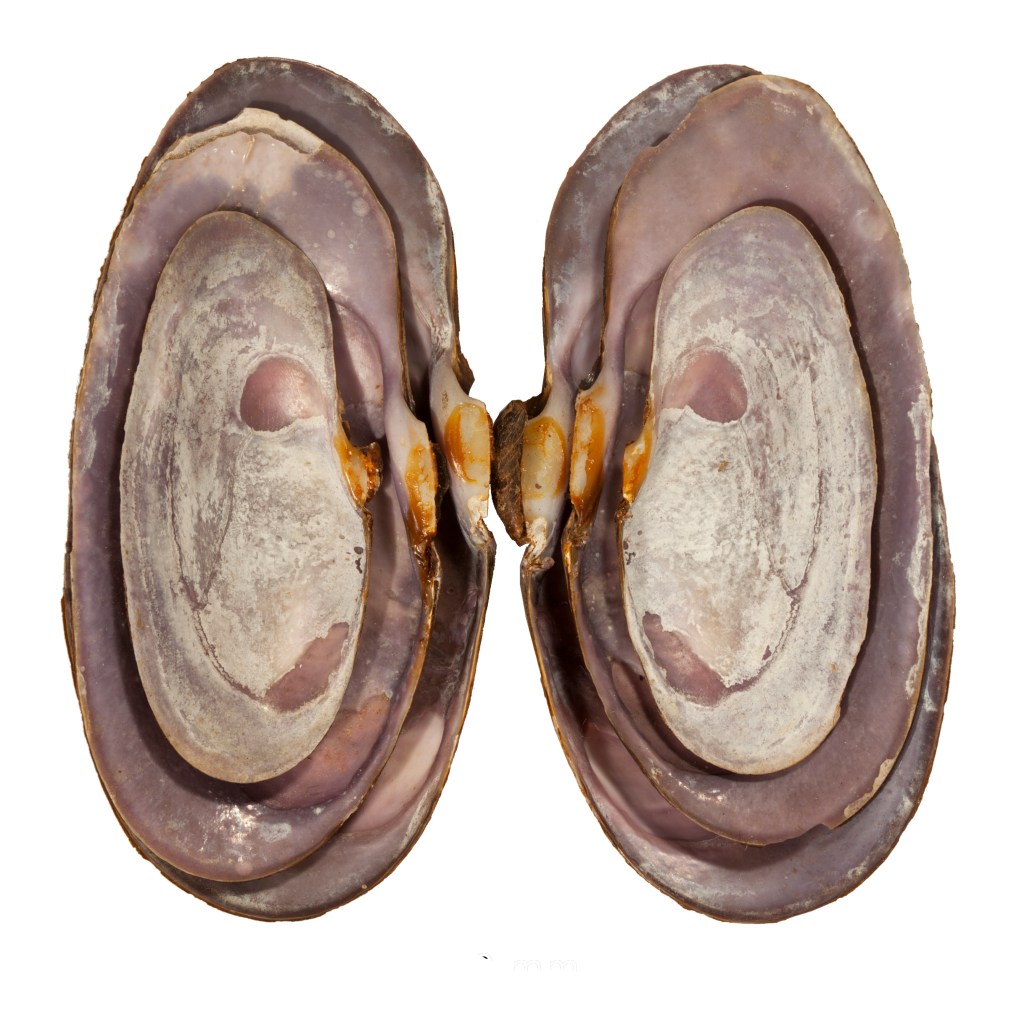
First of all, let’s look at how a bivalve opens and closes. These animals have to open up their shells so they can bring in water for feeding and breathing. That means bringing some of their vulnerable squidgey bits outside of the shell where they could be eaten by a passing predator. So they also want to be able to close the shell again for protection. Bivalves living in tidal areas may also want to close up to stop them from drying out when the tide is out. The shells of bivalves are held closed by muscles called adductor muscles. When these muscles relax, a springy ligament helps the shells open.

If we look inside the hinge, we can often see some teeth – ridges and grooves that stop the two sides of the shell from slipping side to side. Sometimes the teeth are small, forming a comb like structure, while in other species they are big, making a strong link between the two shells. If you ever find some pairs of shells try having a look at how these teeth interlock.


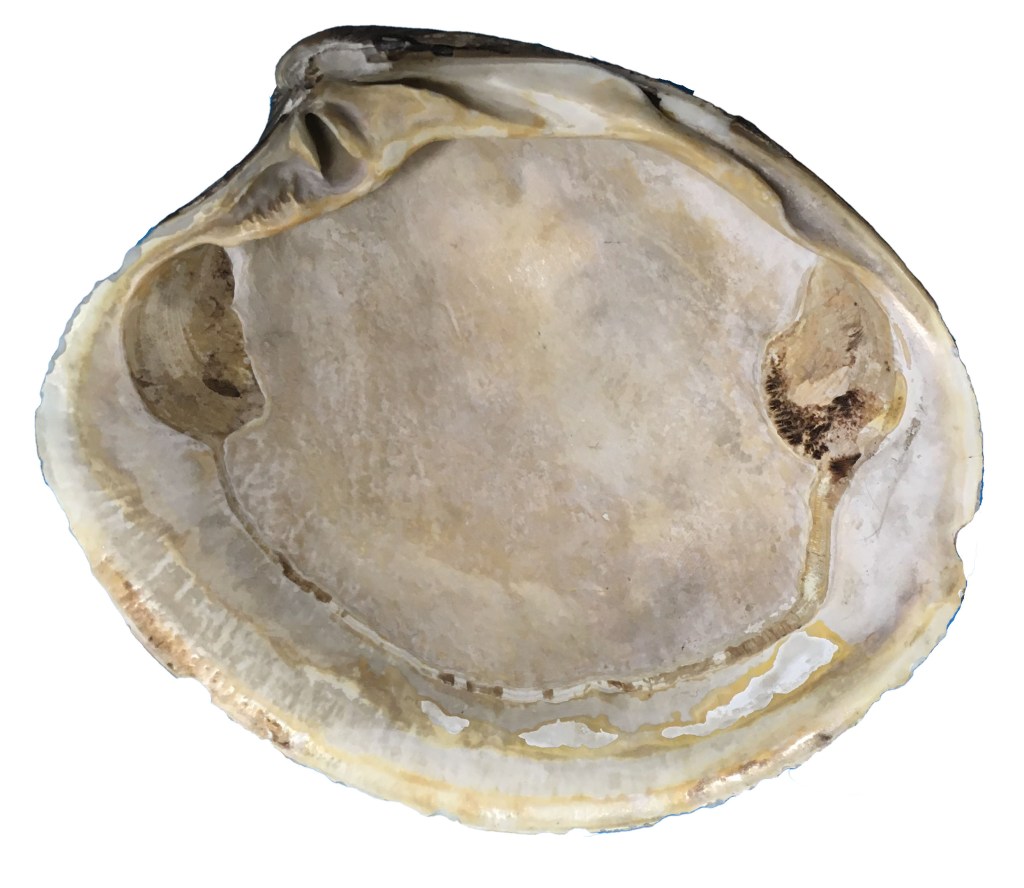
If we look closely at a shell, we can also deduce where the structure called the mantle was attached to the shell. The mantle is really important as it makes the shell. You will often see, or feel, a faint line a little way in from the outer edge of the shell. This line is called the pallial line, and marks the edge of the mantle attaching to the shell. Studying the shape of this line can give us evidence about the lifestyle of the animal when it was alive. Can you see how the pallial

Can you see in the picture above that the pallial line marks out a pocket at the back? This is a pocket where the structures called the siphons can be pulled back into the shell. What are the siphons and why is this important? The siphons bring water into the animal – water that they use for breathing and also filter to capture food. A lot of bivalve molluscs burrow into the sand or sediment of the sea floor. To reach the sea above they have to have longer siphons than bivalves that live closer to the surface of the sea floor. So a deeper pallial sinus means the bivalve is a deeper burrower. Pretty clever.

Now that you have explored some of the structures inside your shell, would you change the way you sorted your shells into groups?


You can find out more about bivalve anatomy on our website.
Evidence: predators and more

Some shells can tell us about more than just the animal that lived inside – they can sometimes tell us how the animal died. Have you ever found a shell with a small but perfectly round hole in it like this? Chances are it was preyed upon by a dog whelk. Dog whelks drill a hole in the shell of their prey then squirt in some digestive juices that turn the animal into mollusc soup which they can suck out to eat.
Some shells form homes for other animals as well:
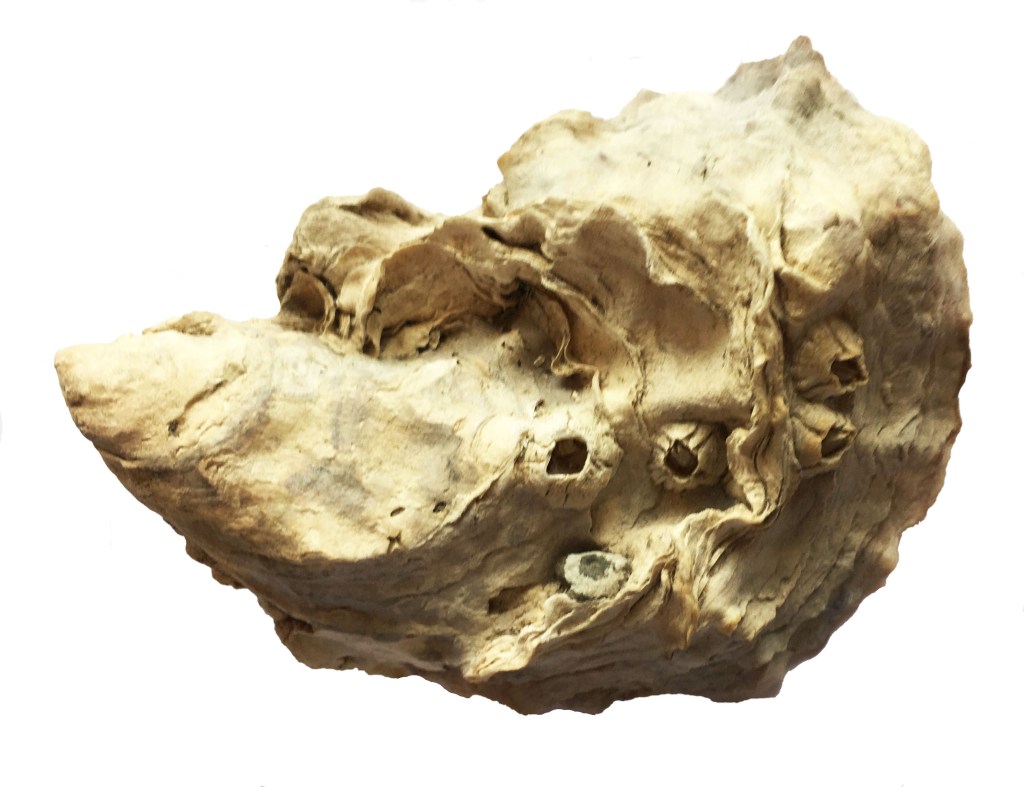
Oyster shell encrusted with barnacles 
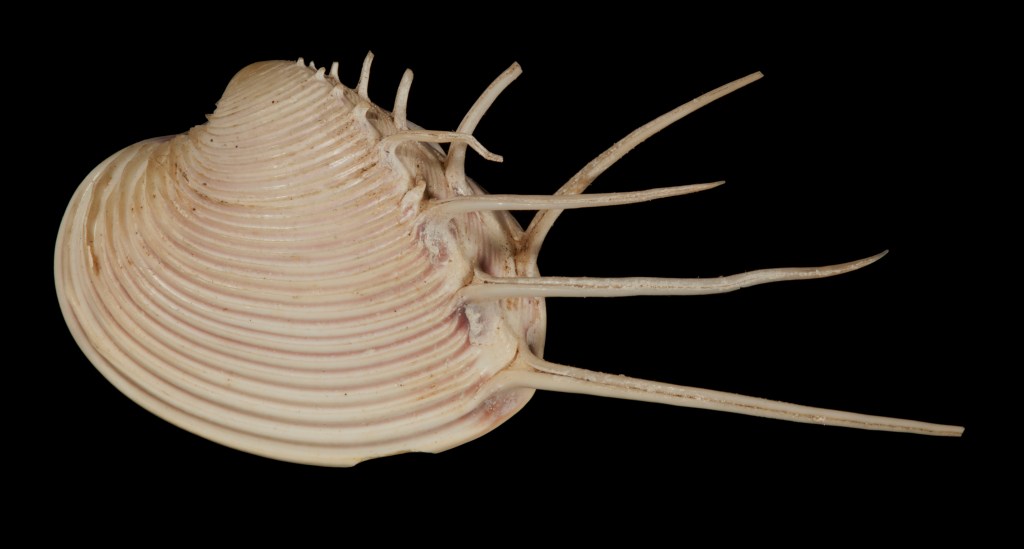
Oyster shell with holes bored by piddocks – a type of bivalve mollusc that creates tunnels using the ridges on its shell. 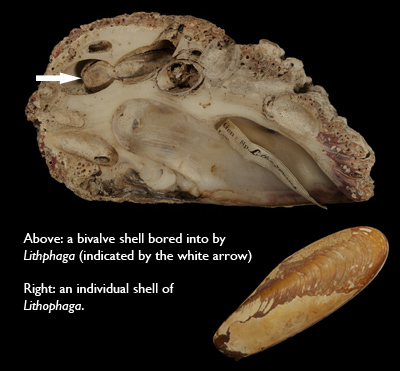
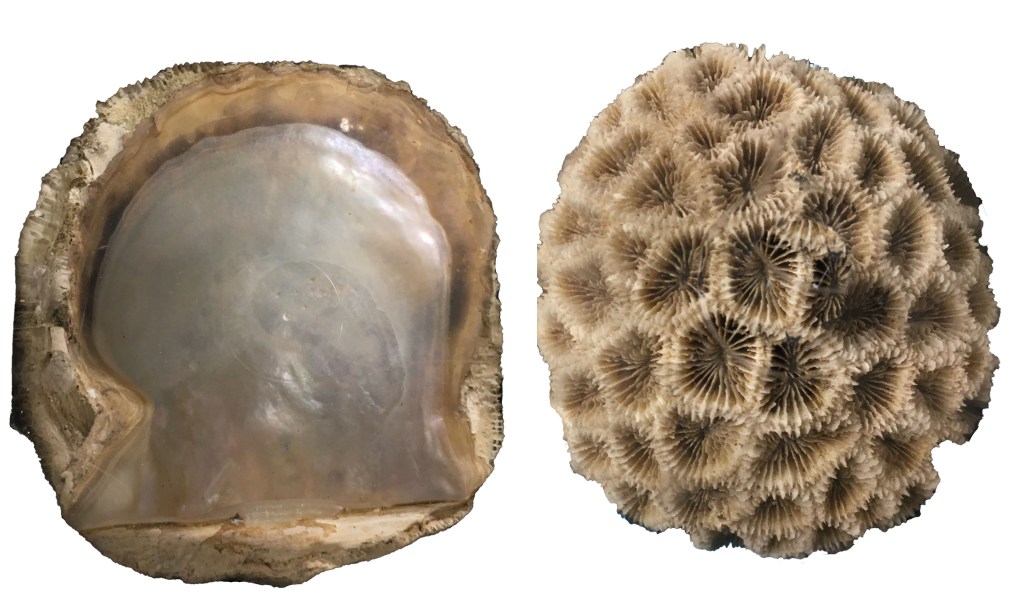
Oyster shell encrusted with a coral 
Whelk encrusted with barnacles and with worm casts (tubes made by worms) 
Scallop shell encrusted with barnacles and worm casts – not necessarily when the animal was alive
Task: Can you see anything like this on your shell? Why not add it to you Shell Detective diagrams.

Create: Growing Shells
Molluscs grow by adding to the edges of their shells. This means that look at a mollusc shell you are looking at a history of their growth. Here are a few examples:


You can find out about the way scientists have been using this history held within mollusc shells to travel back in time and look at past climates on our website.
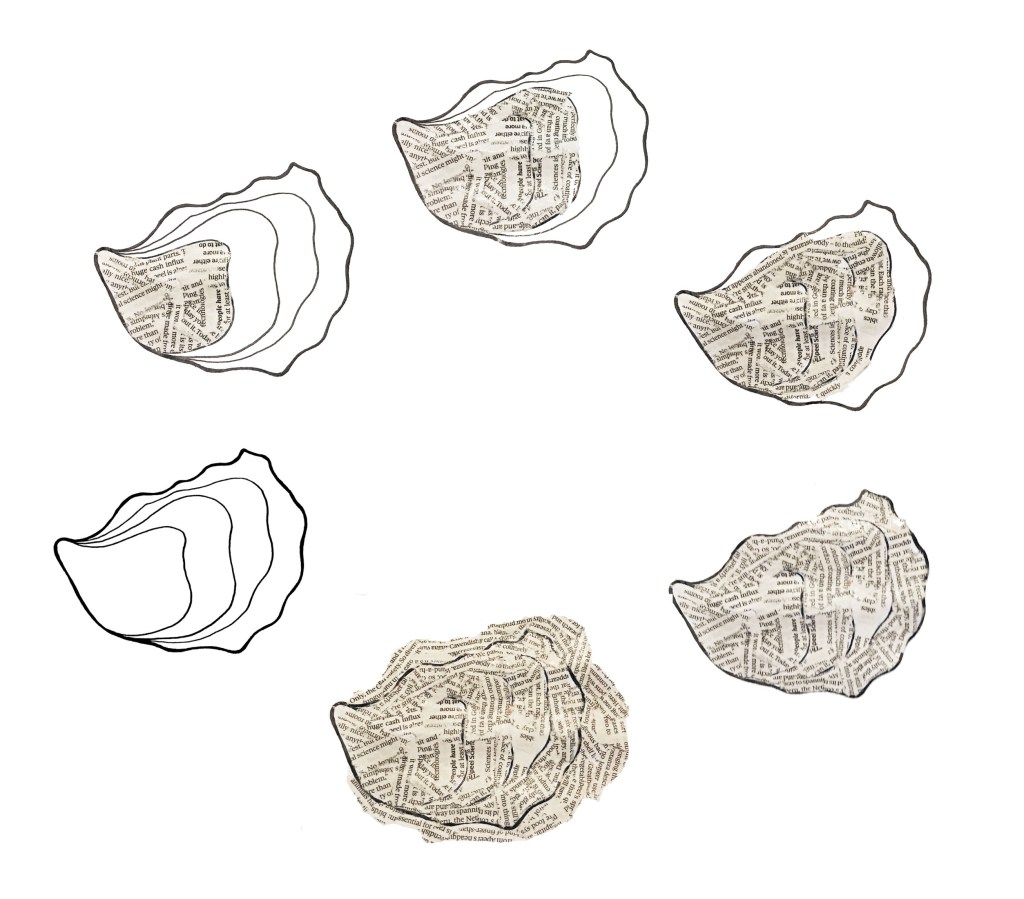
Task: Make your own oyster shell.

You will need:
- Make an Oyster Shell sheet
- Newspaper or other scrap paper to collage
- Glue
You will see several outlines on your sheet. Grow your oyster shell by starting with the smallest outline, then adding layers of collage around the edge to build it up to the next biggest outline, and so on until it is full. Keep going and make it even bigger. Why not decorate with some barnacles or other animals that might attach themselved to an oyster shell in the sea.

Congratulations to you for the wonderful clarity with which you have put together this fantastic information! I can imagine the hours it has taken. A superb resource – well done and THANK YOU!
LikeLike