

Creating a pond is one of the best ways to provide a diverse range of habitats and attract a wide variety of new species to any outdoor space. You are likely to encounter wildlife you would otherwise never see, which makes pond dipping popular amongst children and adults alike.
If you only have a small garden, or no outdoor space at all, then don’t worry as a mini pond that fits in a window box can still go a long way. Small raised or hanging ponds may be inaccessible to frogs and other larger pond visitors, but even something as simple as a bowl of water on a windowsill can attract freshwater invertebrates and provide a drink for passing birds.
There are lots of free guides online that take you through the steps of making a mini pond:
We followed their advice and made two of our own so that we could share our experience with you. One is a raised, freestanding mini pond suitable for any small garden and the other is even smaller, so that it can be hung up or buried in a window box.
The materials needed for the build are very cheap and you may already have most of them lying around the house. You can definitely make a pond without needing to buy any bespoke parts, with the possible exception of purchasing suitable plants, if you want to add them.
Step 1:
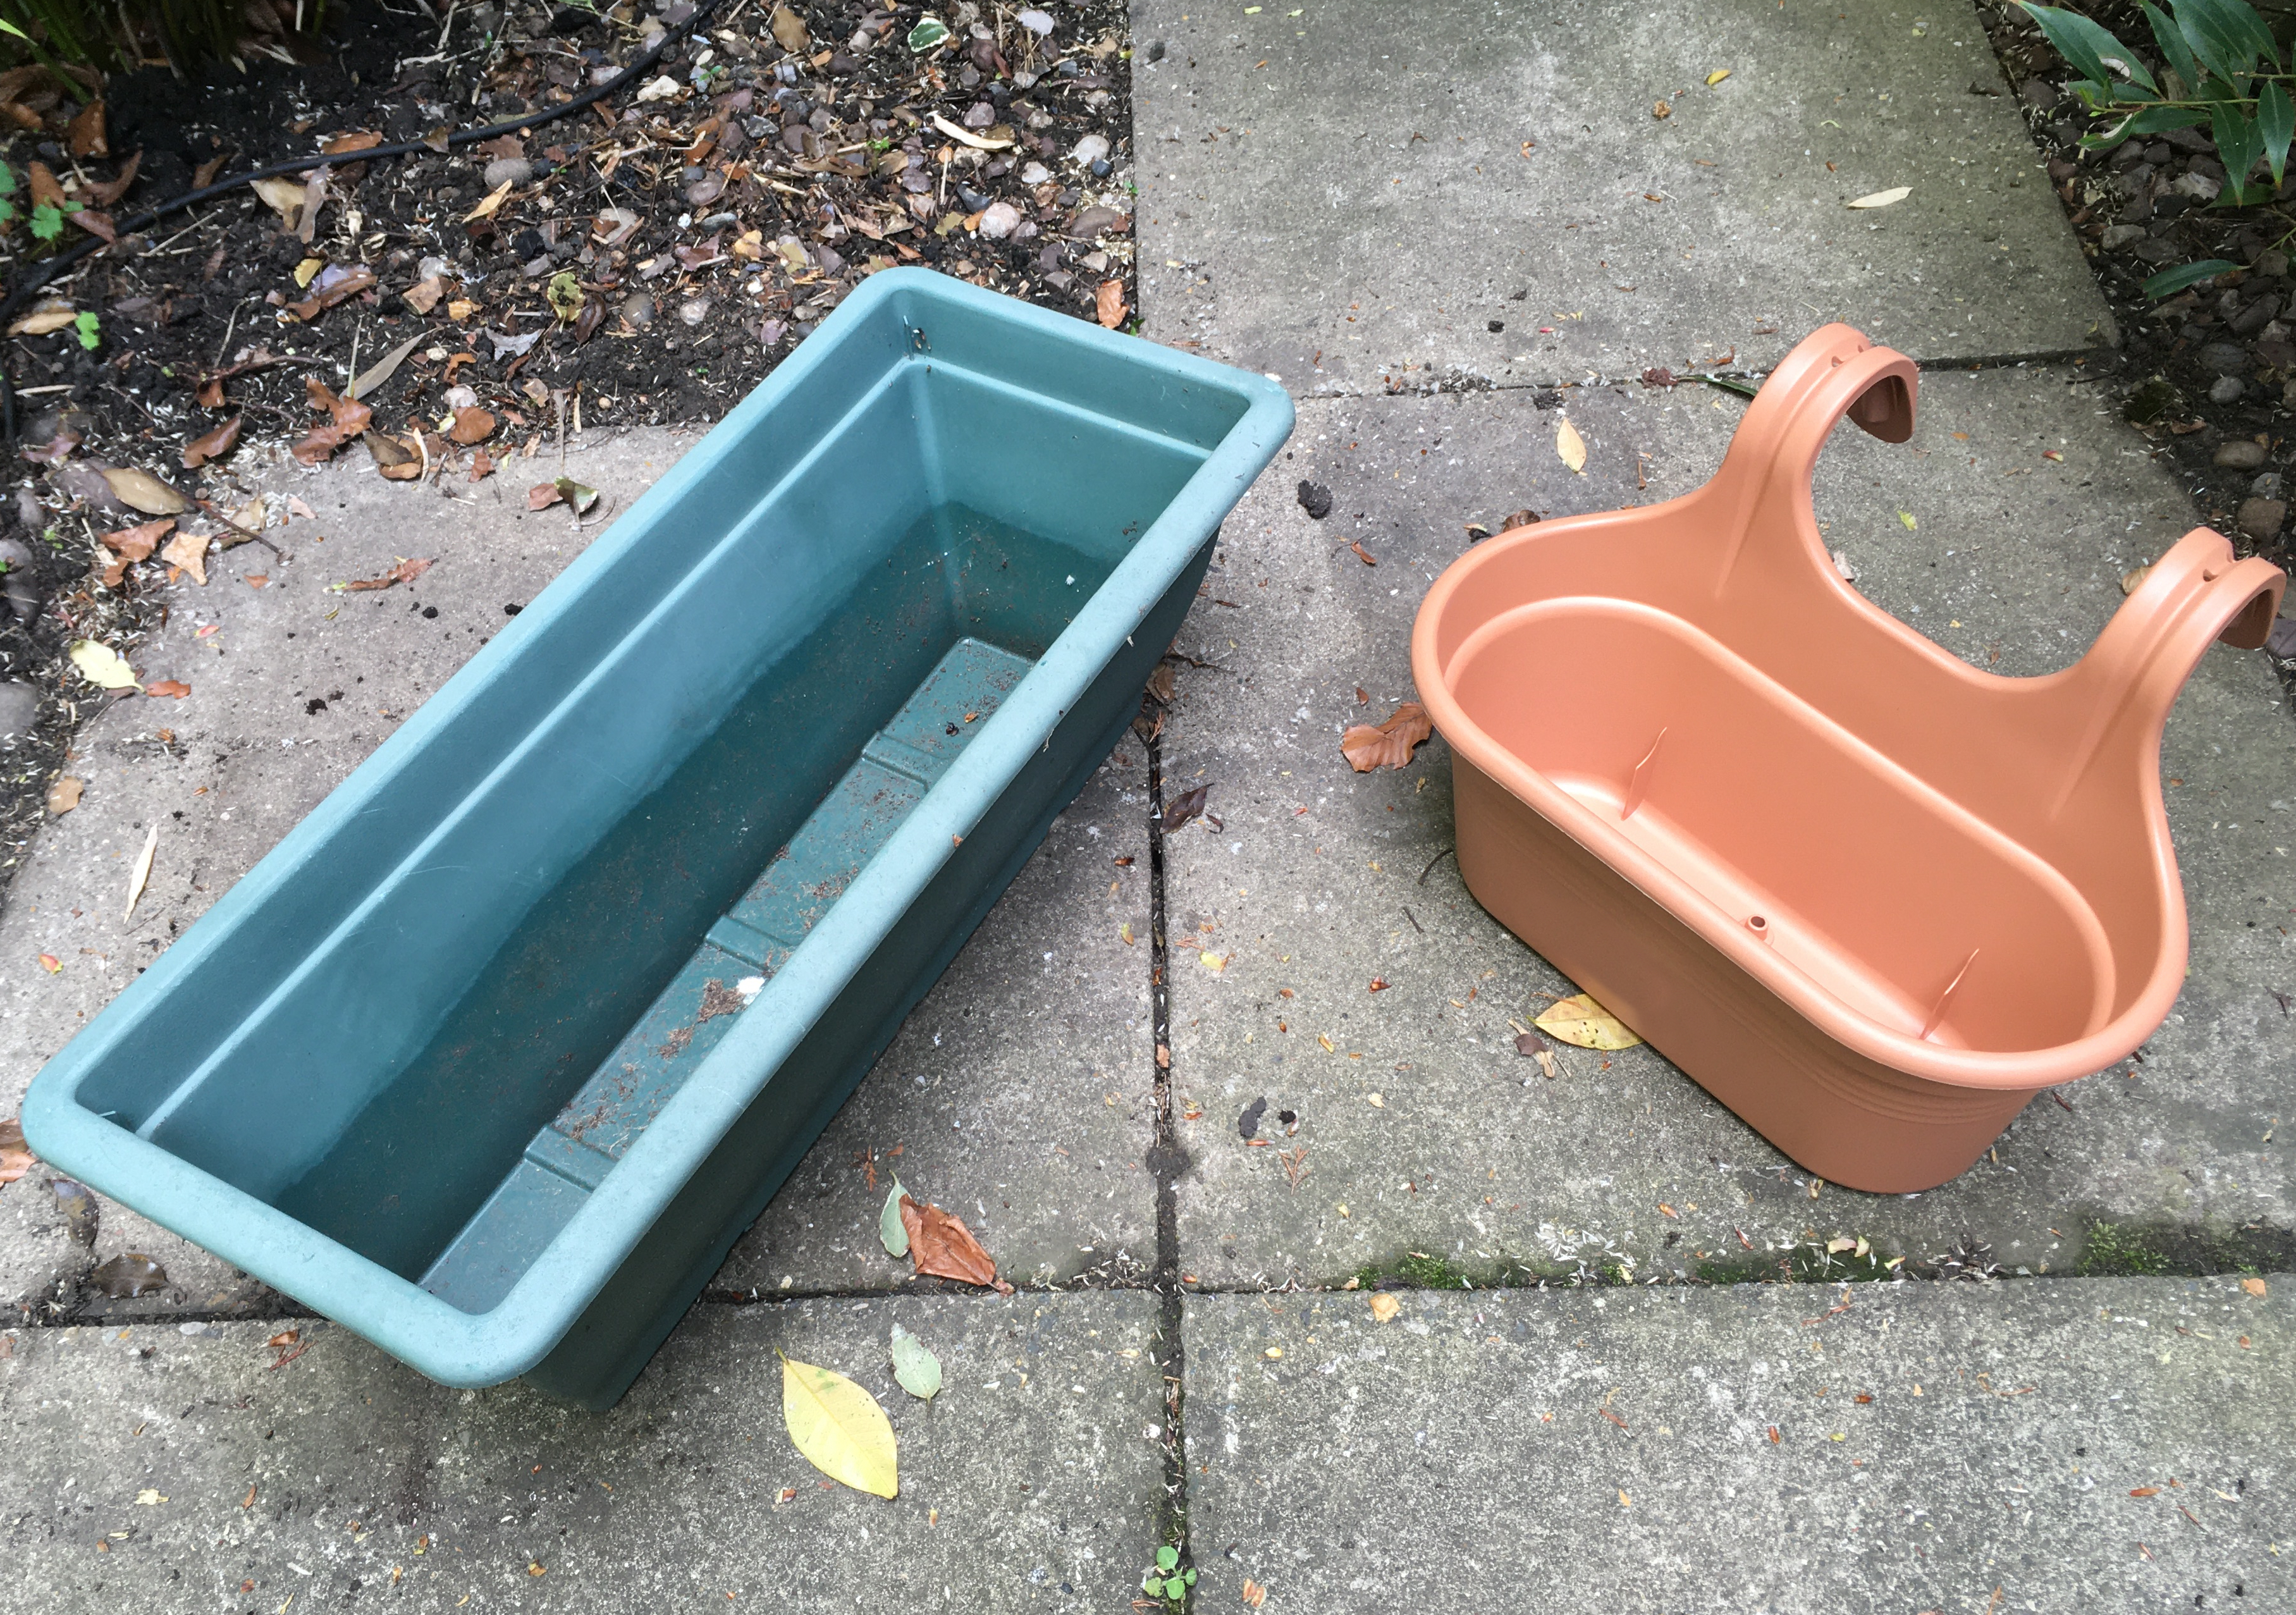
The first step is to find a container that will form the base of your mini pond. Ideally this should be watertight or at least easily sealed. For ours we found some old flowerpots, but you could use almost any container and we have even seen an example that uses an old kitchen sink!
Step 2:
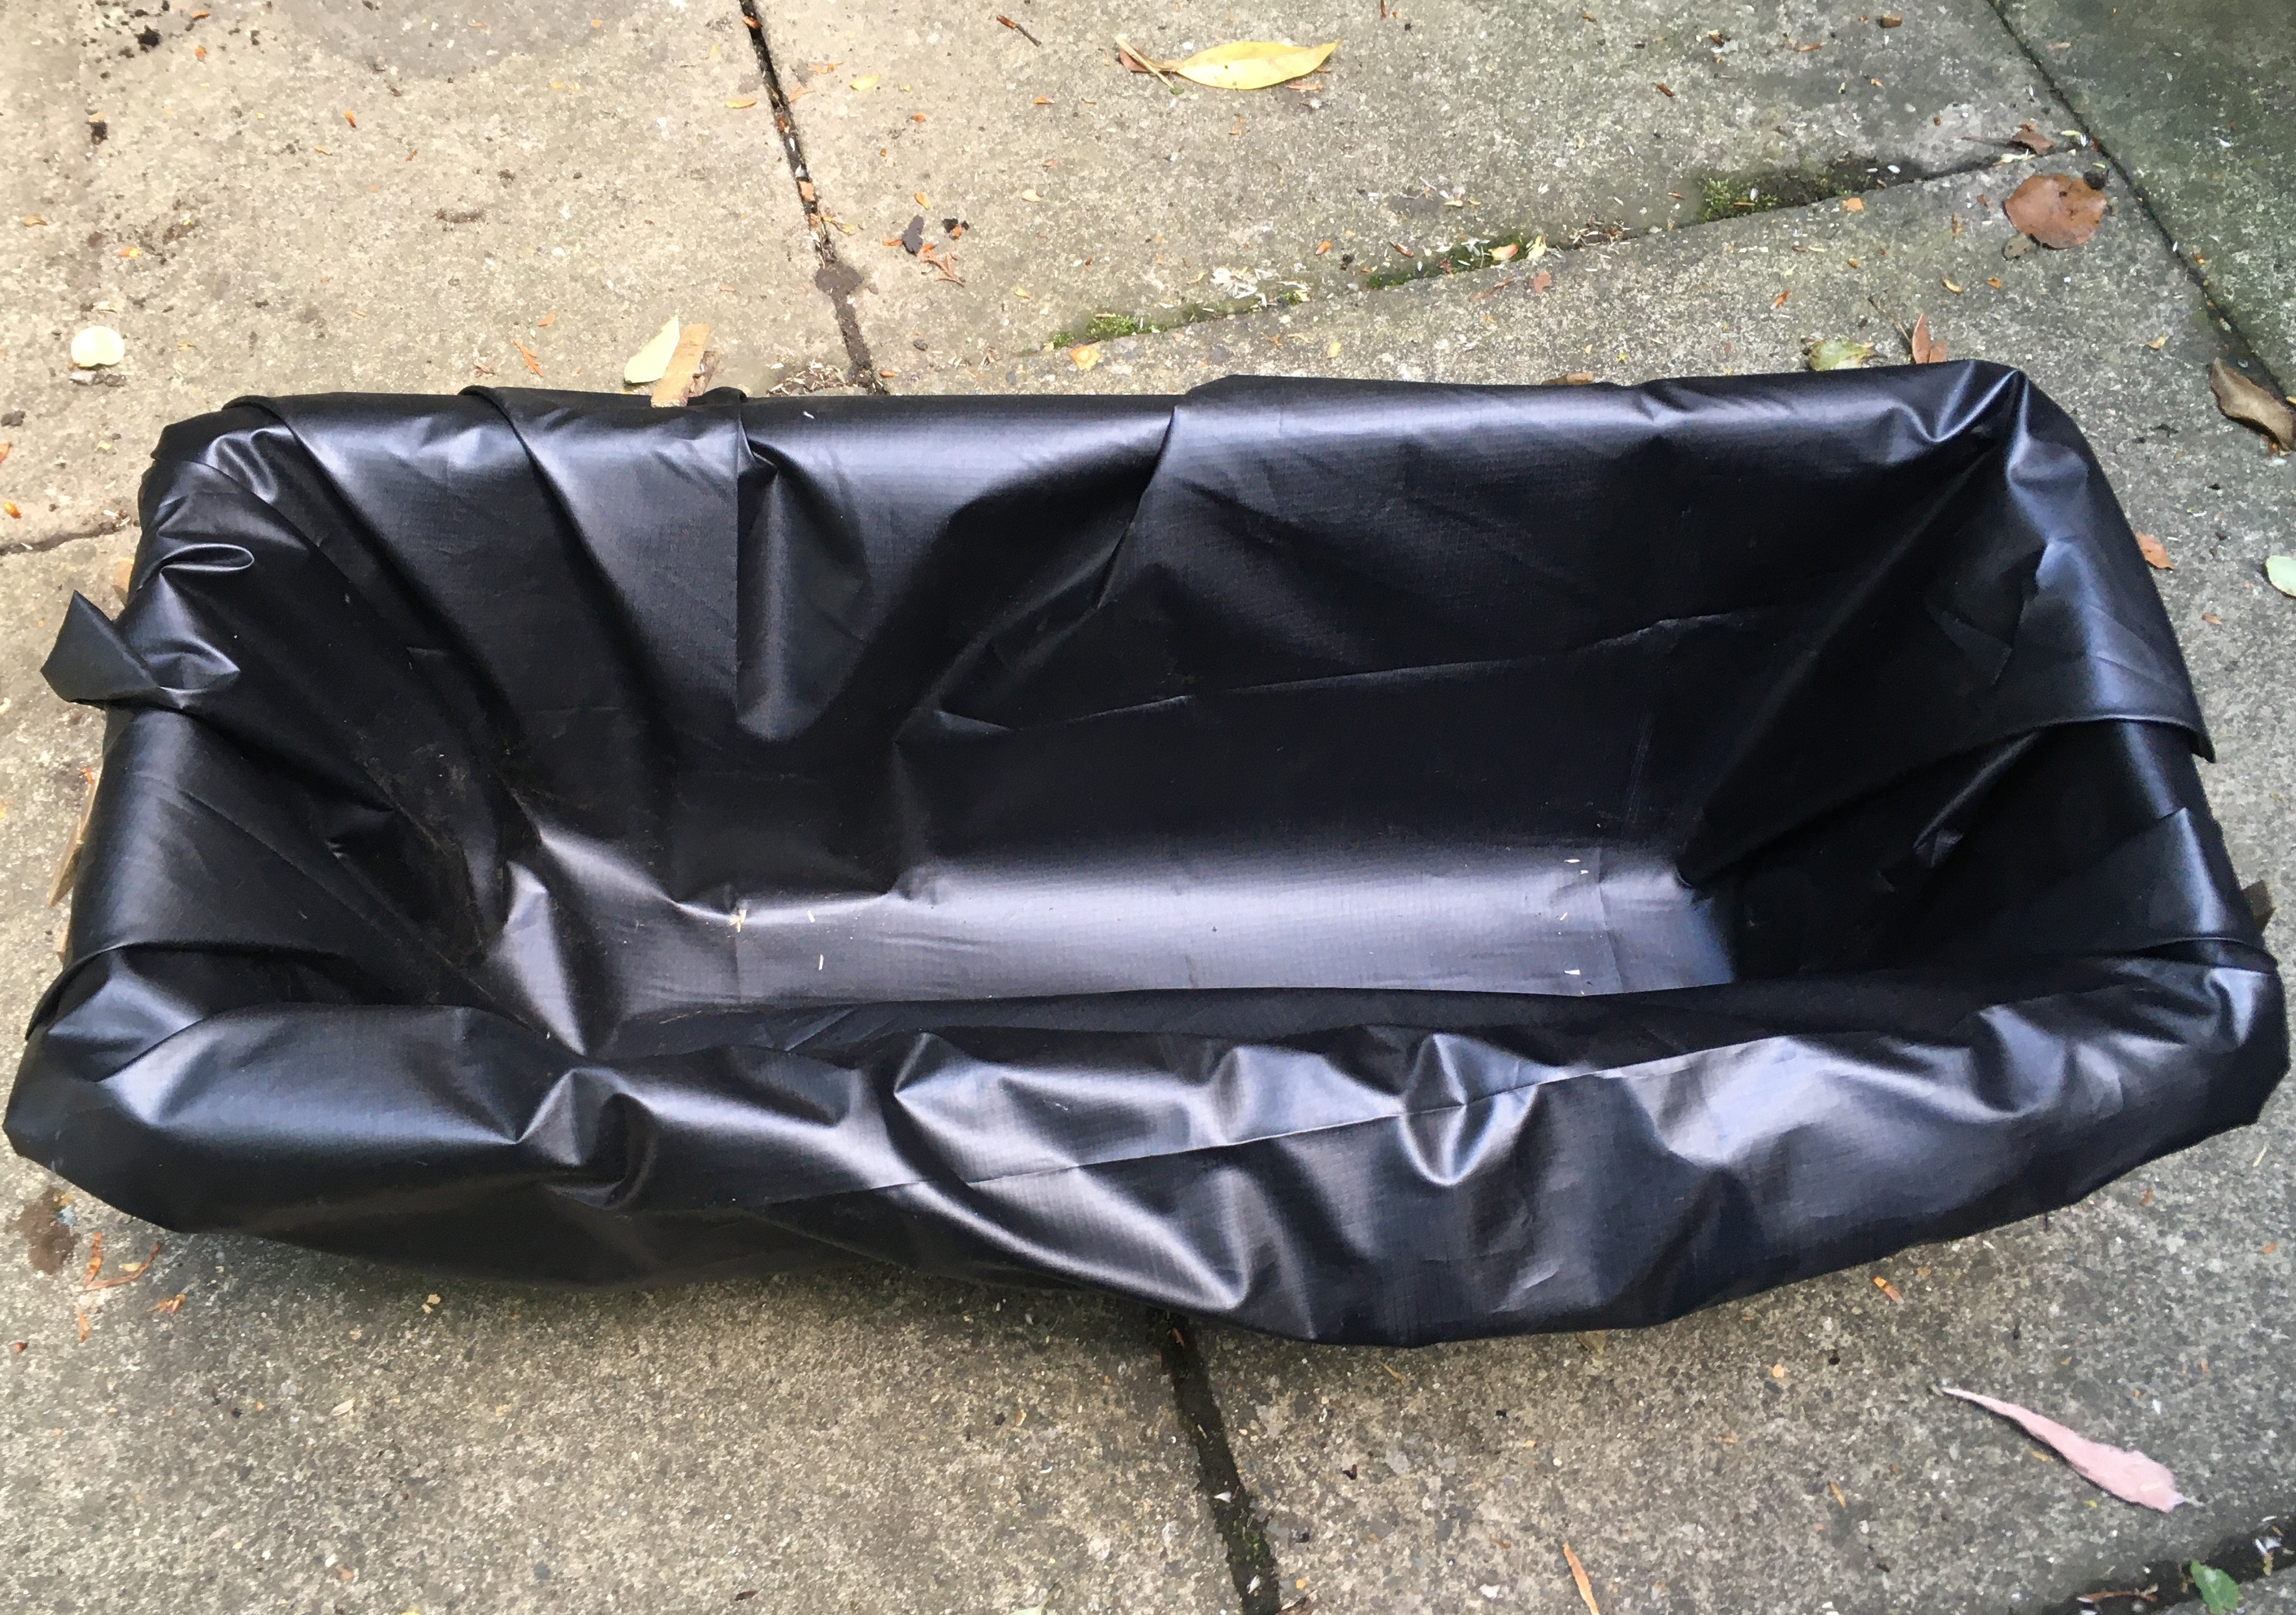
Now it is time to make doubly sure that your container doesn’t have any leaks. One option is to buy some cheap waterproof lining to fill out and cover the base of the pond.
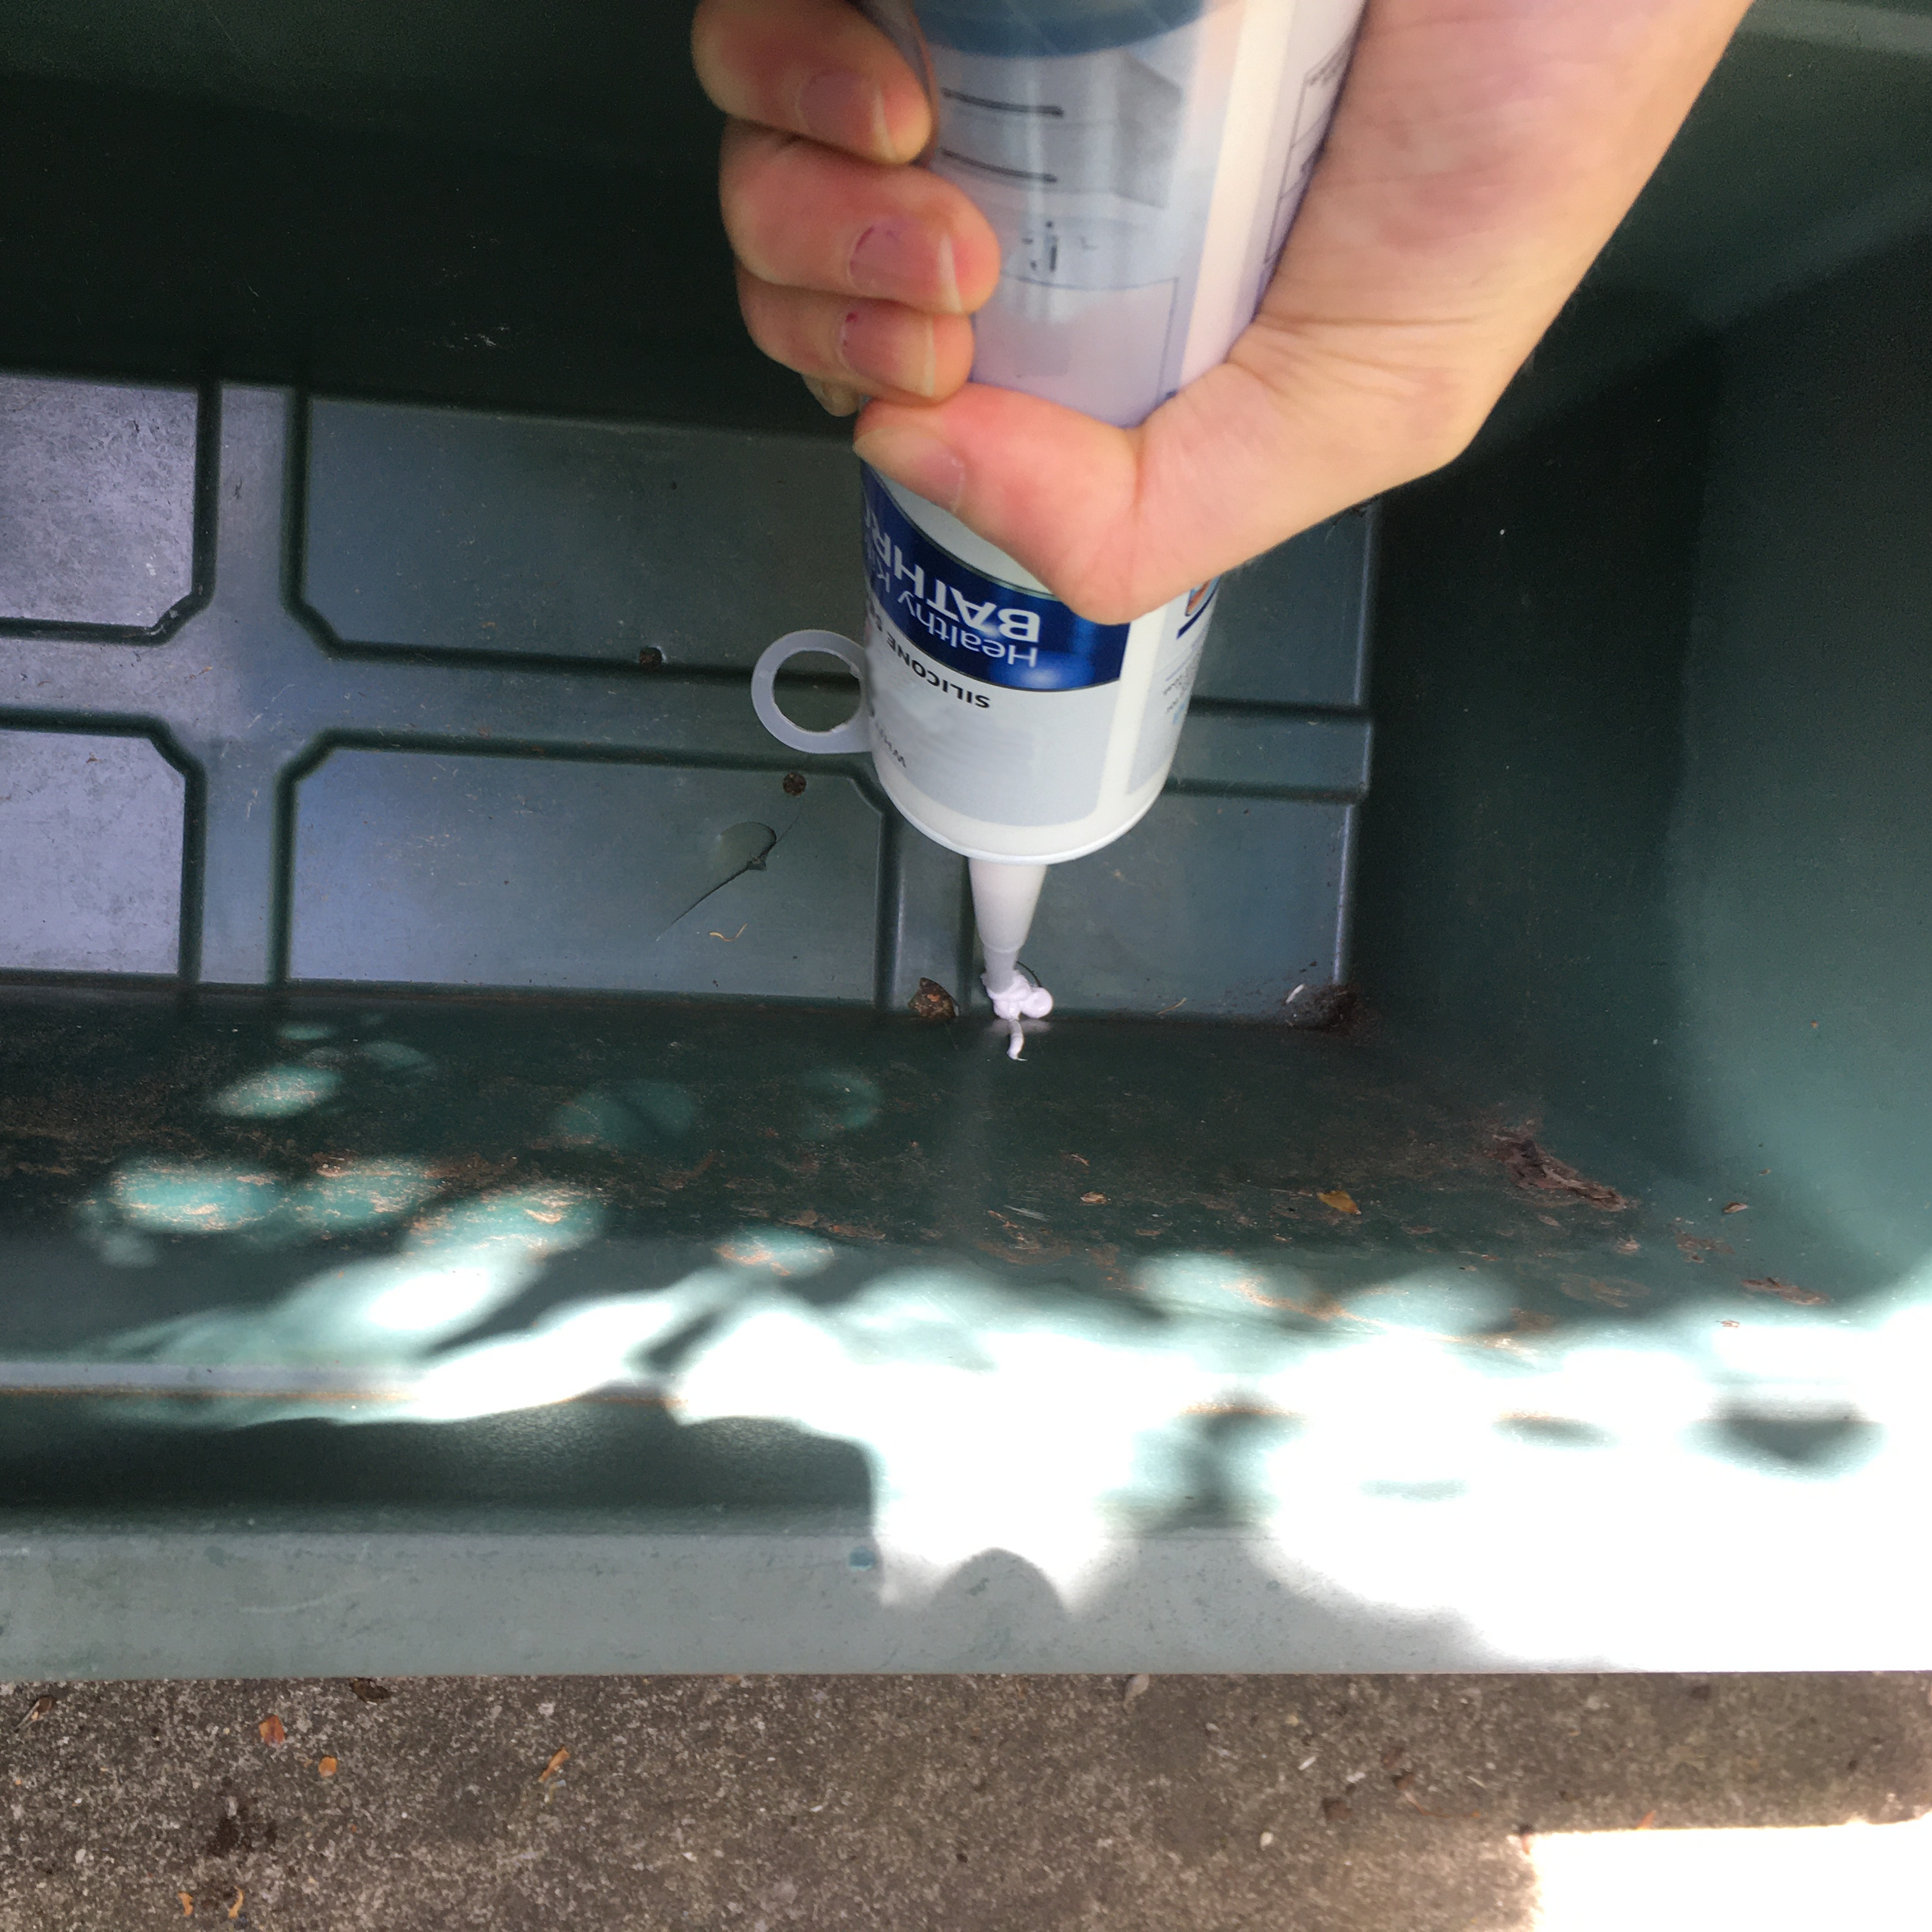
Another option, and the method we used, is to apply a waterproof sealant. An advantage of this is that you may already have some sealant in the house for grouting bathrooms and it makes the overall build slightly simpler.
We used this to block up the cracks in one of our flowerpots and waited for it to dry.
Step 3:
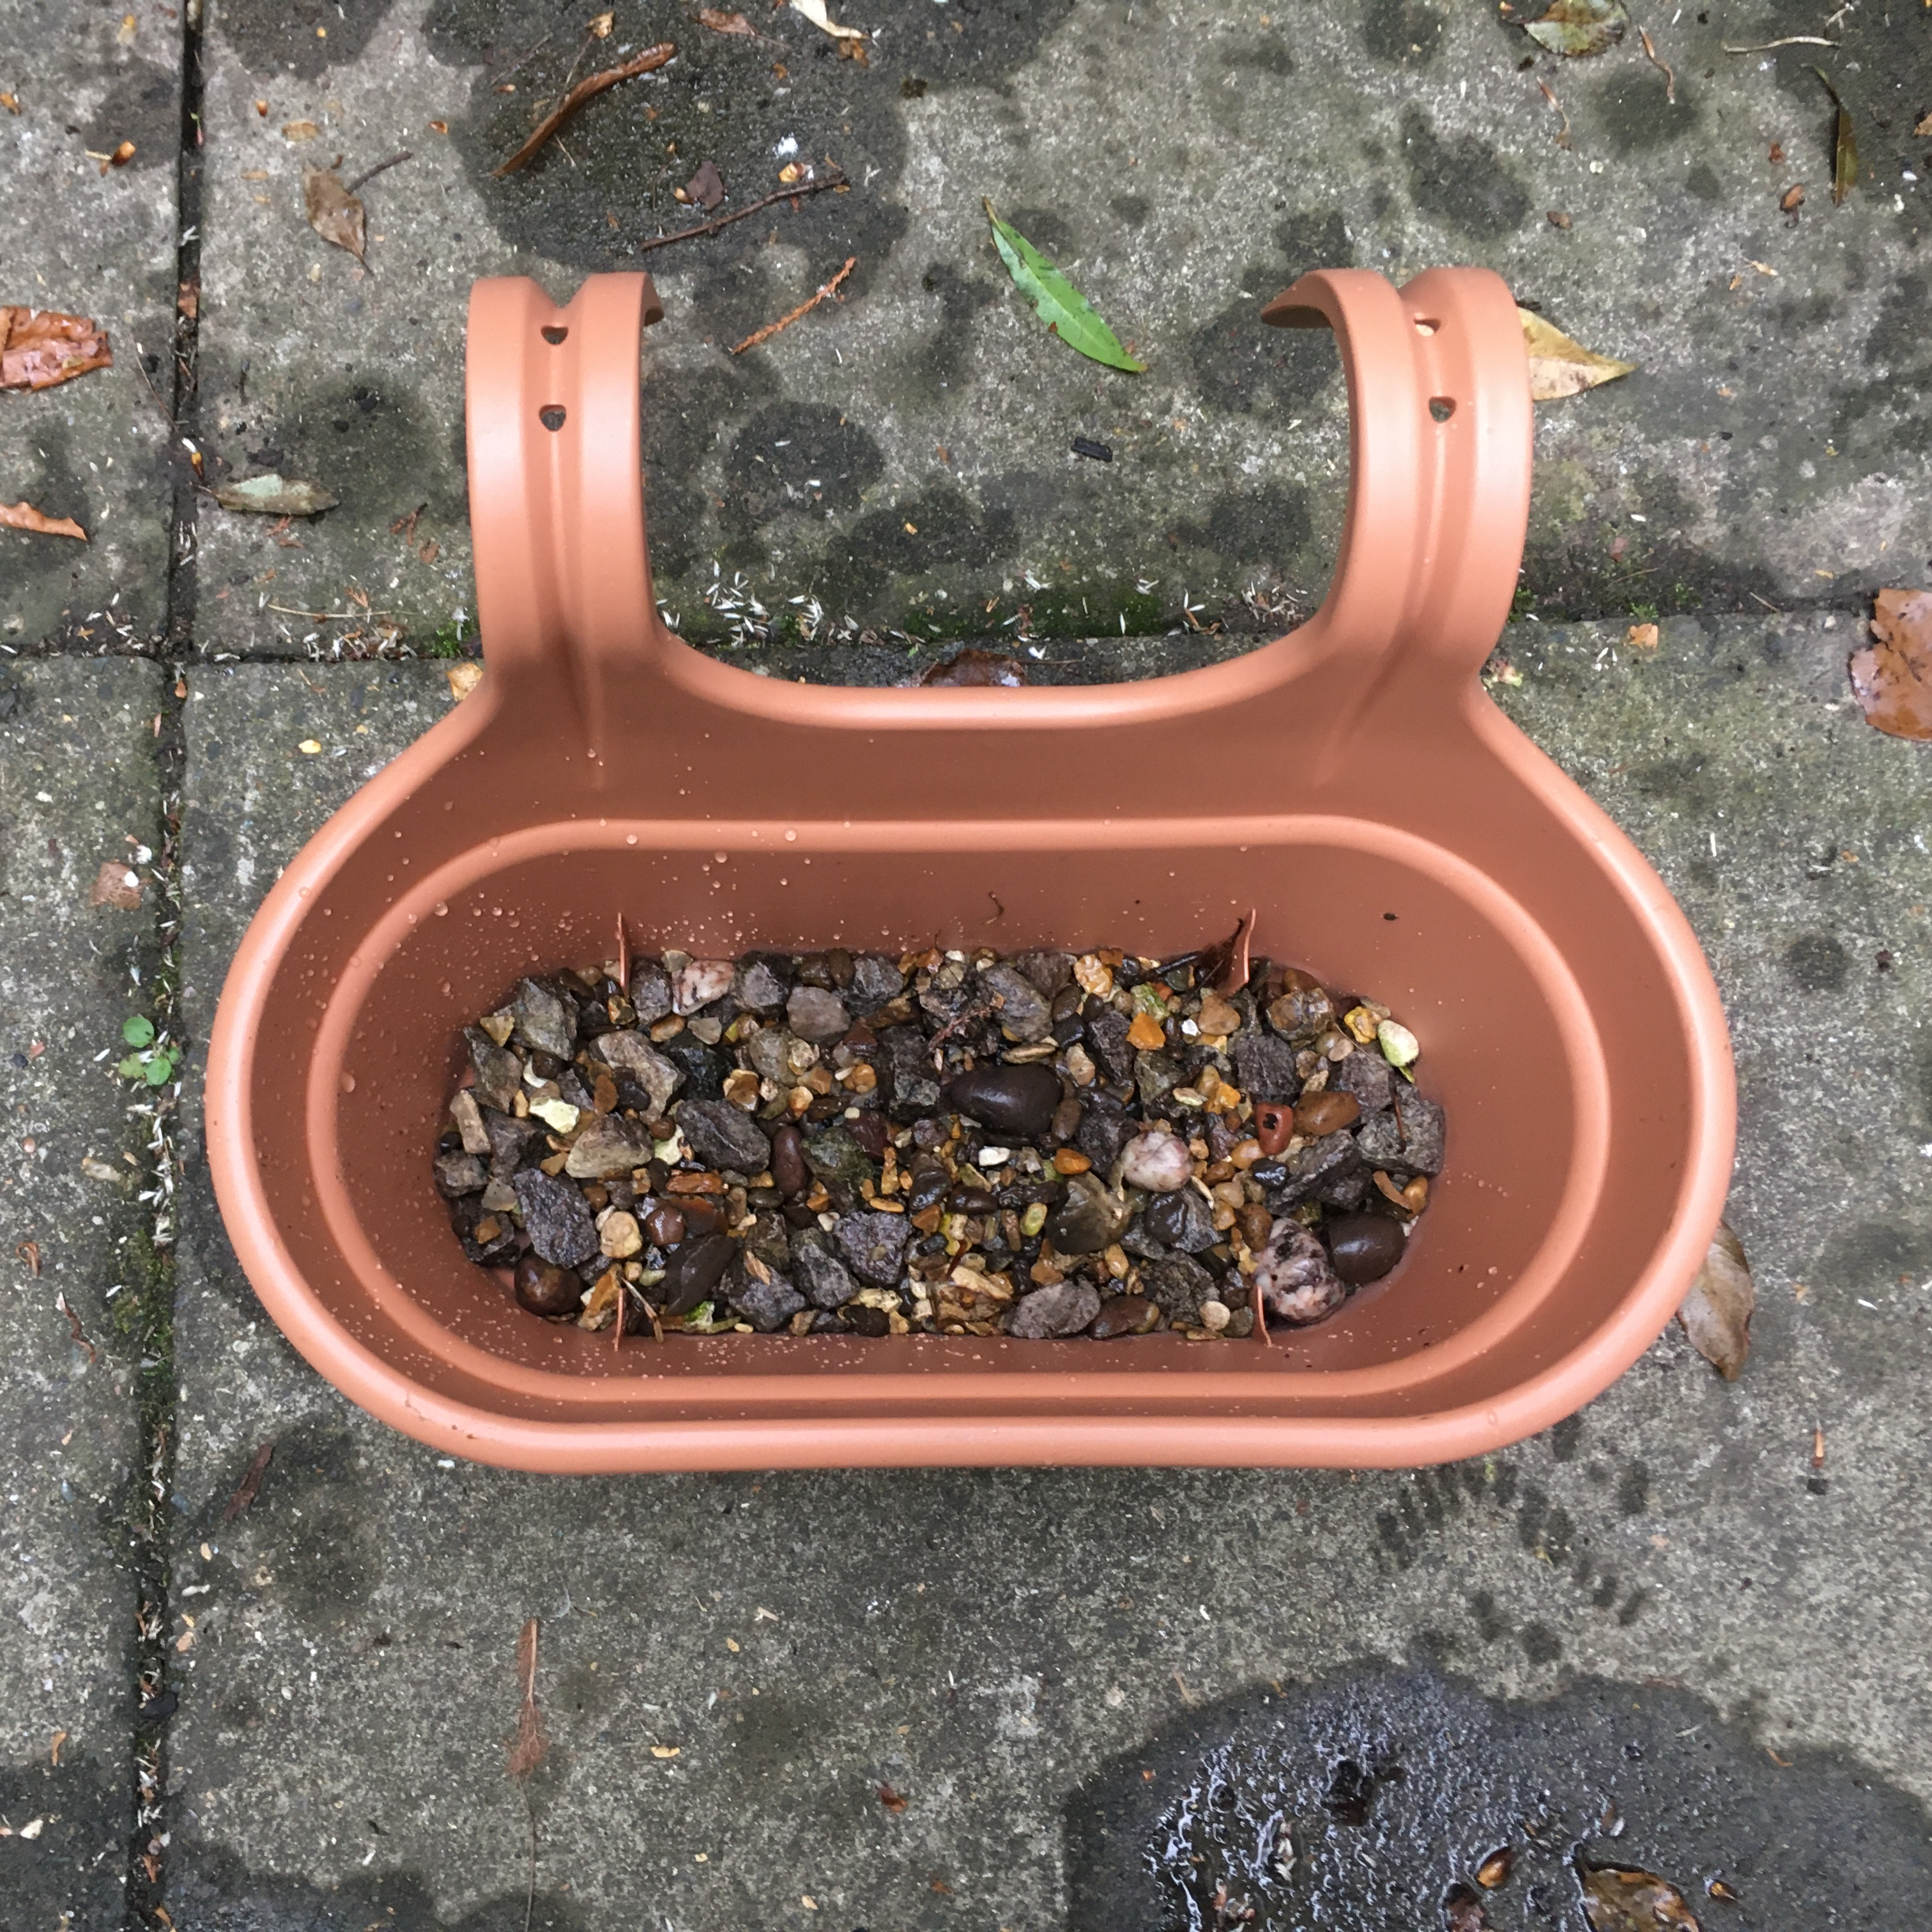
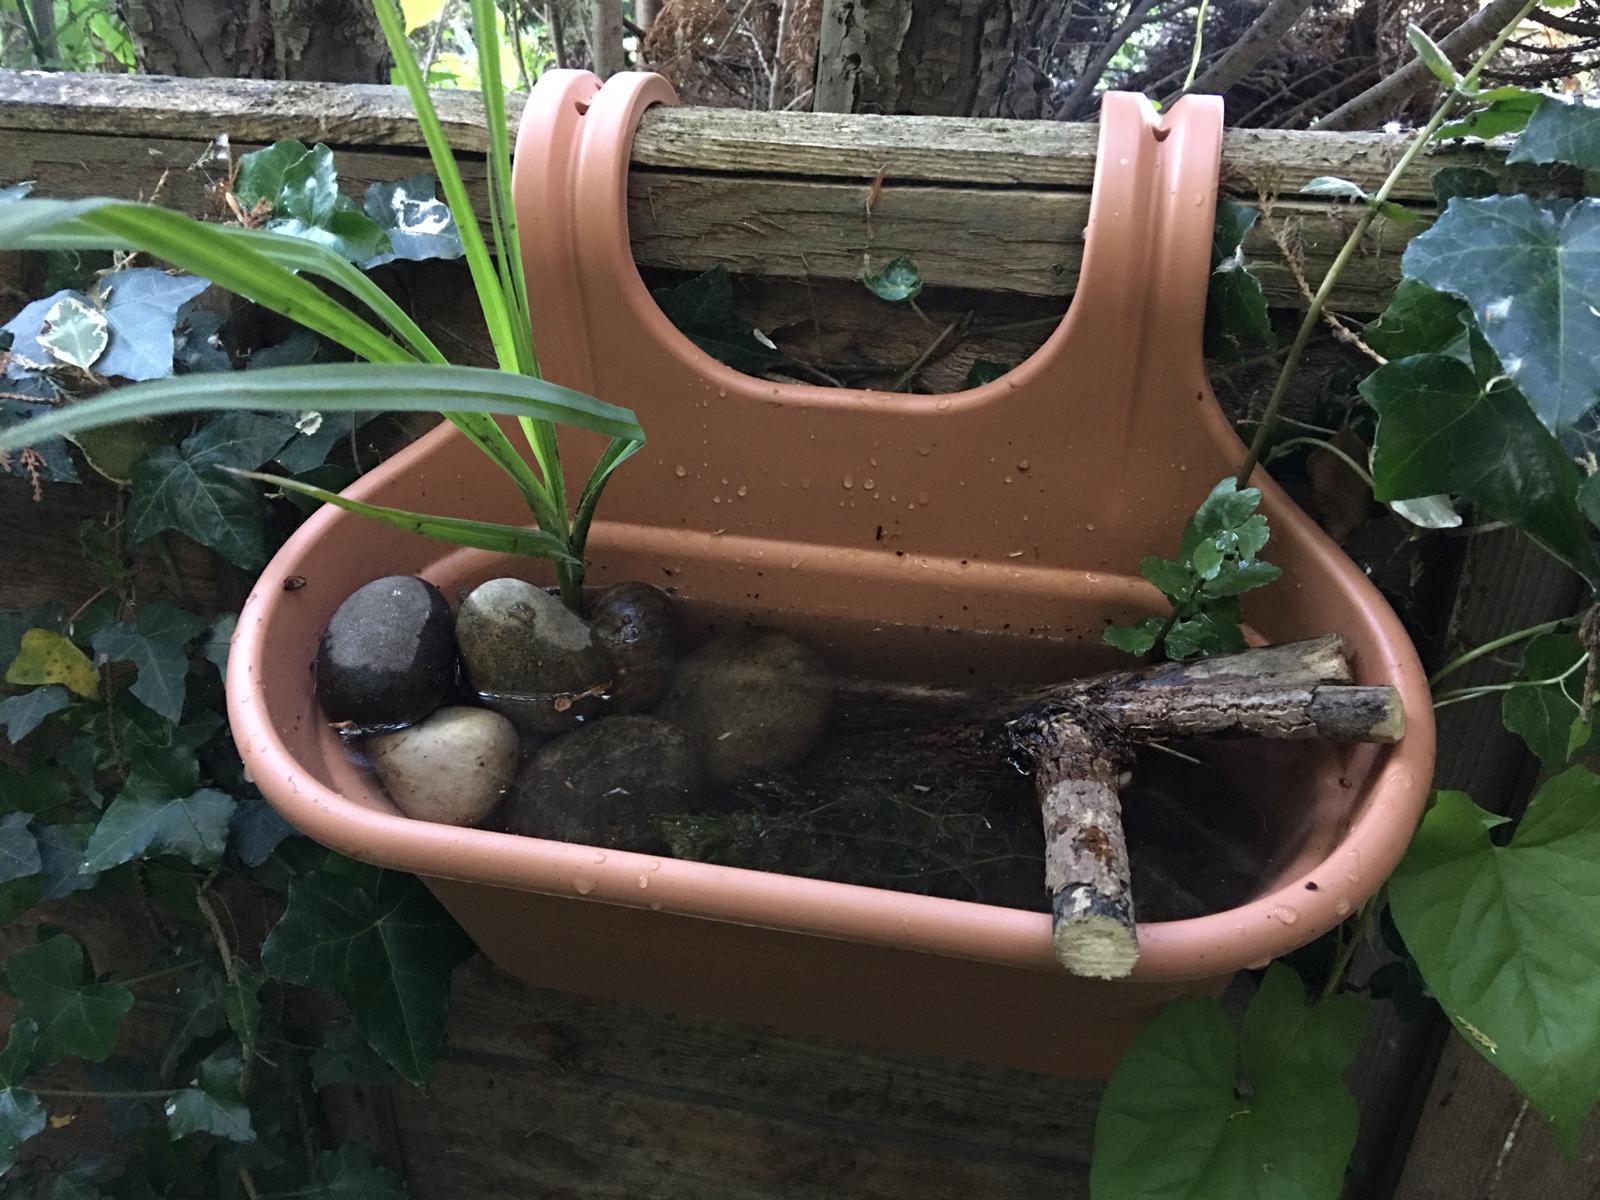
Add a layer of pebbles and gravel to make crevices for minibeasts to hide in. This can also help weigh down the roots of some of the plants you add later and will give them something to grow on other than bare plastic.
Step 4:


Add in some larger stones or logs to create different depths and sloping sides of the pond, so that animals can get in and out more easily.
If you want to, you can even make a mini ramp like we did. You may need to rearrange and wedge the end of any wood beneath the stones so that it doesn’t float away.
Step 5:

Fill your pond with water. Ideally you should use rainwater for this as tap water contains chemicals that can harm pondlife.
If you have a water butt this can help you collect rainwater more quickly. Alternatively, you can try filling up some buckets from your gutters and catch the rain falling on your shed or house during a downpour.
Step 6:

Add some plants into the mix. A combination of submerged oxygenating plants and marginal plants around the edge of the pond works well and small ponds only need one or two of each.
The Wildlife trust suggests these plants for a garden pond:
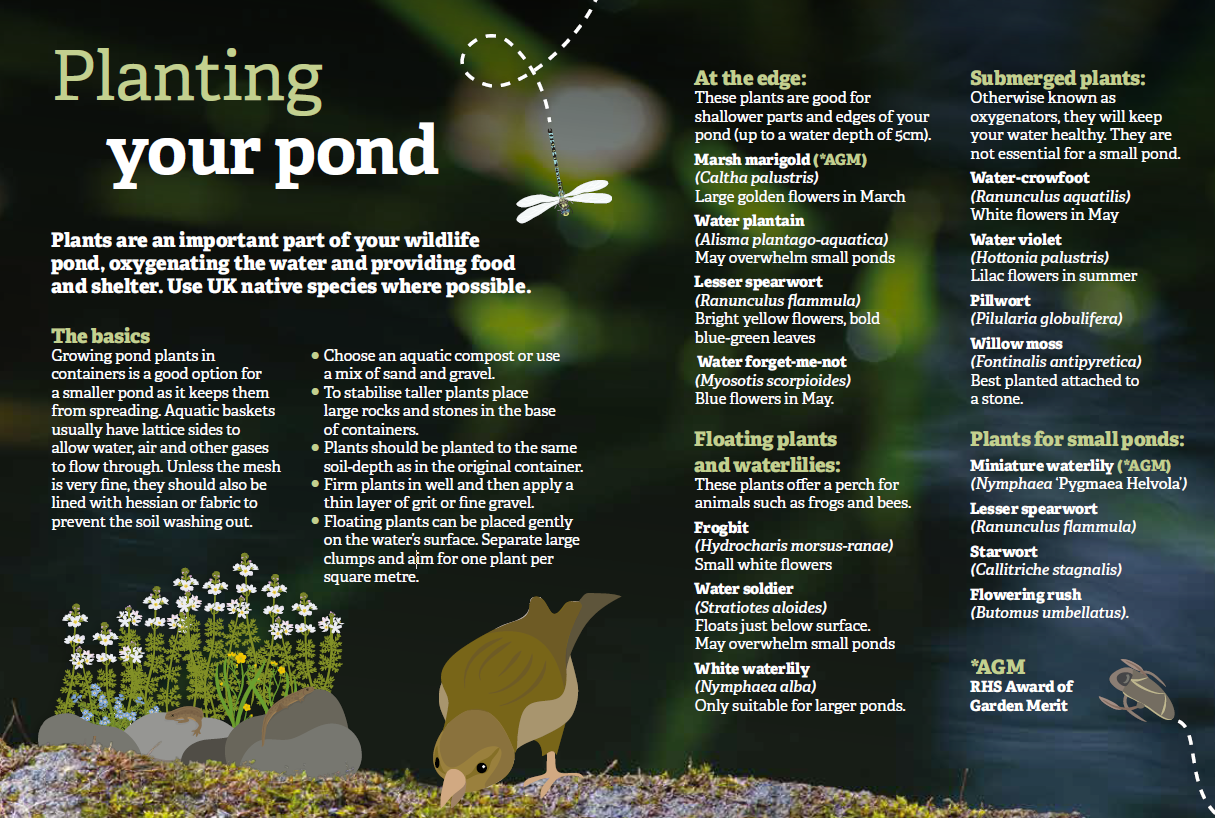
Grow Wild UK have a list of native plants suppliers, many of which also sell aquatic plants.
Step 7:

Time to watch and wait for wildlife to move in. Give a few days for the water to settle as it may appear cloudy when you first create your mini pond.
Don’t transfer animals or frogspawn in yourself as this can spread disease. Things will soon start to move in and if they want to be in your pond, they will find their own way.
Top tips:

- If you have space, you can bury your mini pond and make its edge level with the ground. This will increase ease of access for animals such as frogs and newts, but you should take care as other animals can also fall in. Make sure they have plenty of things to cling onto at the sides of the pond so that they can climb back out. Alternatively, for a raised pond you can create stone steps or a wooden ramp to improve access.
- If you don’t have a garden and want to hang up a mini pond or water source for passing birds, then be aware that they can get quite heavy. Make extra sure that any supply of water is safely secured as you don’t want your mini pond to suddenly fall down.
- If you cannot collect rainwater from your gutters you can try leaving buckets and other containers out on a wet day. You could also try stretching out a sheet of tarpaulin for water to pool in the middle and then transfer it to your pond.
- Do not be tempted to add fish as they will eat all the other pond creatures.
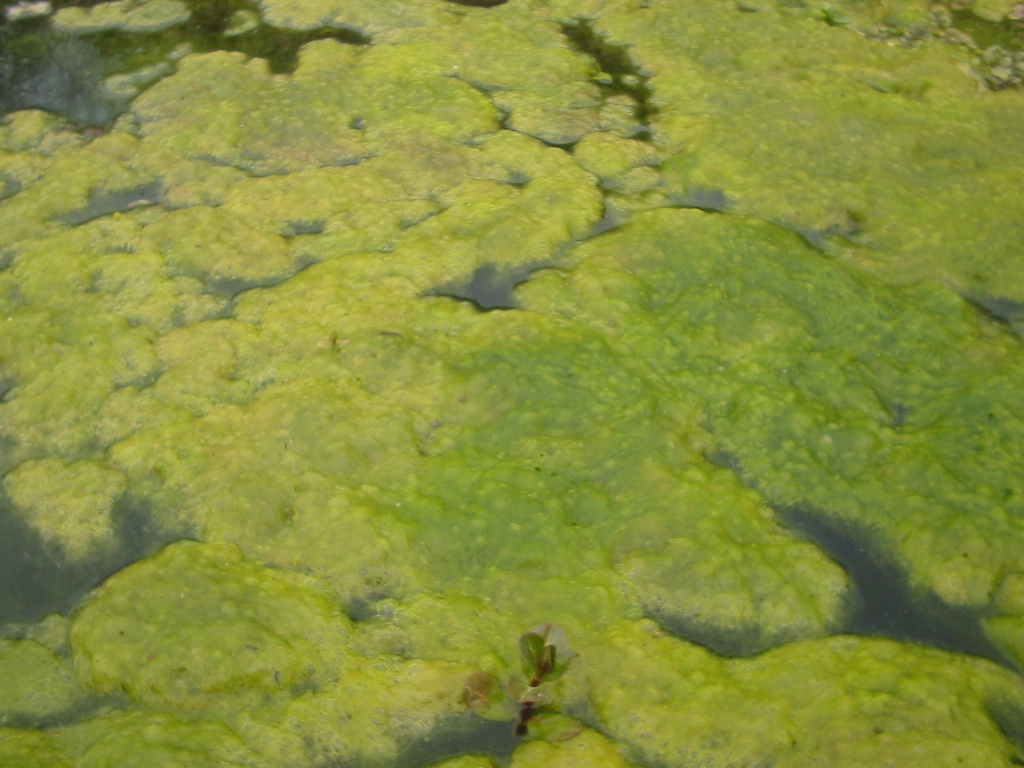
- Don’t worry too much about pond maintenance in the first few months but down the line it may start to get blooms of algae or blanket weed. To stop it completely taking over you can remove it by hand or wrap it around a stick like spaghetti.
Take care to sift through the algae for pondlife before you remove it so that they have a chance to escape.
Wildlife in a School Pond
Find out more about the species that your pond may attract by following our visit to the pond at Trumpington Park Primary below. It’s a bit bigger than a mini-pond but still only small and there was loads to see!
Trumpington Park Primary School Invertebrate Survey 16/03/2020
In mid-March 2020, a team from the Museum of Zoology and the Wildlife Trust for Bedfordshire, Cambridgeshire and Northamptonshire visited Trumpington Park Primary School to survey for invertebrates and see the wildlife that students can interact with in their school grounds.
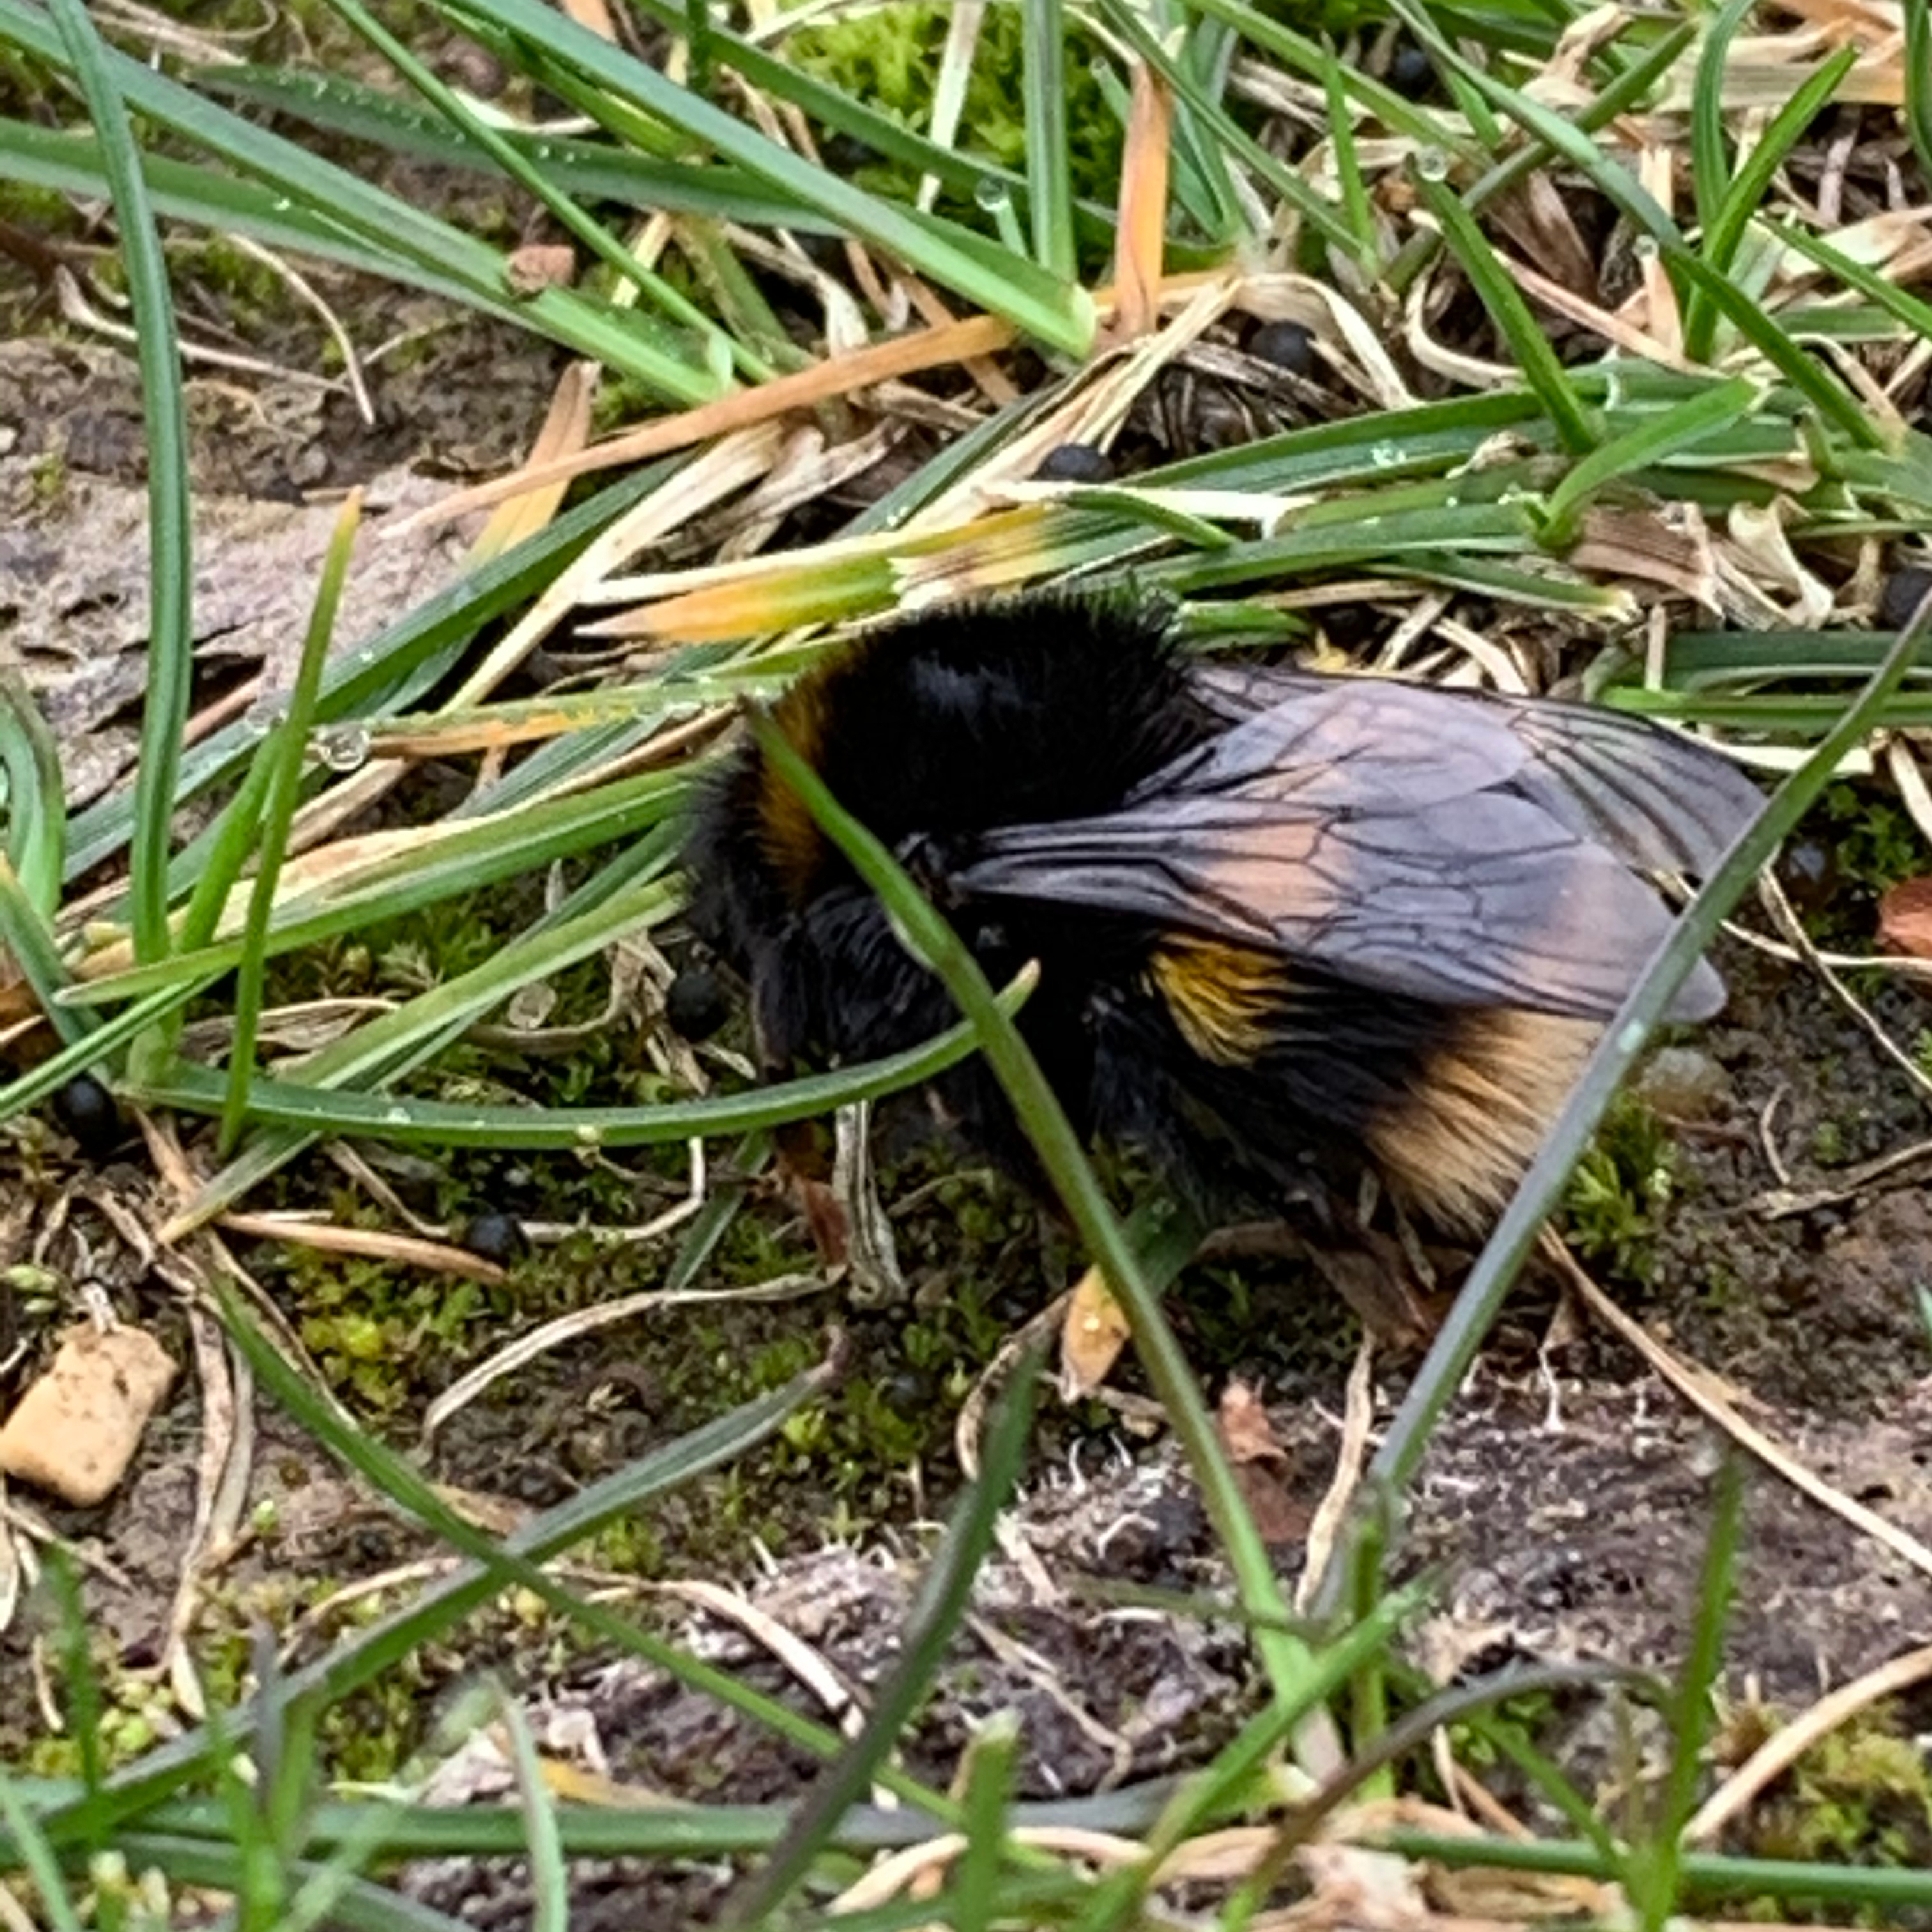
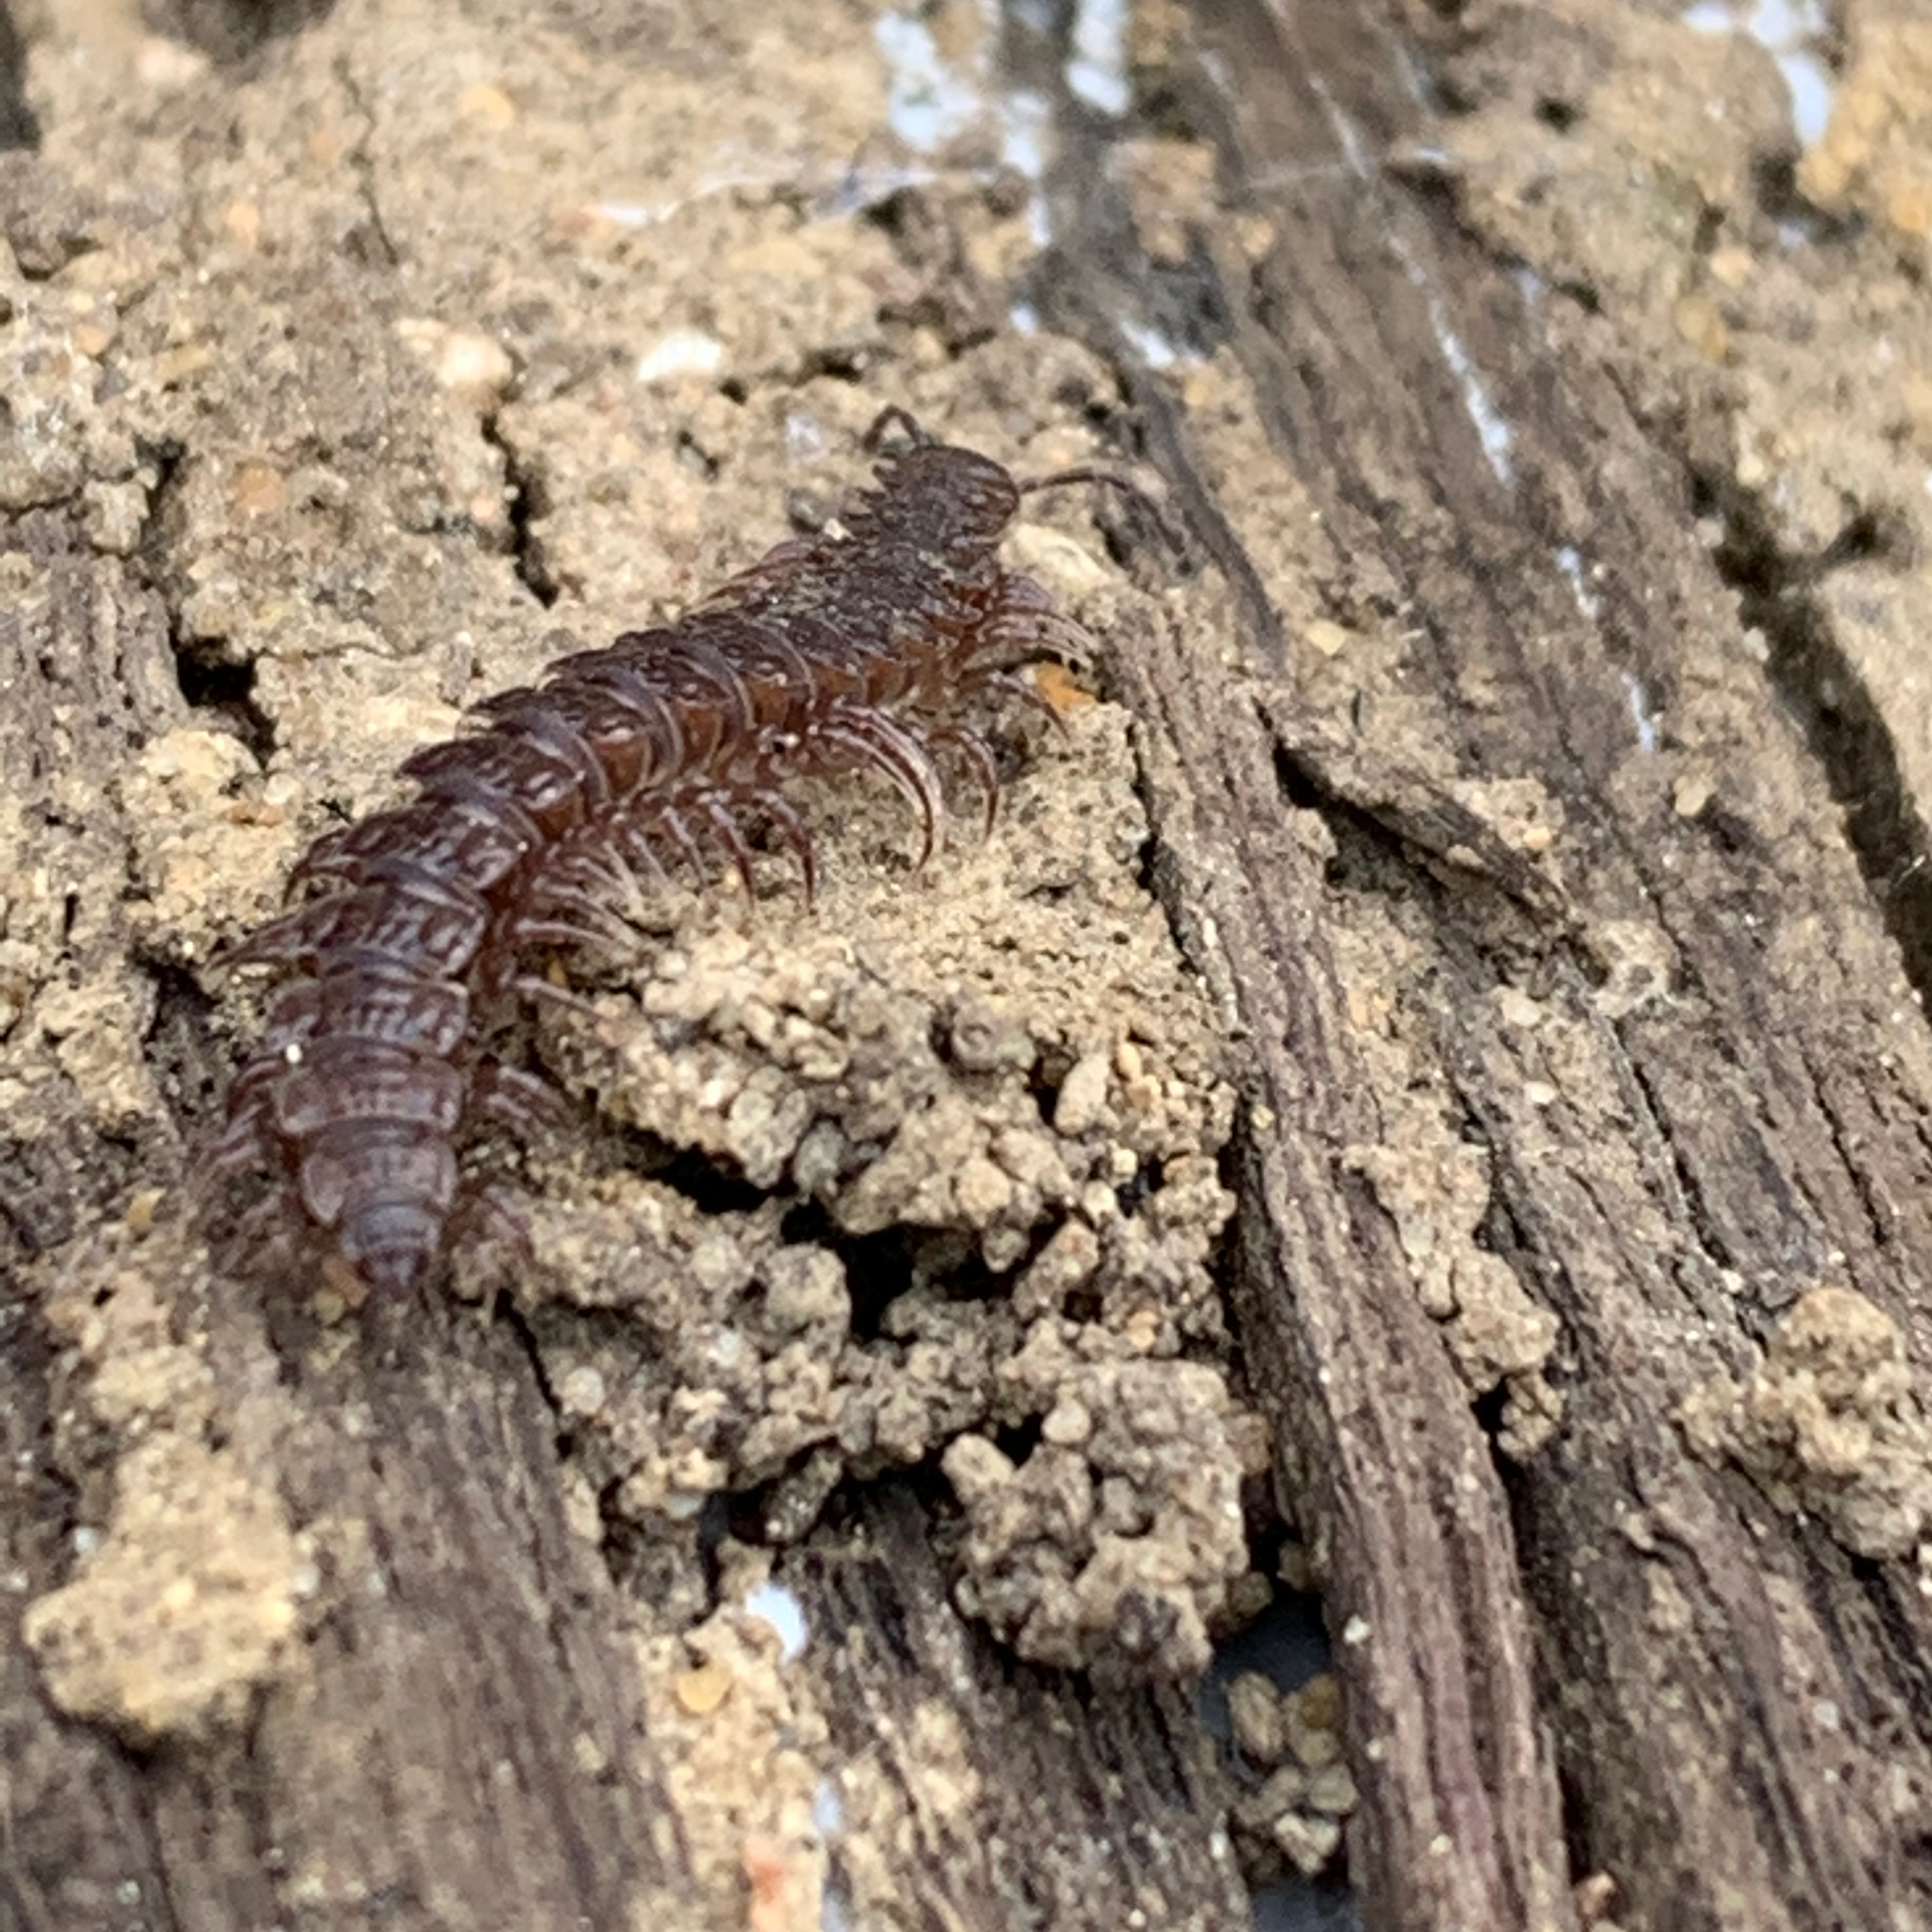
Even though it was early in the season, we found a wealth of different species, including a queen buff-tailed bumblebee and flat backed millipede.
One of the highlights of the visits was delving into the world of water invertebrates. The school is lucky enough to have a small pond; only a few meters wide and about a foot deep.
Here is the full list of invertebrates we found in the school pond:
Pond Dipping
- Caddisfly larva
- Dragonfly larvae (x3 species)
- Mayfly larvae
- Greater Water Boatman
- Lesser Water Boatman
- Freshwater shrimp
- Diving Beetle larva
- Diving Beetle
- Pond Snails (x2 species)
- Fly Larvae
- Daphnia/cyclops (water fleas)
- Freshwater worm
The caddisfly and dragonfly larvae are only found in freshwater with low pollution levels and are generally used as indicators of good pond health. They are sensitive to pesticides and fertilisers and require well oxygenated water, that isn’t choked by algae or decaying leaf litter. If you are lucky enough to have a pond in your garden or nearby, see if you can locate these indicator species.
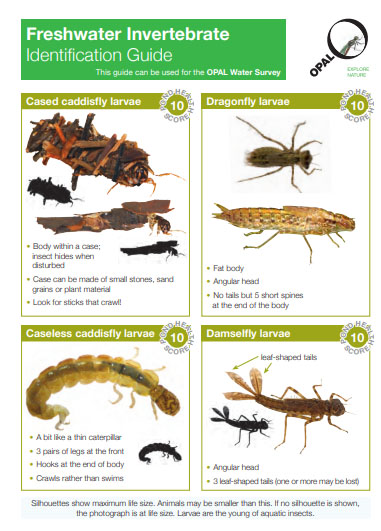
Open Air Laboratories (OPAL) offer a free survey guide to assess pond health, as well as free ID sheets on lots of the invertebrates and larger species you are likely to find.
![]() Caddisfly larvae:
Caddisfly larvae:
These larvae are usually found enclosed within a transportable ‘casing’, which they construct out of material they find around them in the pond. However, there are some species where the larvae are case-less.

Casings help to protect their soft bodies and form a cylindrical tube, from which they can poke out their head and front legs in order to feed and move around. Different species can build the casings from a wide variety of materials, ranging from grains of sand to decaying plant matter, depending on the habitat.
The species we found at the school appears to be making use of a little of everything. You can see the hole at the back (posterior) end, which it uses to draw in oxygenated water over its gills.
Dragonfly larvae:
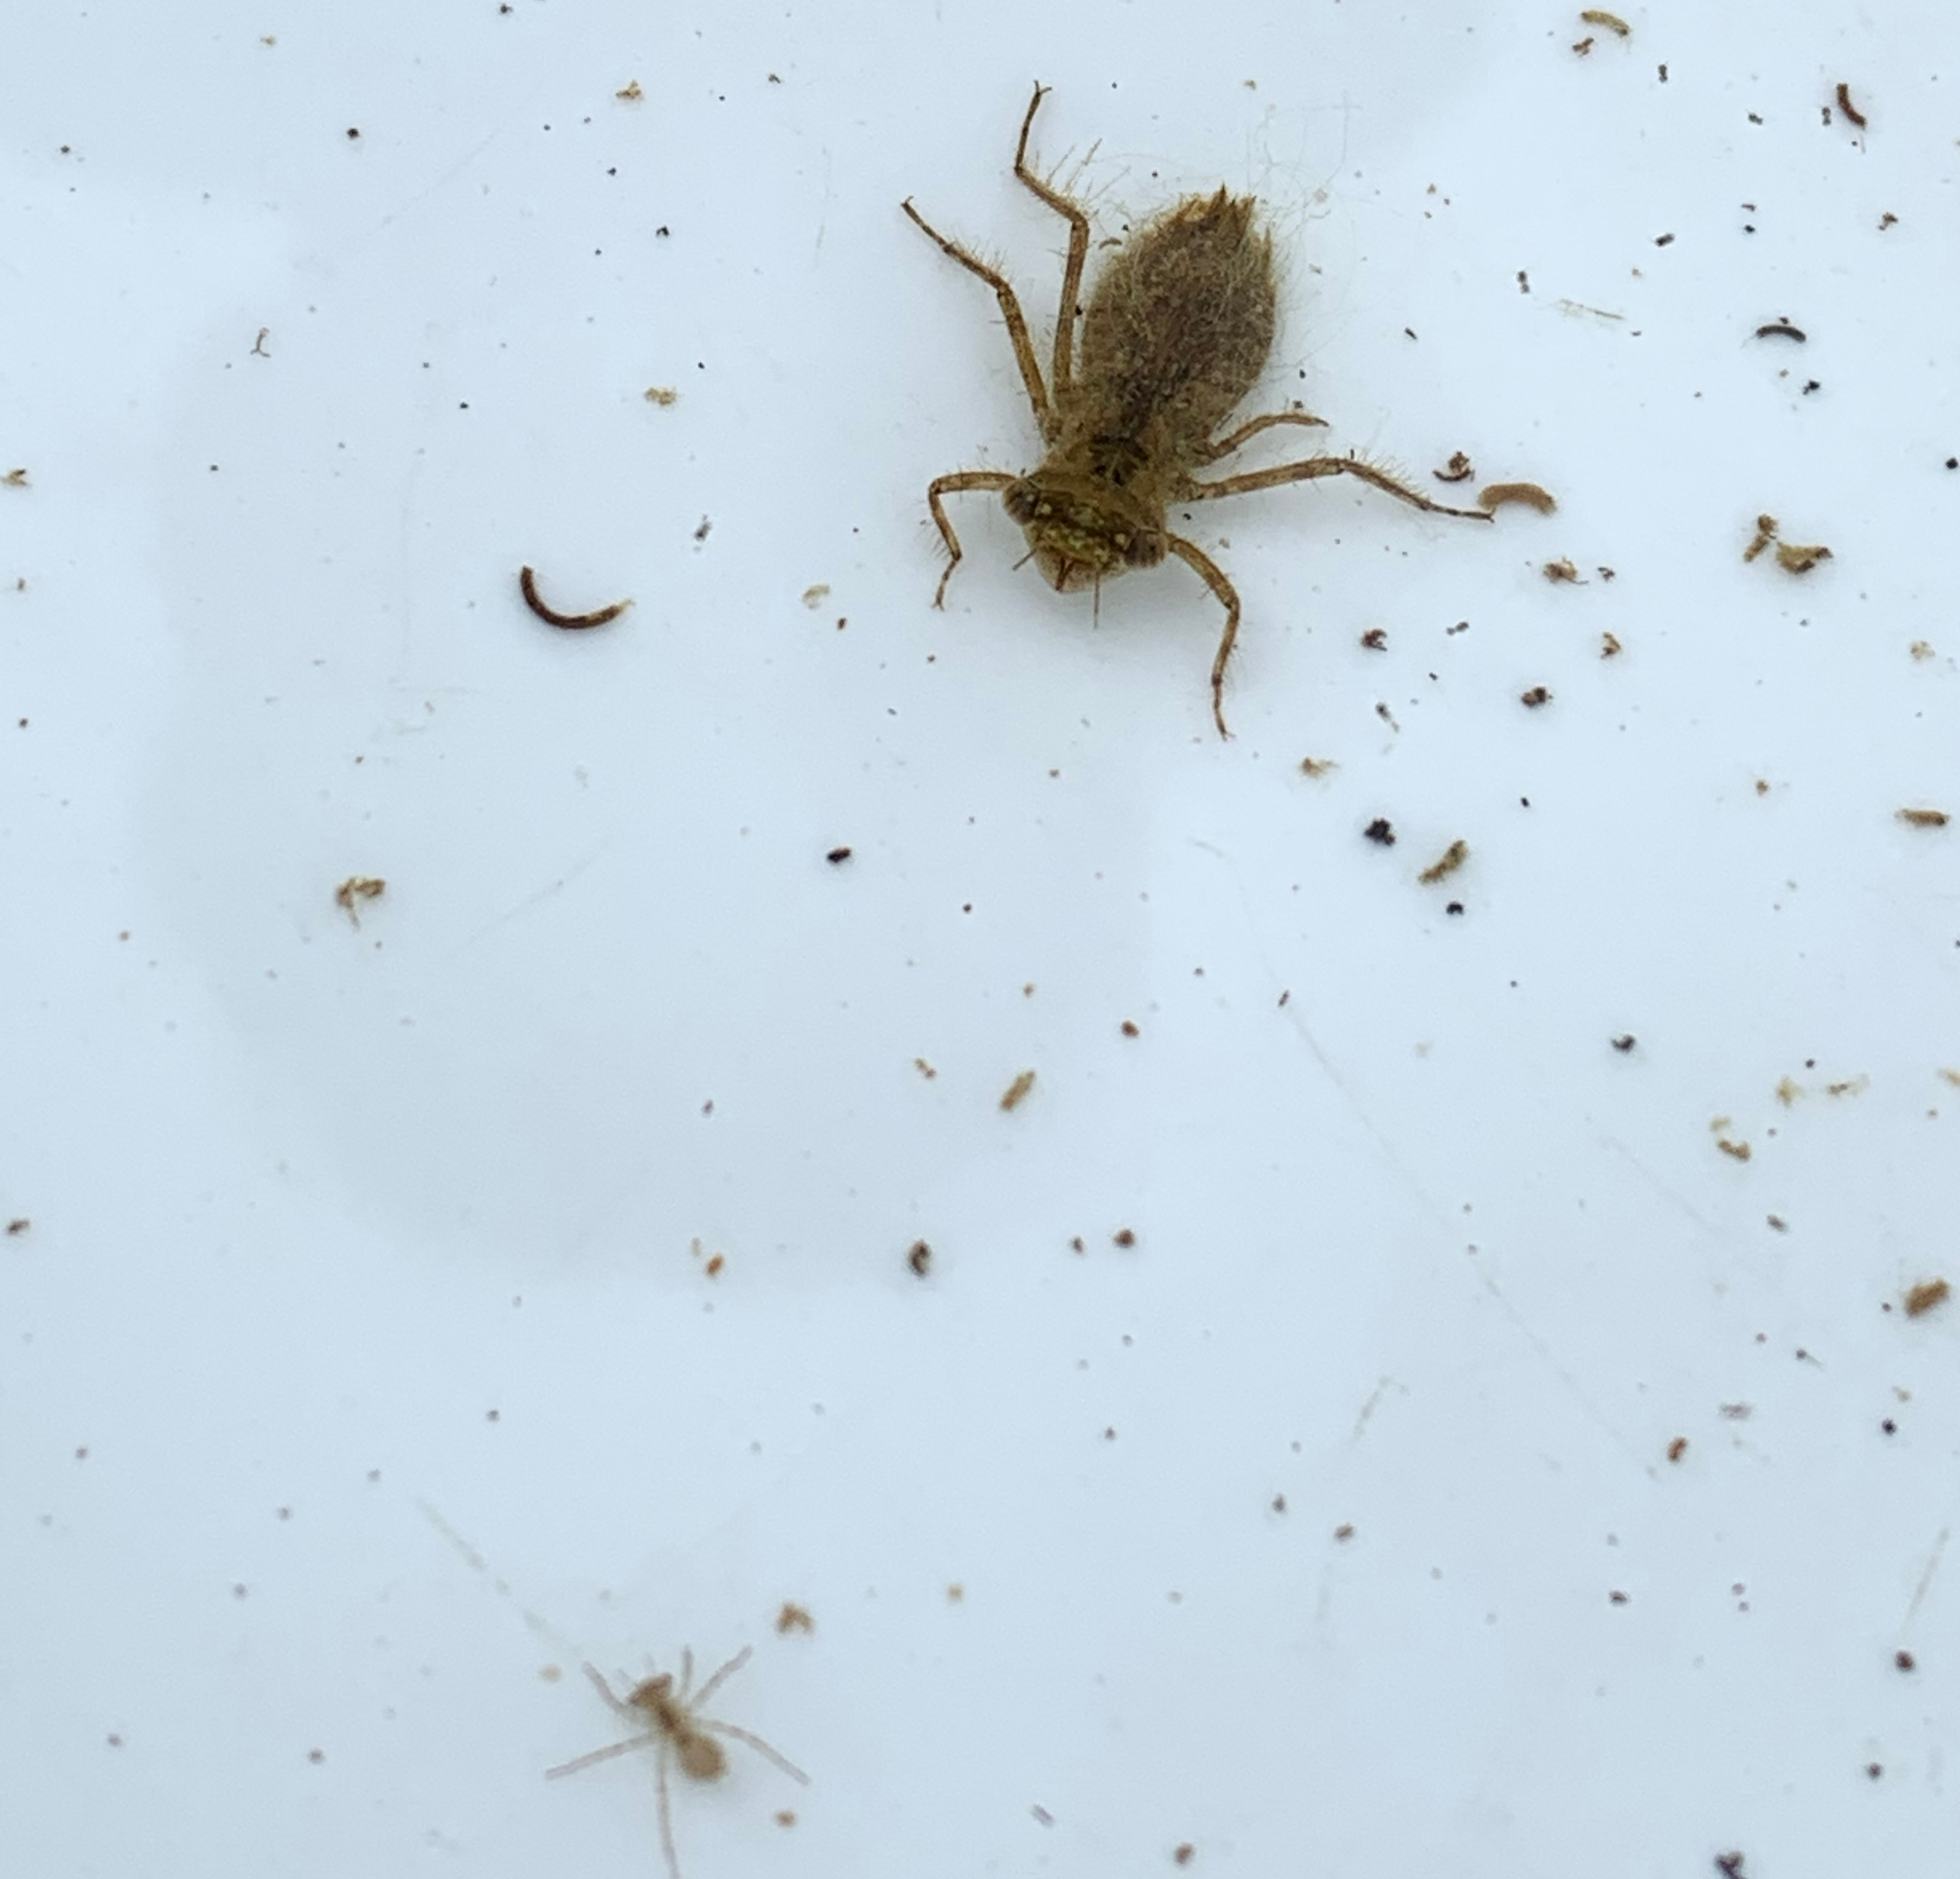
The picture shows one type of dragonfly larvae we saw in the pond but just like the adults, the larvae of dragonfly species can look very different. This one is short and squat, whilst others are longer and more streamlined.
You can also see a much smaller dragonfly larva in this picture. It appears to be the same species, but it has a lot of growing to do.
These larvae moult and shed their skin many times, before finally emerging from the water and shedding one last time into their adult form.

We didn’t see damselfly larvae, but these can be another good indicator of pond health. They look quite similar to other species of larvae in the pond but are thinner than those of dragonflies. Damselflies also have three long leaf shaped tails, which they use for propulsion but also function as their gills.
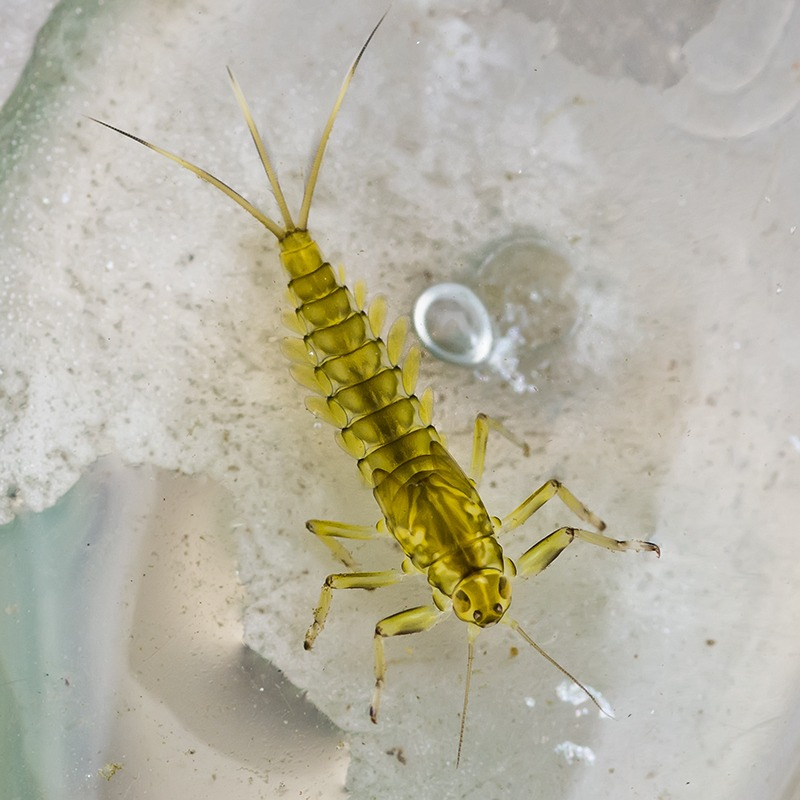
Mayfly larvae. Jon Beresford CC BY-NC-SA 
Long species of dragonfly larvae.
stevenw12339 CC BY-NC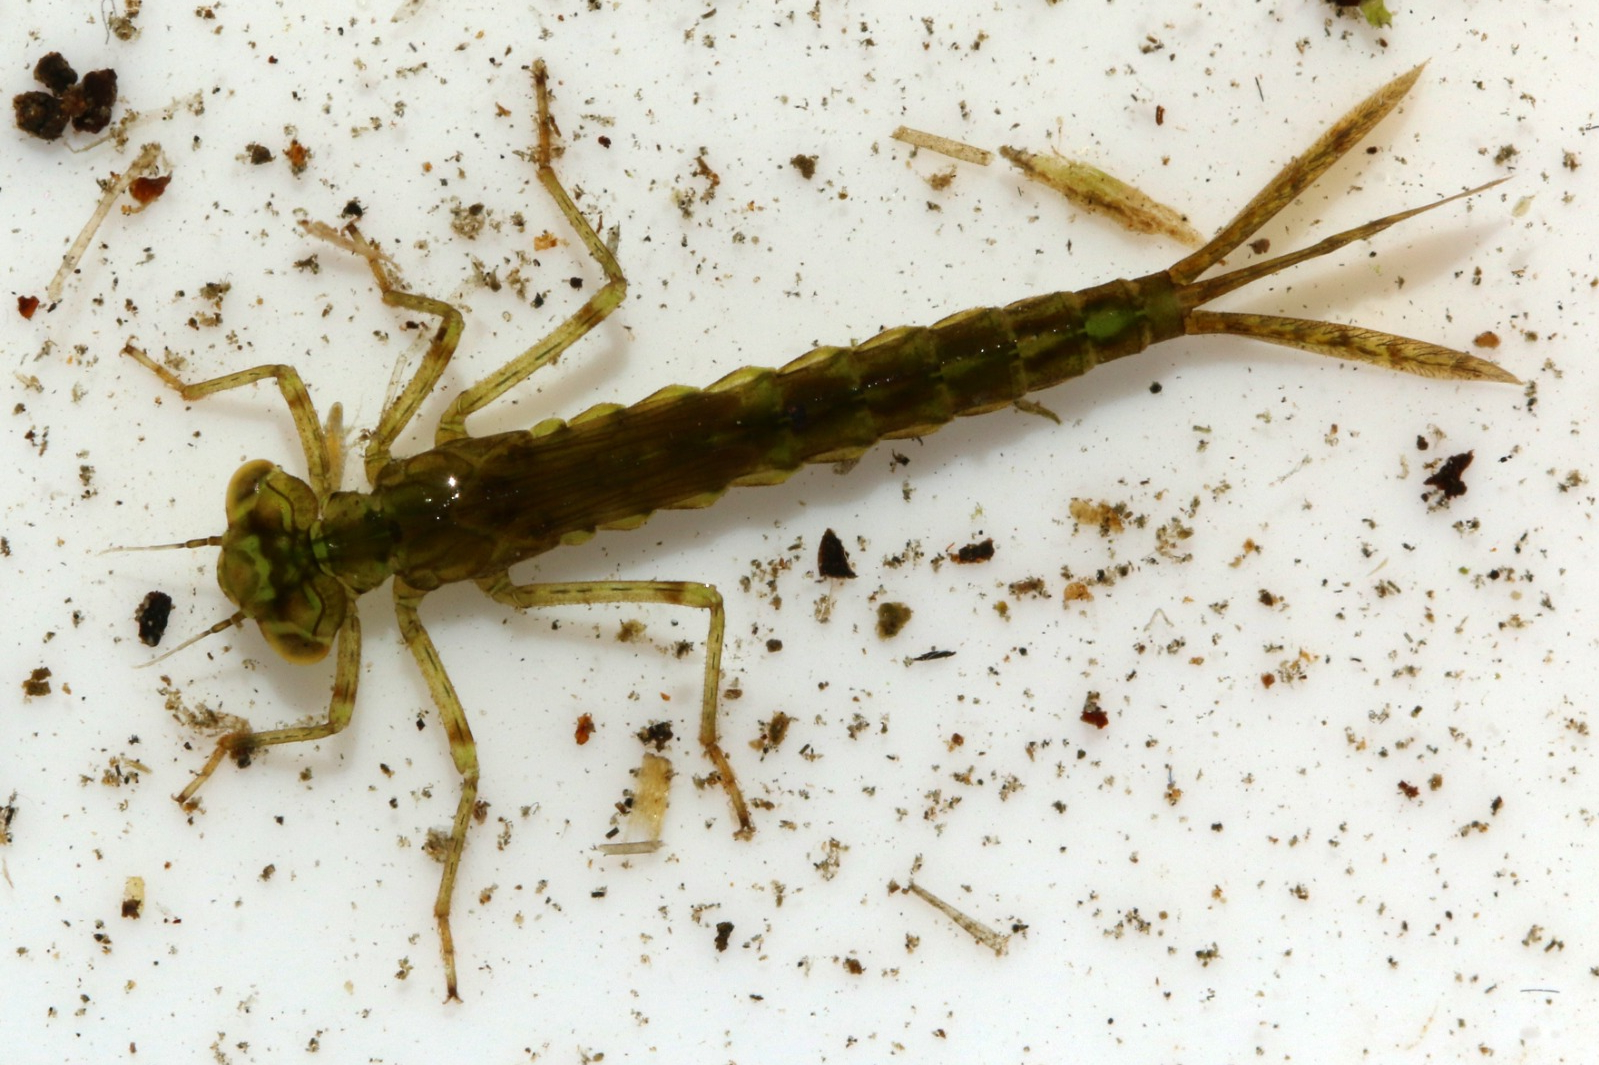
Damselfly larvae. Charles J Sharp CC BY-SA 3.0
Confusingly, mayflies also have three tails, but theirs are much thinner and look like hairs or filaments rather than flattened paddles or leaves. Dragonfly larvae do not have long tails and instead have short spines.
This resource helps you to tell different larvae apart.
Hopefully this post has shown how much wildlife can be supported by even a small pond. Sadly, these kinds of still, freshwater habitats have been declining. Therefore anything we can do to provide more of them will go a long way.
Find out more…
To see more pond wildlife on this blog, check out our Pondwatch series:
Go pond-dipping with Ed Turner, our Curator of Insects in Episode 2
Discover the courtship dance of newts in Episode 4
The Esmée Fairbairn Collections Fund is run by the Museums Association, funding projects that develop collections to achieve social impact.

7 thoughts on “Build your own Mini-Pond”