


Spring is in the air. Birds are nesting, frogspawn is hatching, and insects are buzzing all around. To celebrate, why not try some of our activities all about animal lifecycles, inspired by the collections at the Museum of Zoology.
We have arranged these activities by type of animal. Make nests and make a sock puppet to experiment with the colours of chick mouths in the birds section. Examine tiger skulls and measure your own proportions in the mammals section. See videos of newts and find out about our native frogs and toads in the amphibians section. And explore the lifecycles of butterflies and ladybirds in the insects section. There’s lots of information here – choose one animal type to look at in detail, or explore it all. It’s up to you!
These activities support learning in the following areas:
Identify and name a variety of common animals, and describe and compare their structure
Notice that animals, including humans, have offspring which grow into adults
Describe the differences in the life cycles of a mammal, an amphibian, an insect and a bird
Working scientifically, including asking relevant questions, making systematic and careful observations, taking accurate measurements, and identifying differences, similarities or changes related to simple scientific ideas.
Animal Storytime
In this post you can find out lots of information about eggs and baby animals, how their parents look after them, and how they grow and change over time. Why not put together a story about them? Check out our Eggs story on the Puggle Club feed for some inspiration:
Try writing the story of an animal as it hatches and grows. We have a story builder worksheet that you can download to help you stucture it:
Right, onto the animals…
Birds
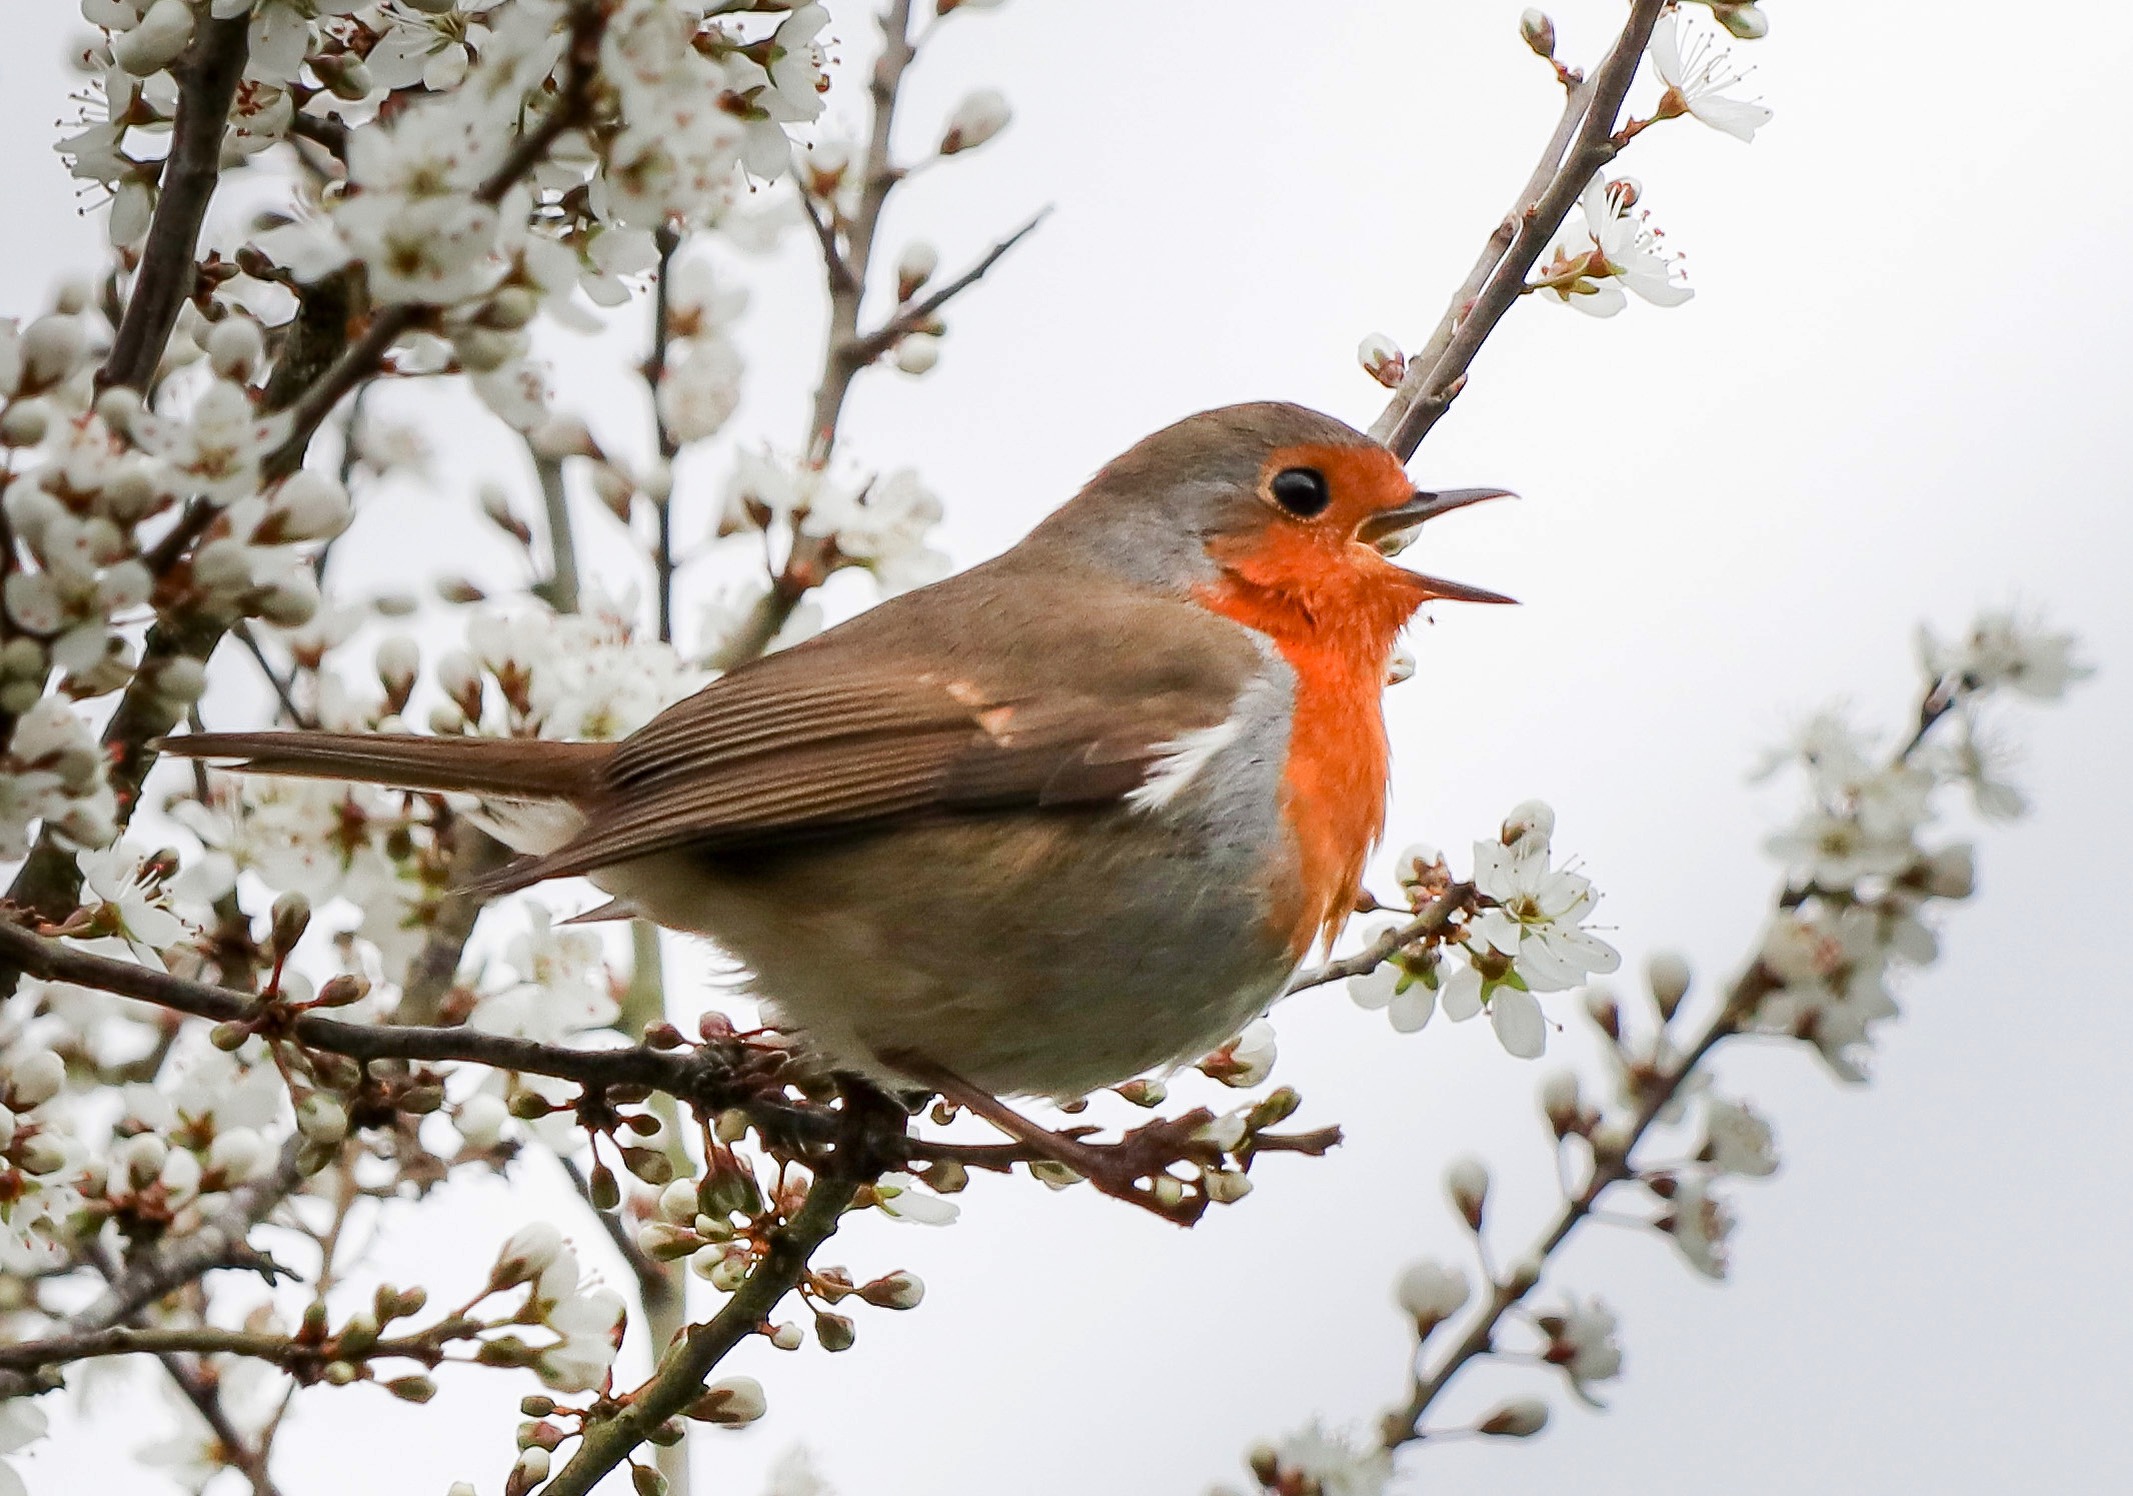
The blackbird you can see probing the lawn for worms, the woodpigeons cooing in the tree tops, the robins singing to defend their territories. These are all types of bird, and they all start out life inside an egg. Take a look at our Cryptic Egg Hunt to see some birds’ eggs and their adaptations.
Many birds build nests where they lay and incubate their eggs (keeping their eggs warm using their own body heat). Some nests are simple, while others are like complicated baskets woven from twigs and moss.
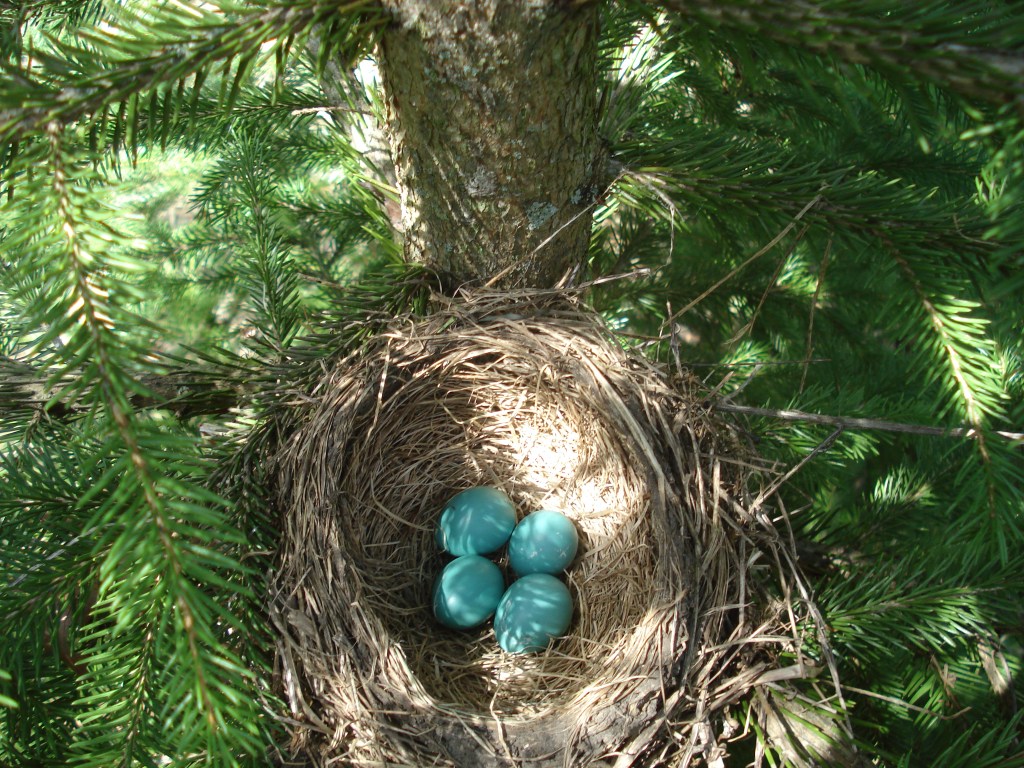
Task: Can you weave a nest as well as a bird?
(image credit: Julie Falk)
Let’s start by having a go at some basic weaving using paper. This isn’t quite how birds do it, but you can get an idea of how you can entwine structures together.
You can download and print the pattern we have used to make this nest here, or you can design your own. This would work really well made out of newspaper or recycled magazines.
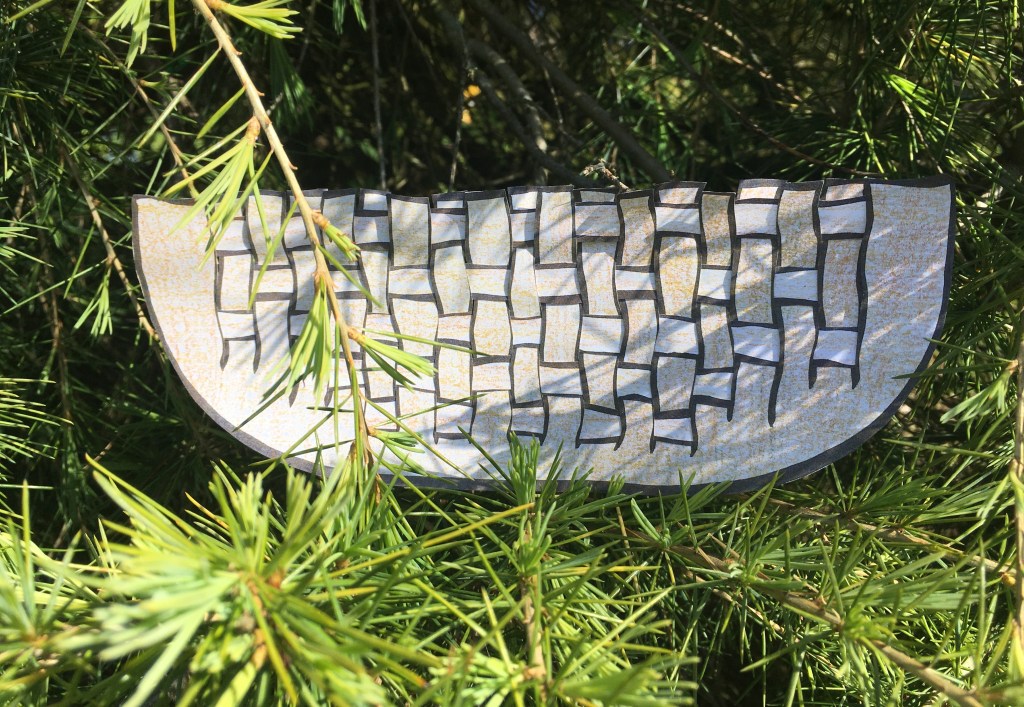
1. Cut out your nest shape – we’ve gone for a shallow bowl-shaped nest with our pattern.
2. Cut lines down vertically, but make sure you leave around 1cm along the bottom that you haven’t cut so the nest stays together.
3. Now cut the strips that you are going to weave across – ours are about 1cm thick.
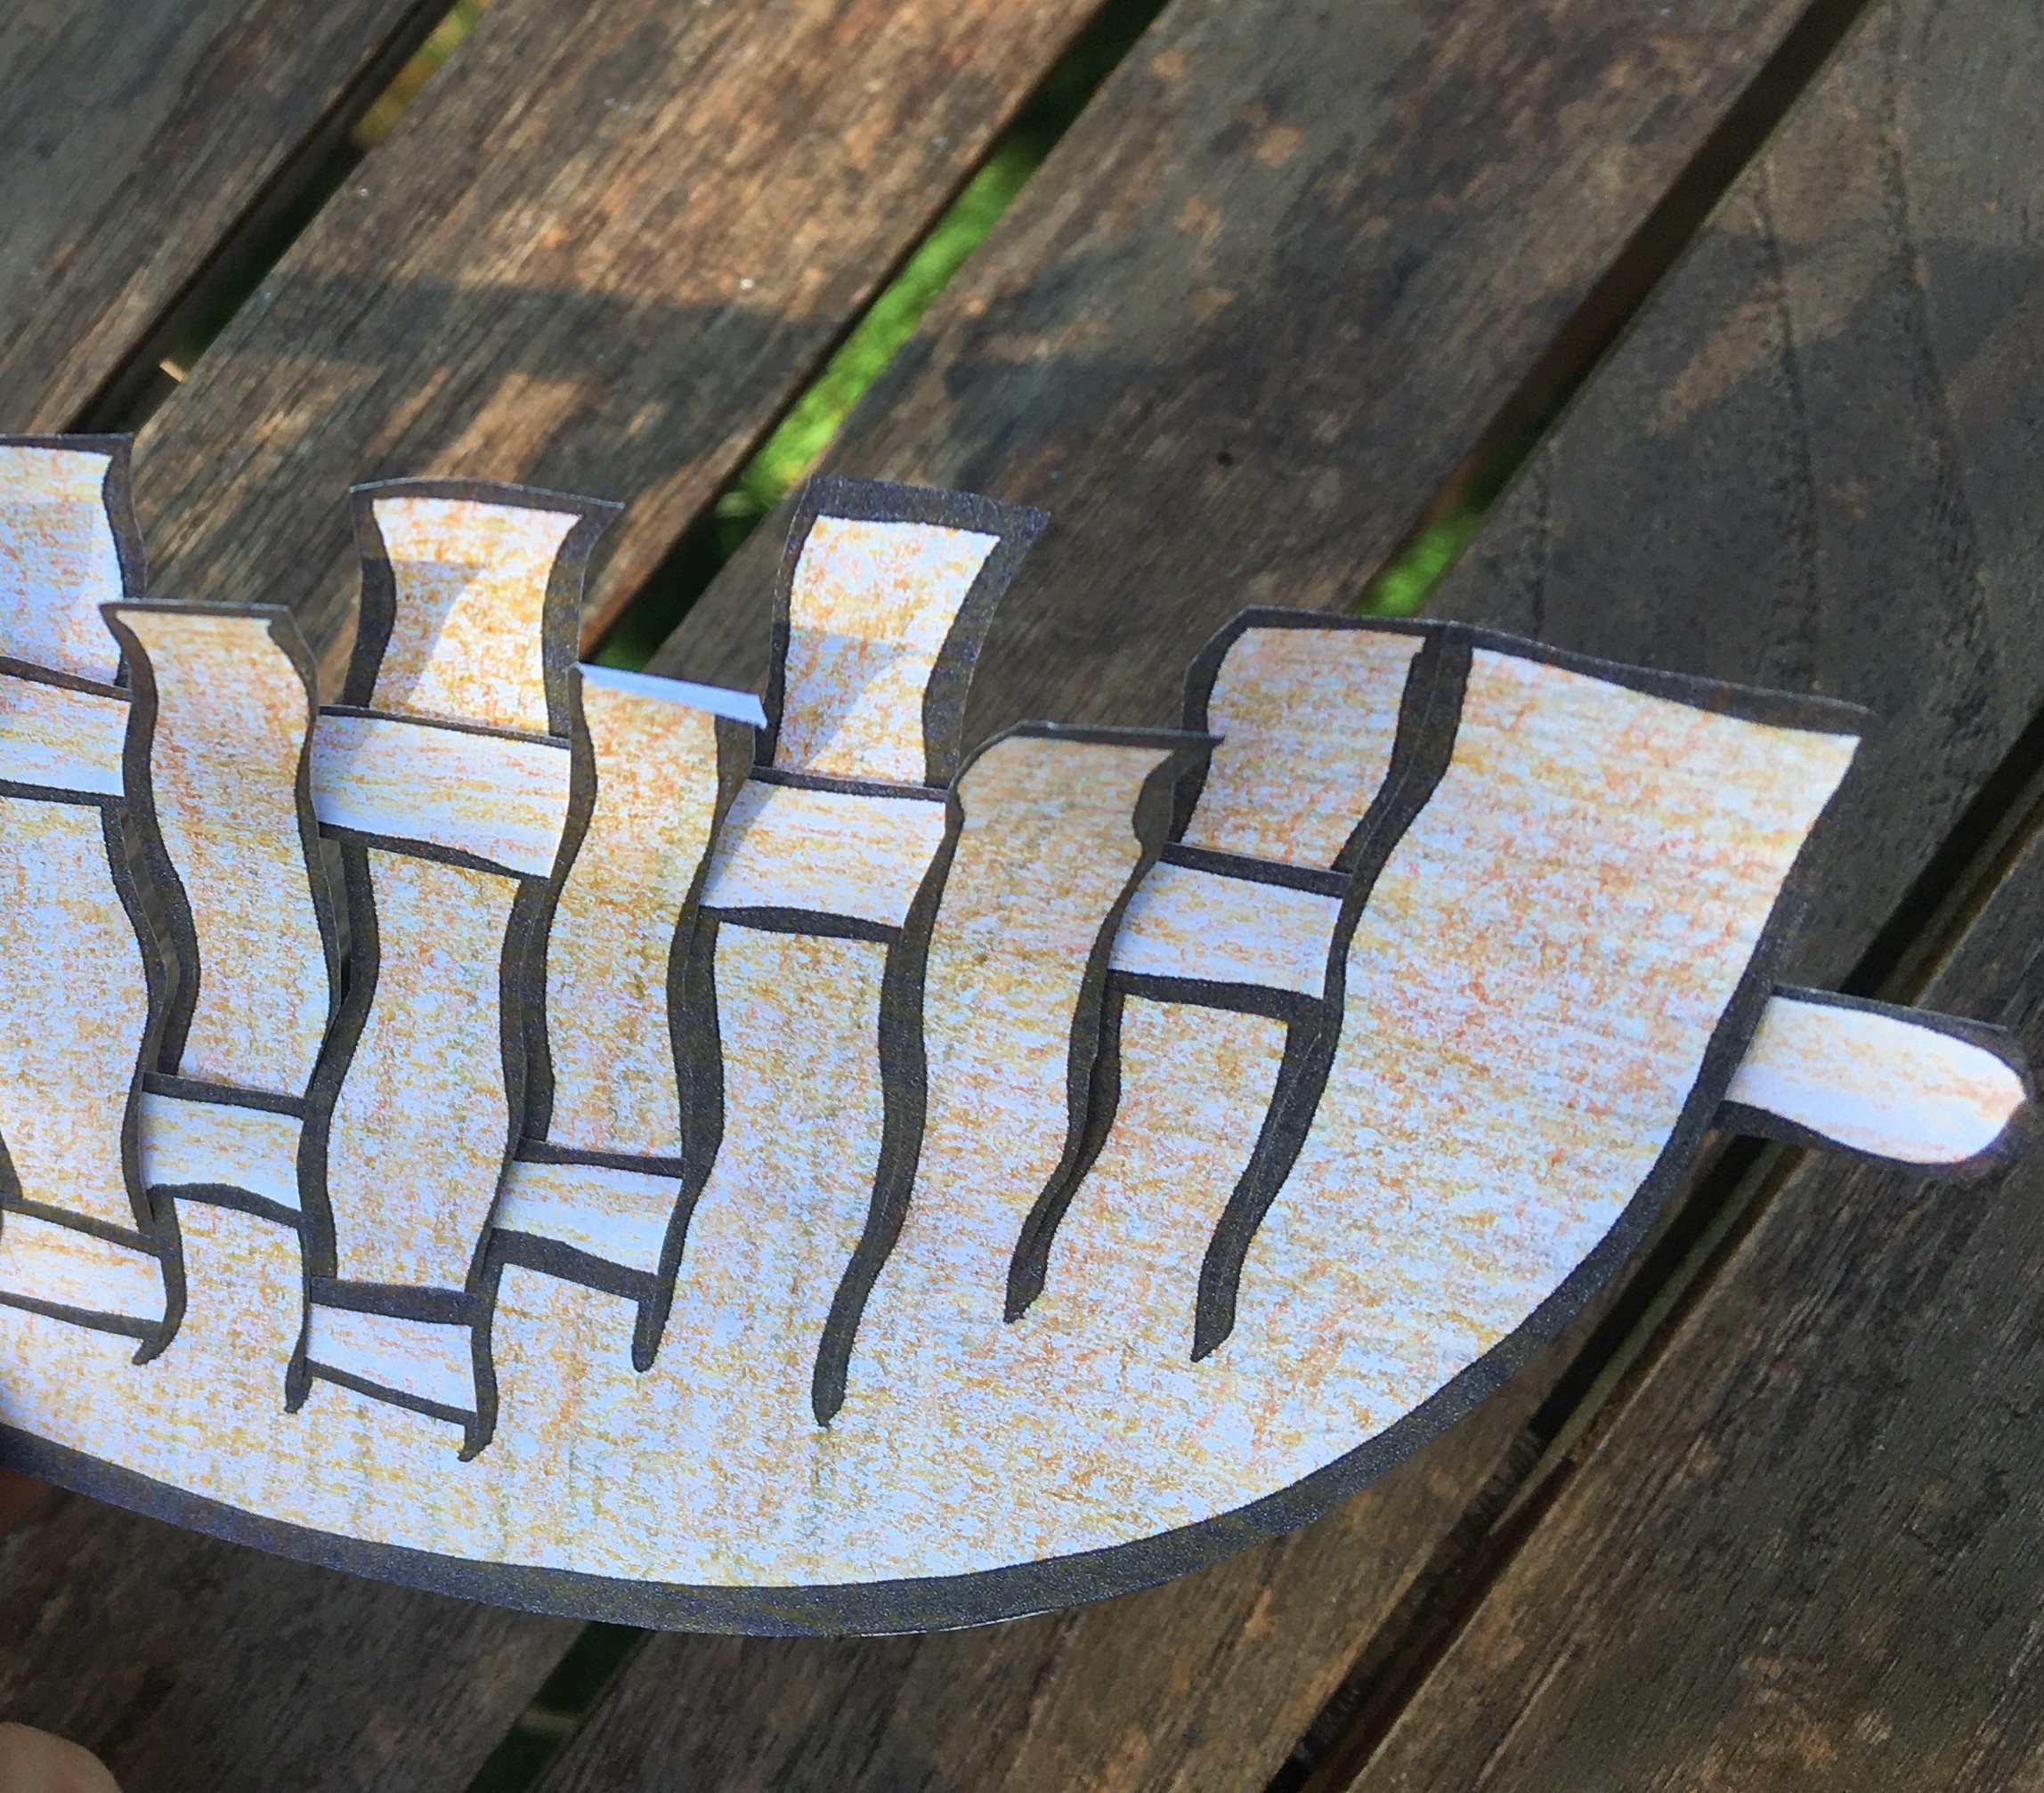
4. Start at the bottom and weave over and under, over and under along the length of your nest. You might want to secure your strip at either end with a little bit of glue or tape.
5. The next strip up you will weave over and under again, but make sure that the verticals you went over last time you go under this time (and vice versa).
6. Keep going and you will have woven a nest.
Now you’ve had a go at this, why not try something in 3D? Here’s a handy guide from the Wildlife Trusts:
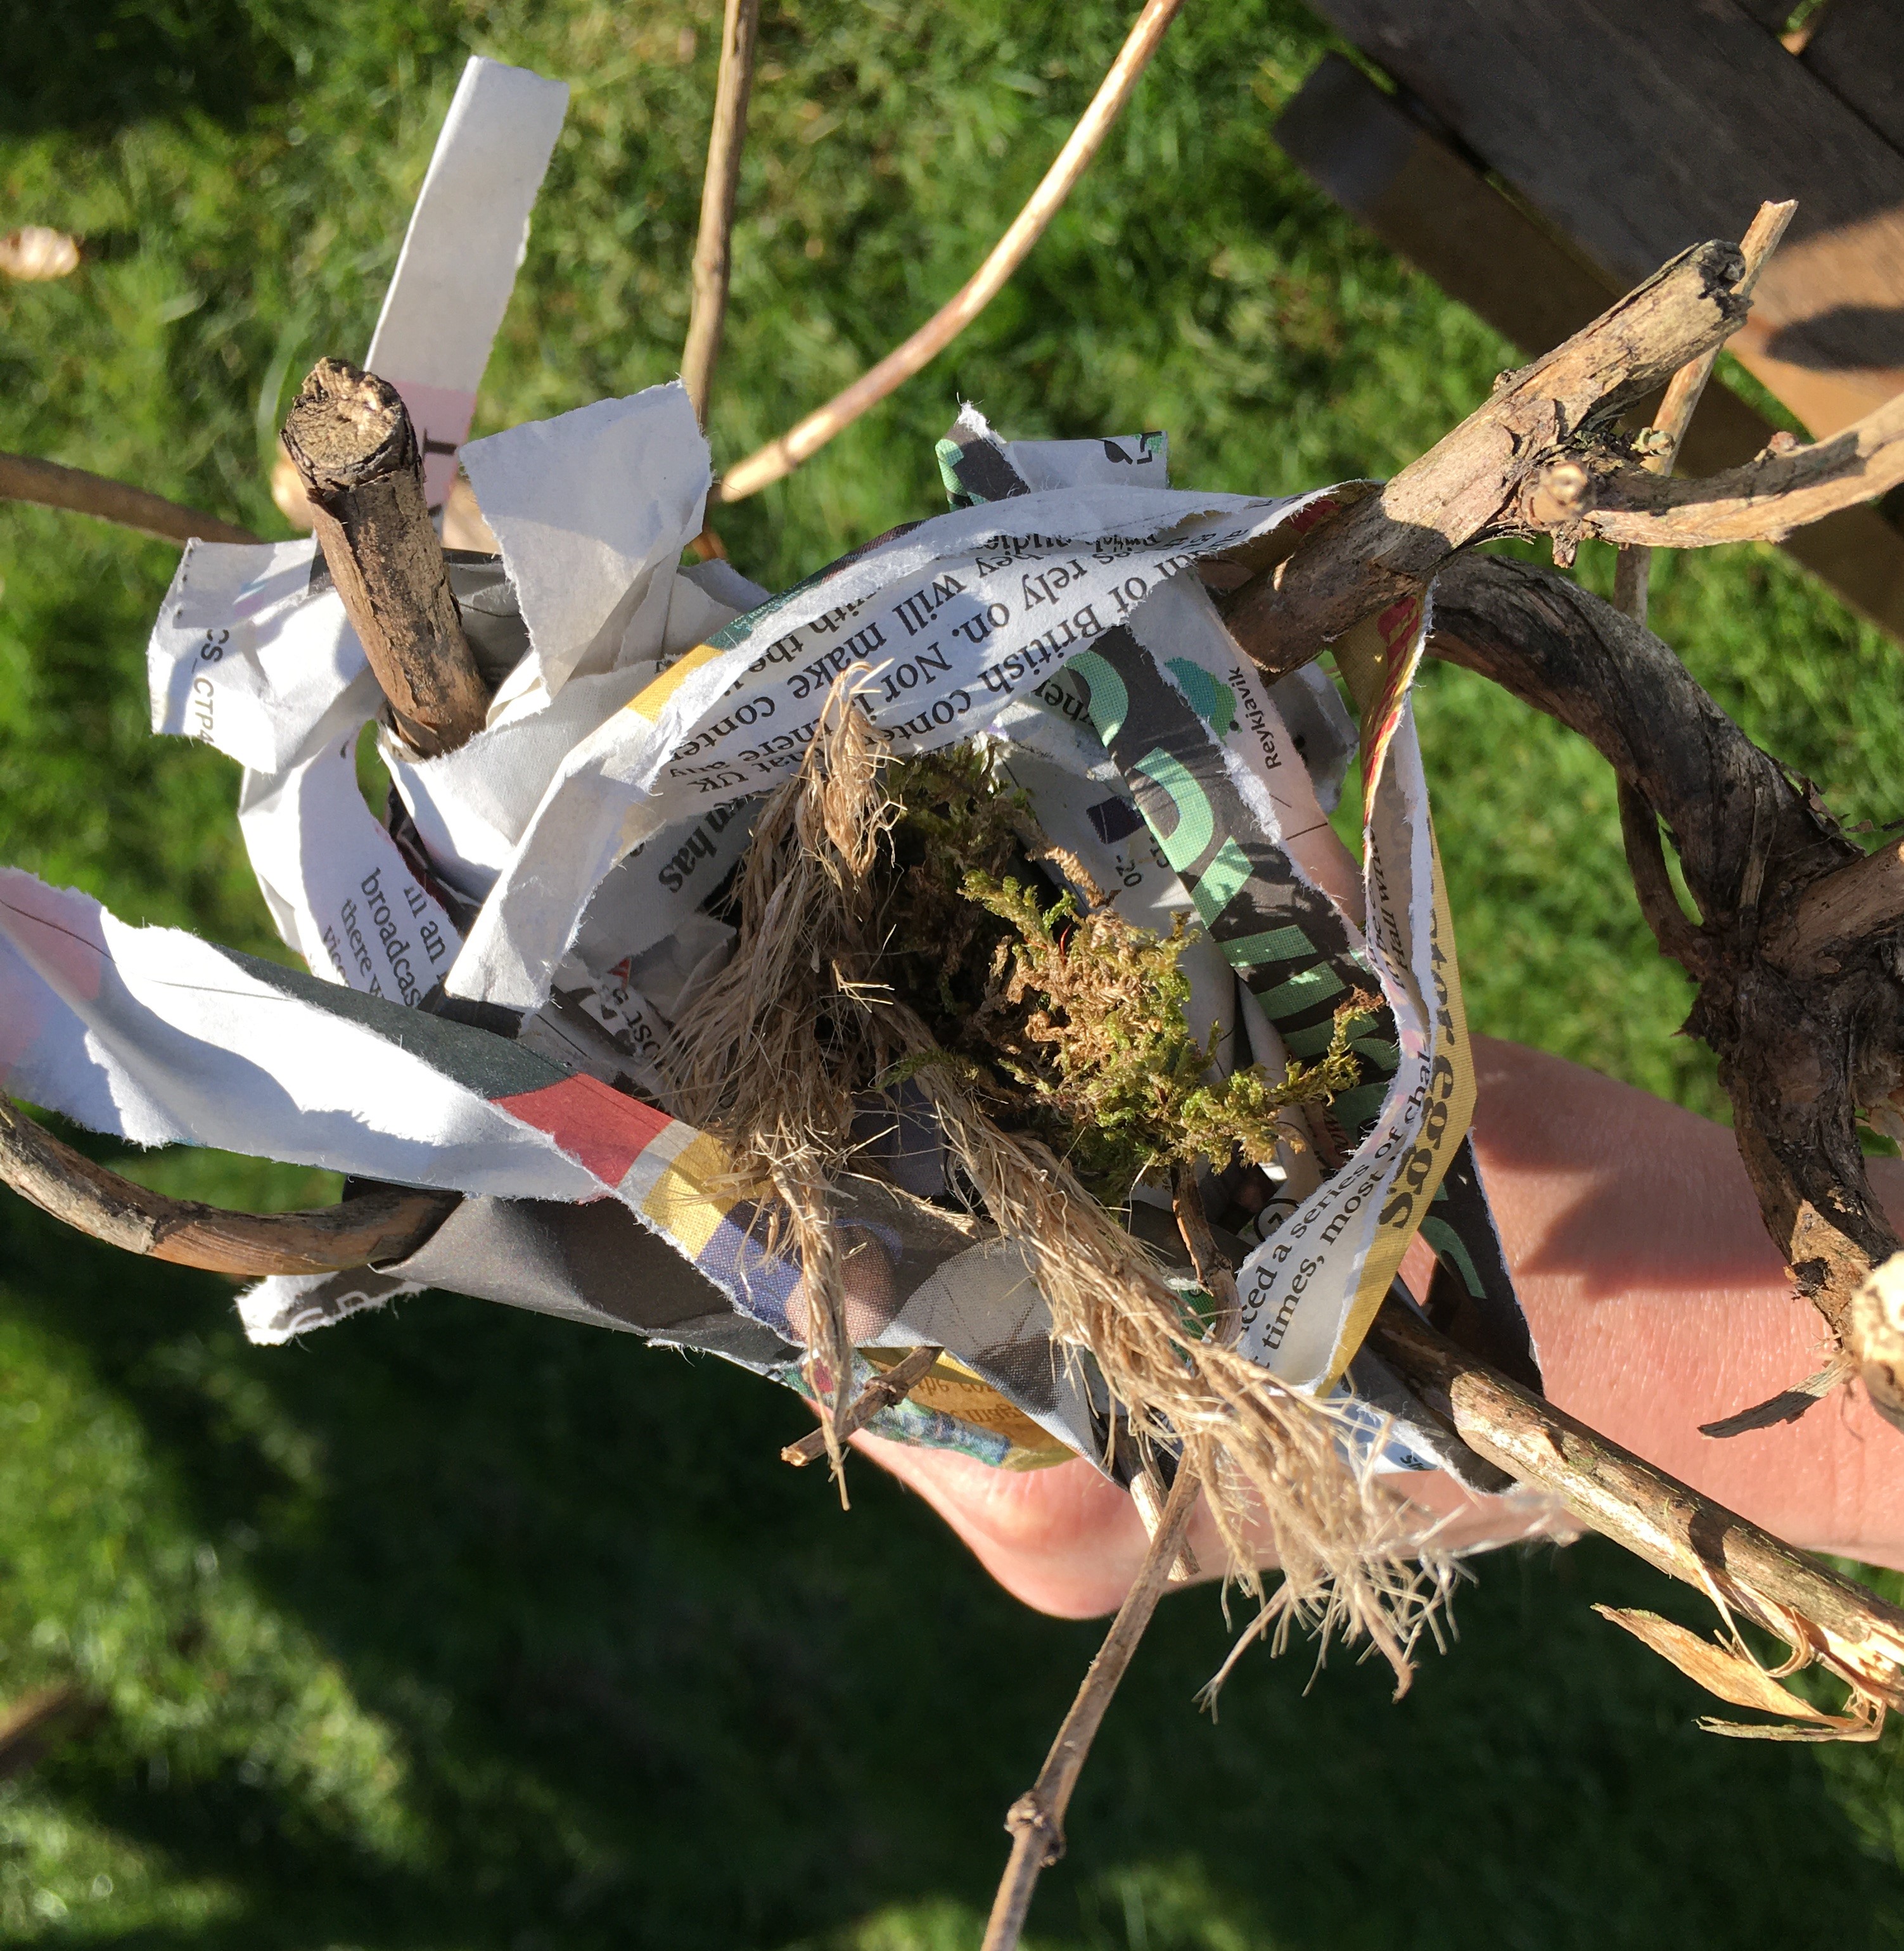
We’ve had a go using a stick found in the garden with a number of twigs coming off it, and strips of newspaper to weave a little cup-shaped nest. We’ve lined it with some soft moss and grass. (Ask an adult to help if you are looking in a garden or outside space to make sure what you choose is safe and isn’t going to sting or prickle you, and make sure you wash your hands afterwards).
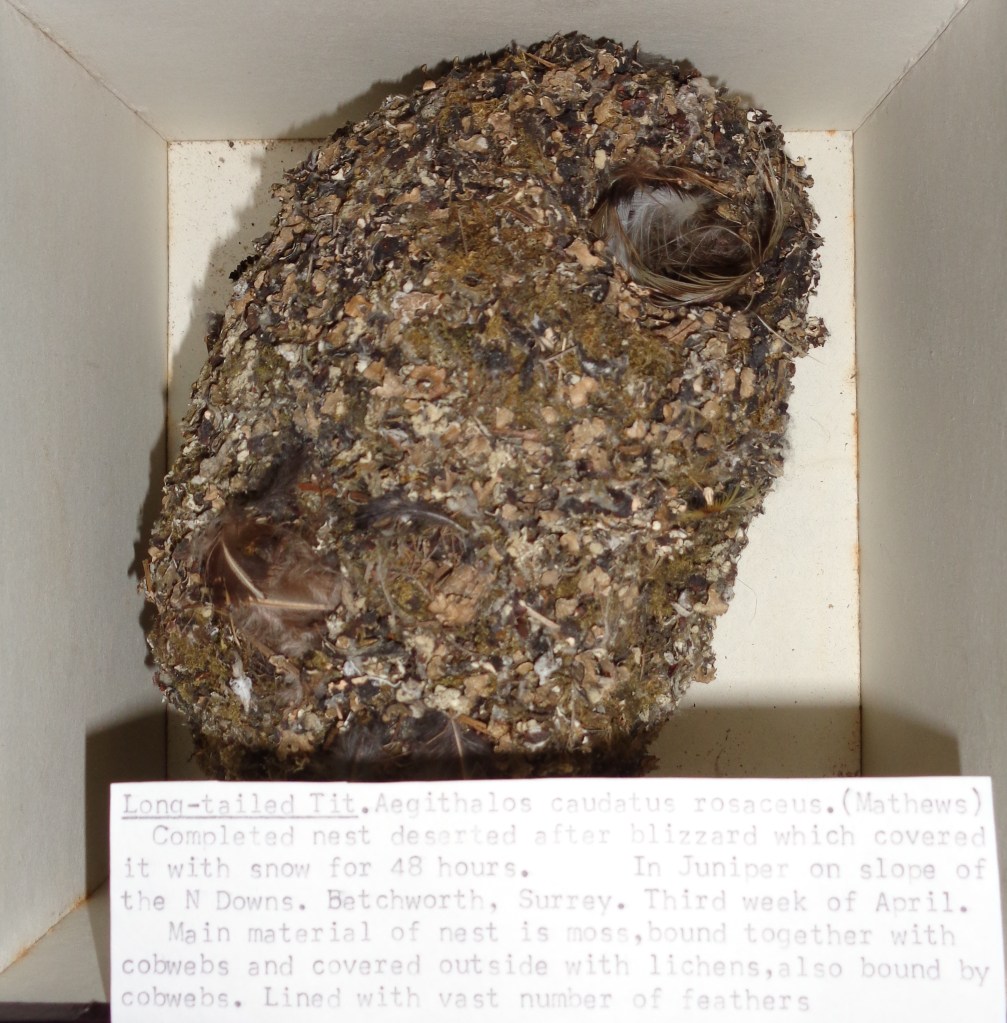
So you’ve had a go at weaving a nest. Did you find it easy, or was it a bit fiddly? Now can you imaging trying to do this not with hands, but with a beak? Birds are magnificent architects, able to produce complex and beautiful structures. Here are a few of the nests we have in the collections of the Museum. They show some of the different ways that birds build their nests and some of the different materials used:


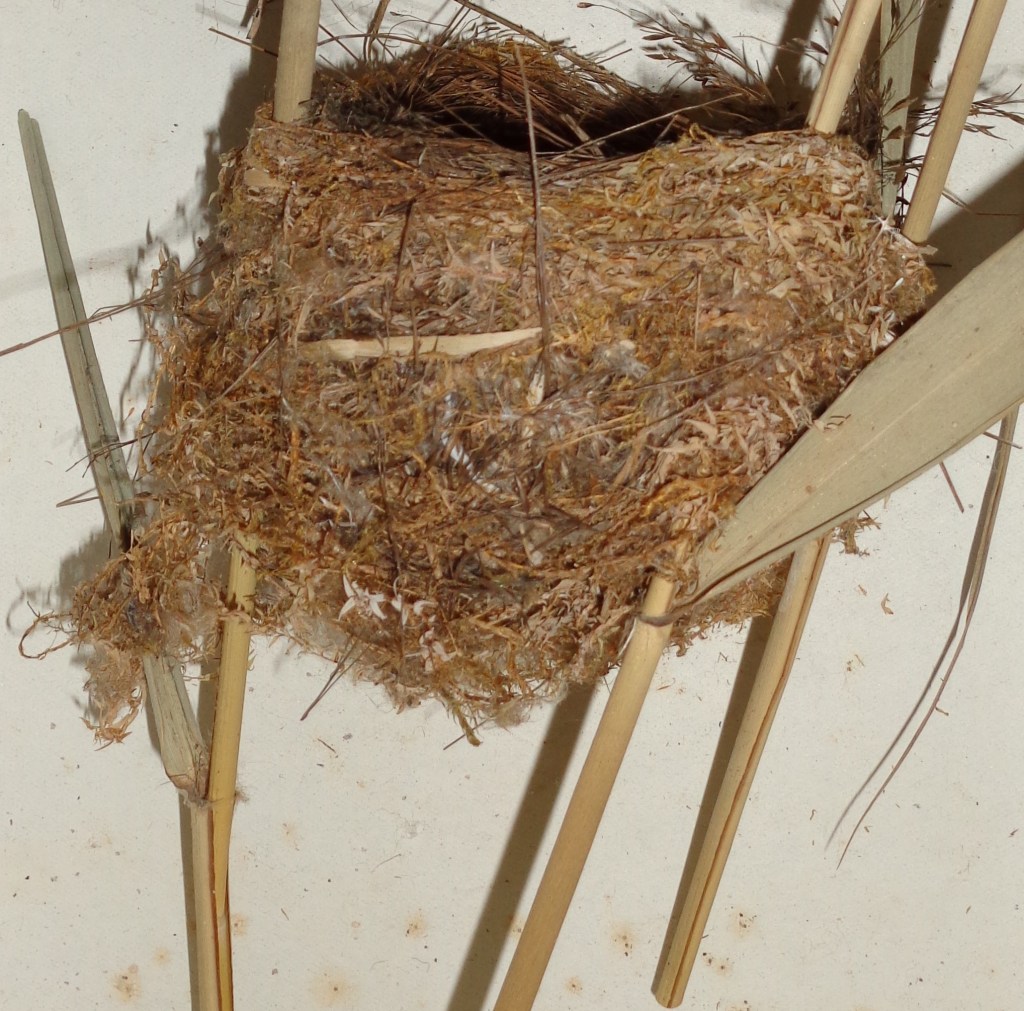
Remember: if you see a birds nest in your garden or on a walk, don’t disturb it. We want to give the birds the best chance possible of raising their chicks.
Hatchlings
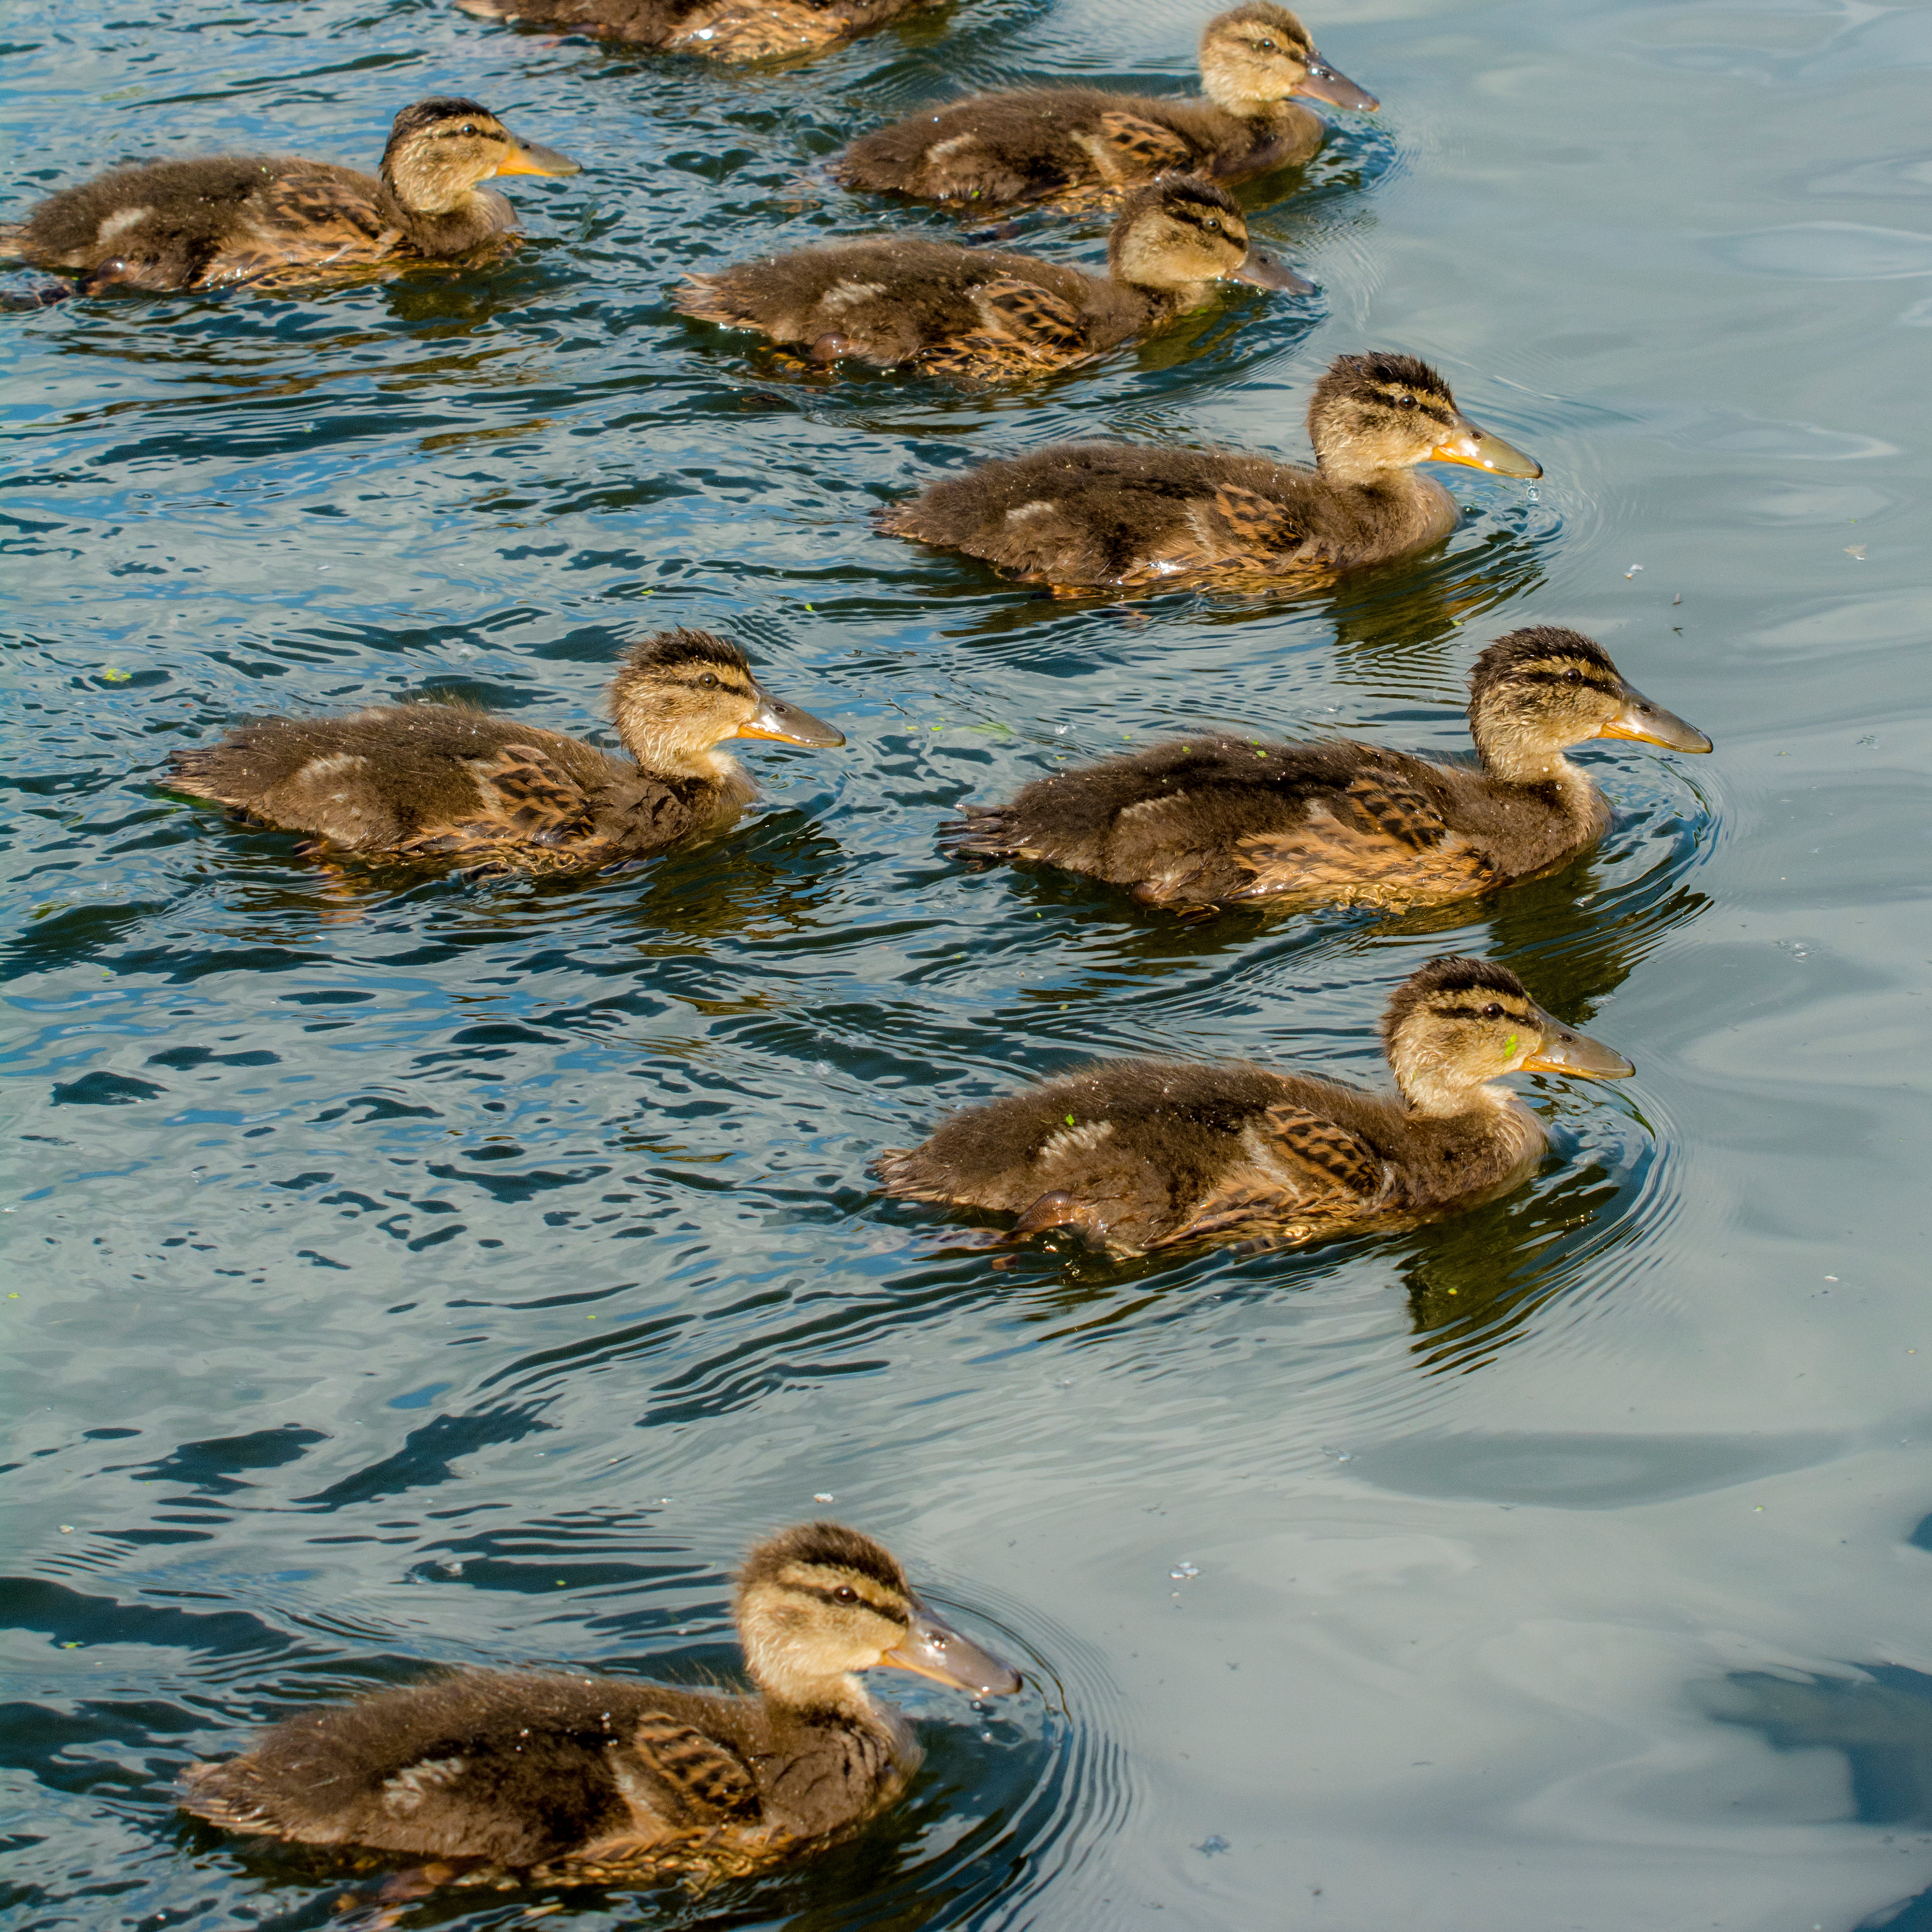
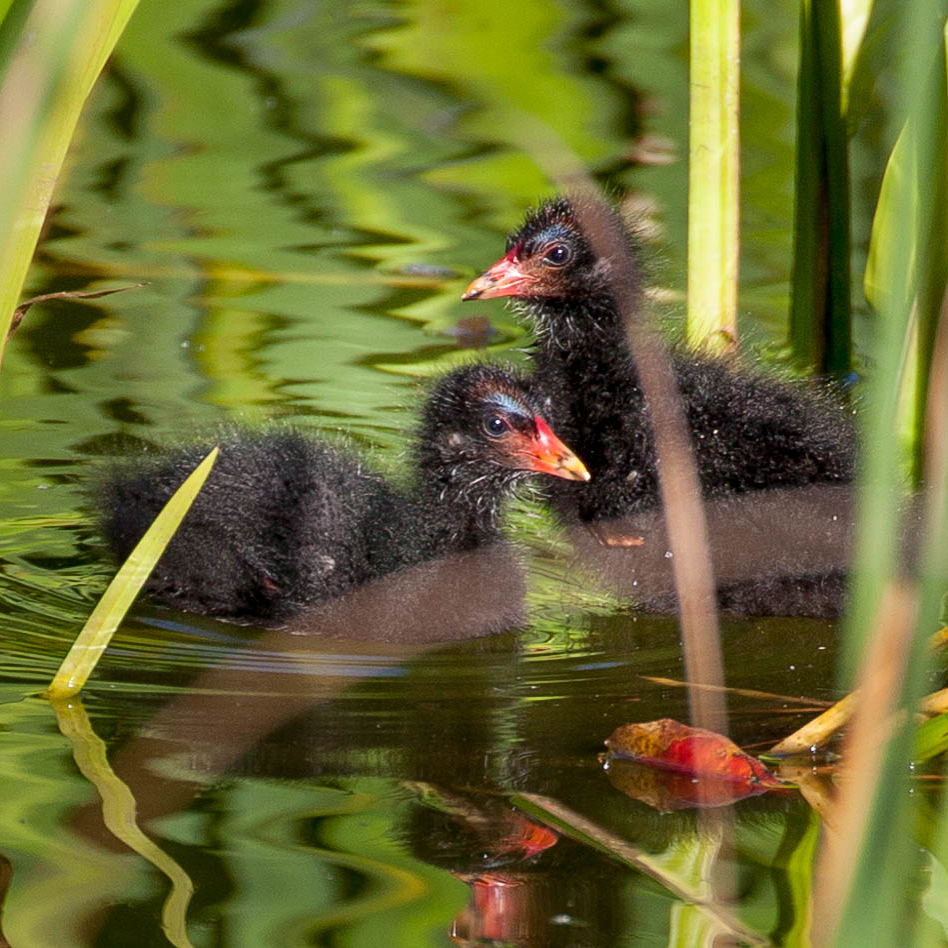
The baby birds that hatch out of the eggs can look very different for different species. Think of the ducklings you might be able to see on a river or lake at this time of year. They are able to walk and swim just hours after hatching. Their downy feathers are fluffy and able to keep them warm. However, there are many types of birds where the chicks have to stay in the nest for a long time, relying on their parents to bring them food to eat. They tend to have sparse feathers – you can usually see the skin underneath – and it can take a while before they open their eyes.
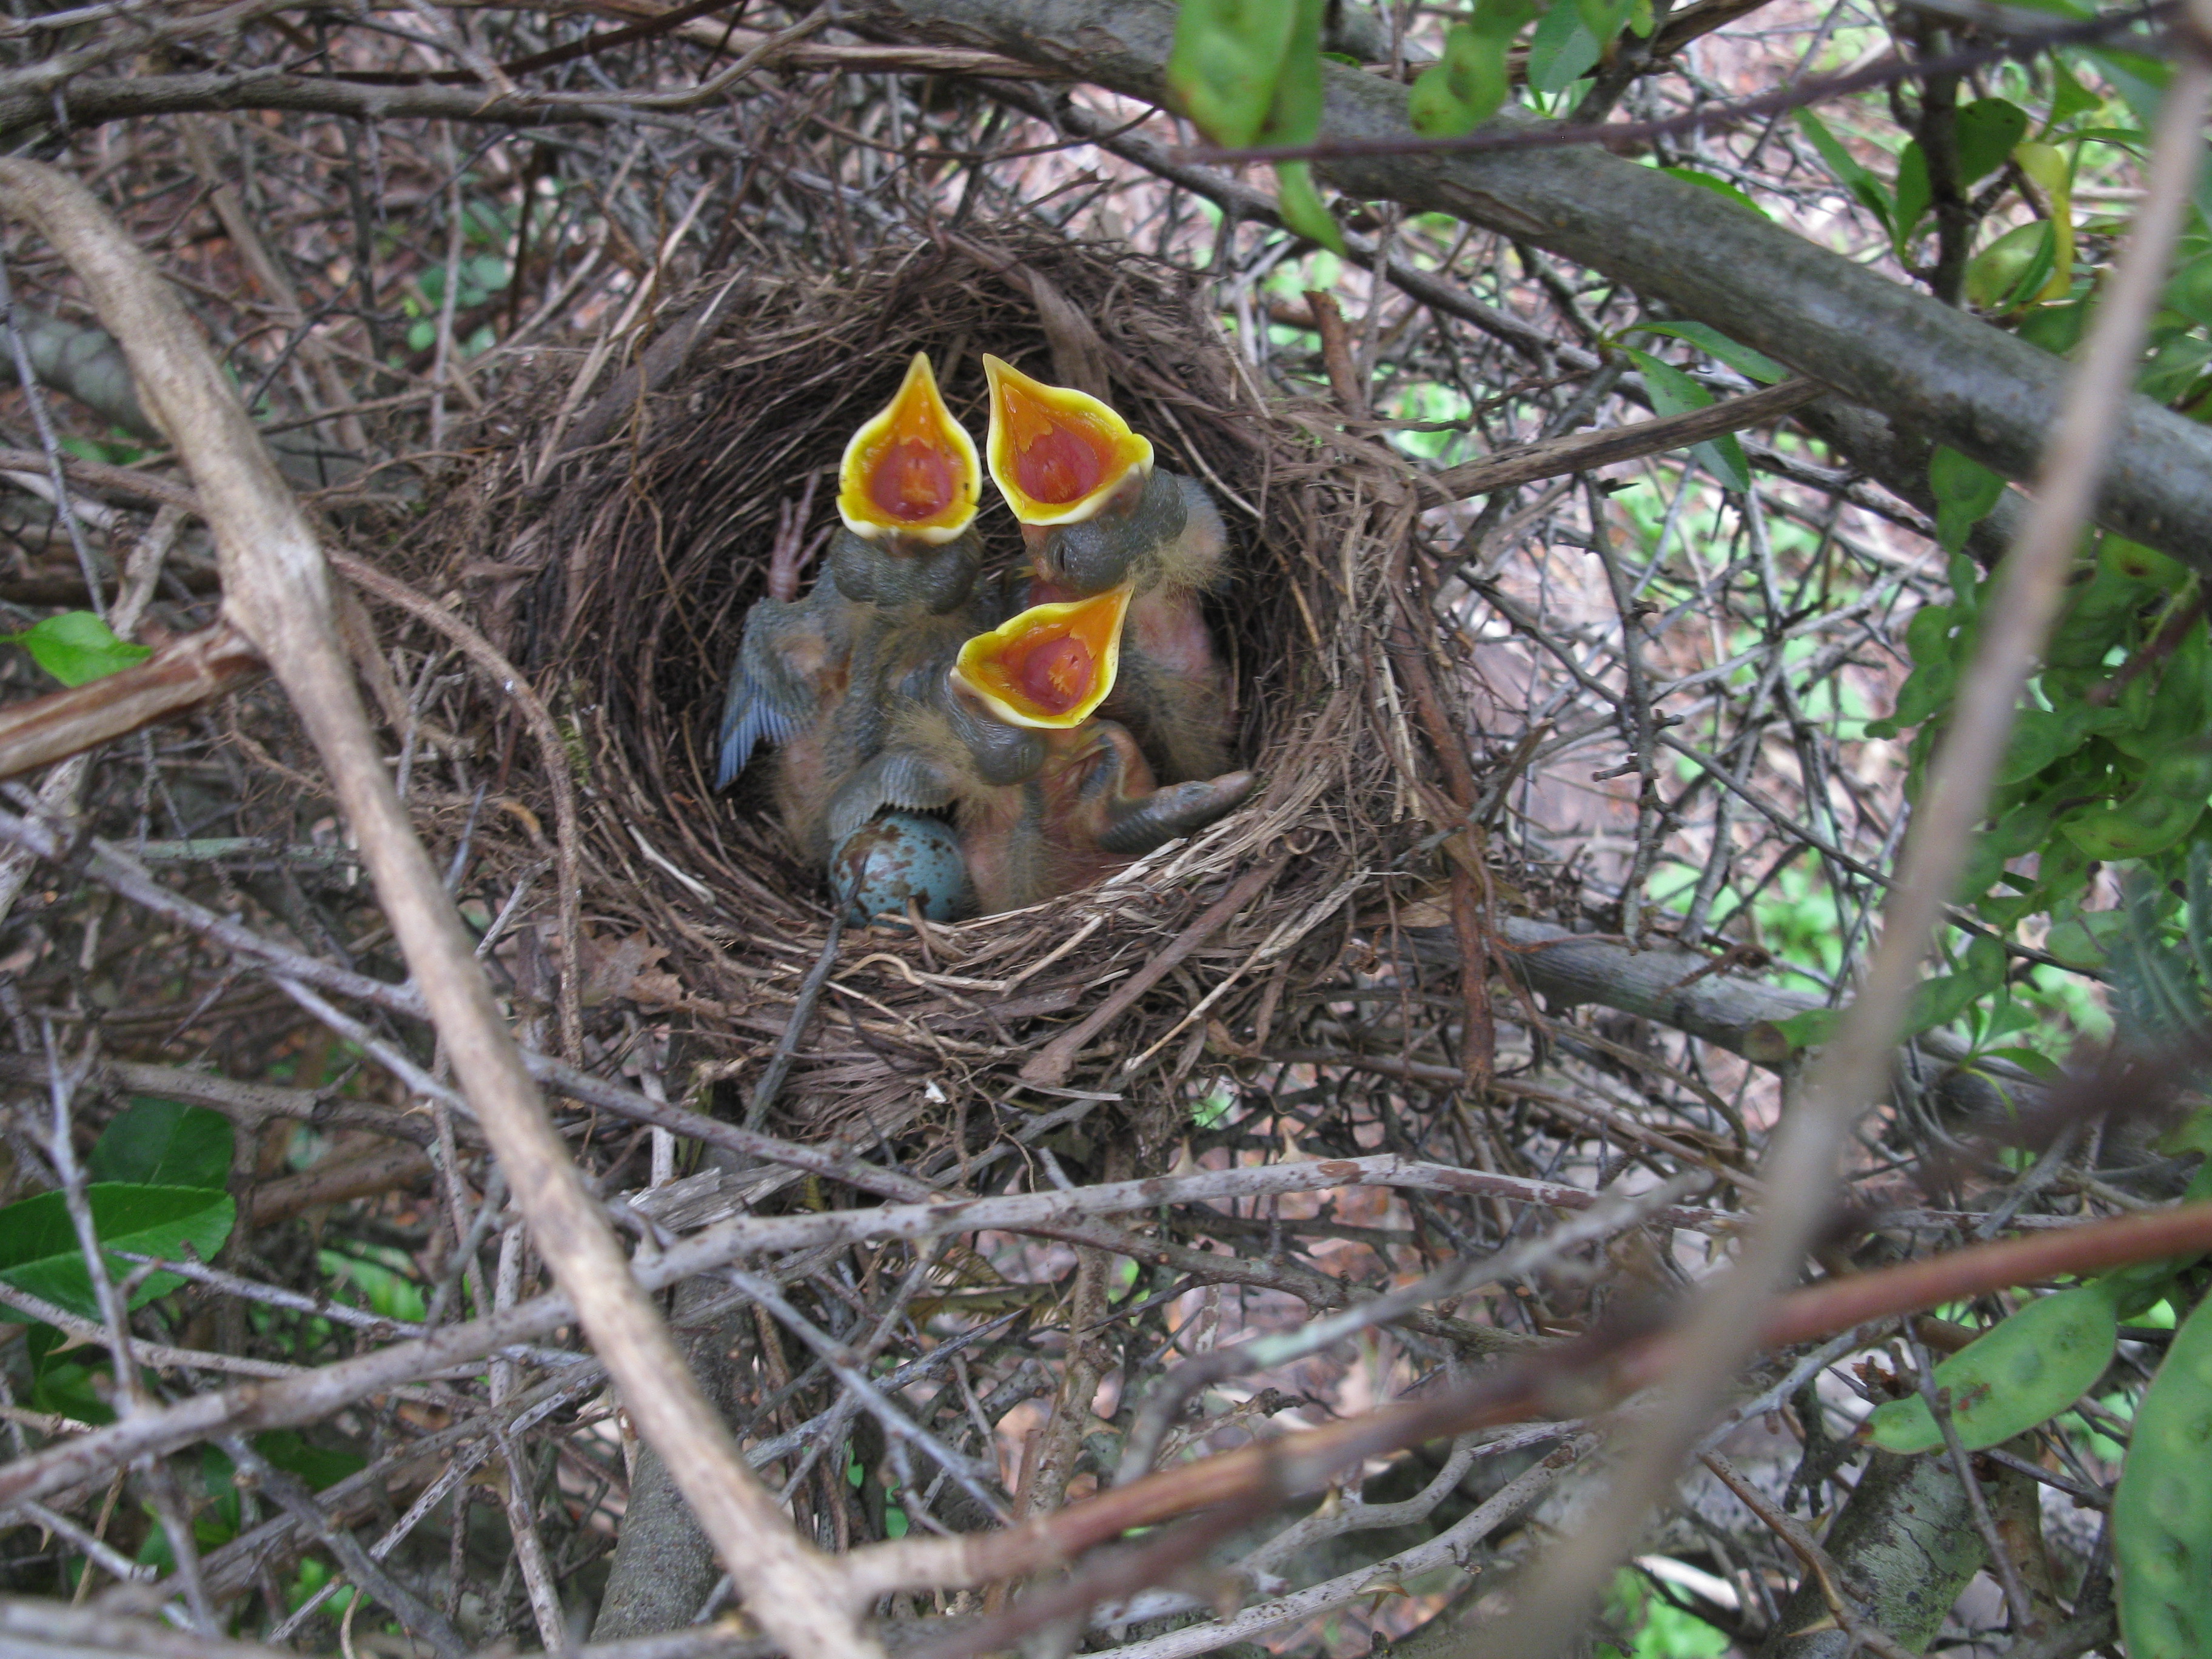
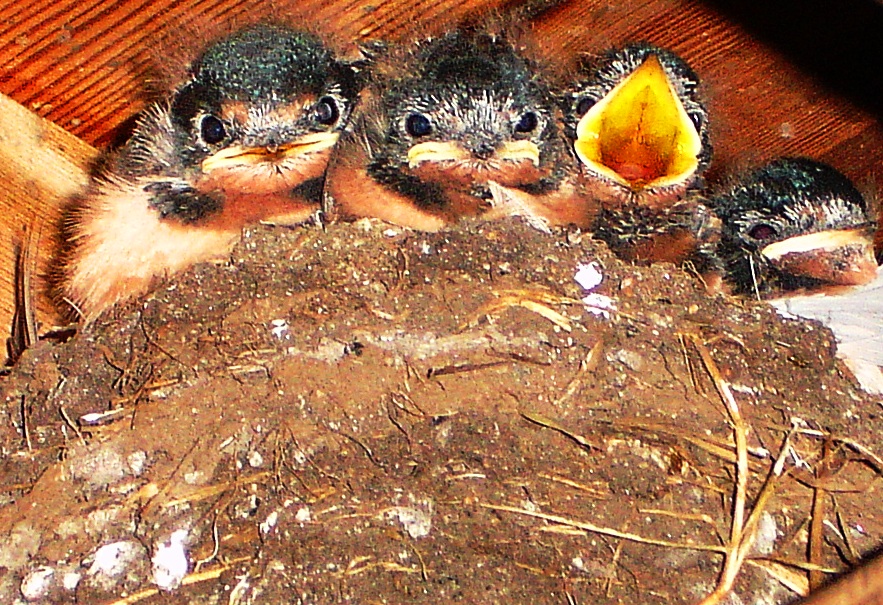
Take a look at these nestlings. Their beaks are wide open waiting for food from mum or dad. Can you see how the insides their mouths are bright yellow? This is an adaptation – a feature that makes the chicks more likely to survive.
Task: Explore the colours inside the mouths of chicks by making a sock-chick.
(image credit: Cyndy Sims Parr)
You can download the instruction sheet, which has a template for the gape.
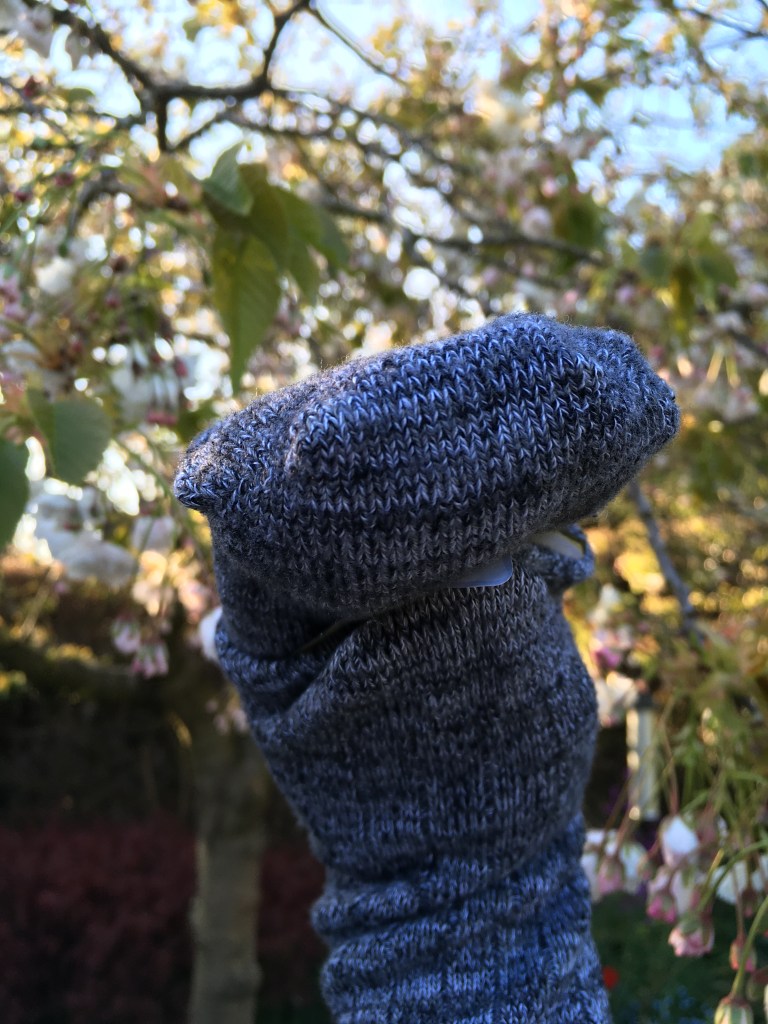

Try making the mouth in different colours. Which stands out the best for you? The bright mouths of chicks are important to trigger their parents to give them food – a bit like the cry of a baby with humans. A nice bright gape will be noticed more easily, so the chick is more likely to get some food.
Mammals
We are mammals. That means that we are warm-blooded, have hair rather than feathers or scales, and started out life being fed on milk. Most mammals give birth to live young rather than laying eggs. Let’s explore how mammals change as they grow using the Museum’s collections and some of the mammals you have at home.
We can learn a lot by looking at the baby mammals skeletons in the the Museum. Let’s start with this tiger cub skull and compare it with an adult tiger skull.
Task: What differences can you see between these skulls?

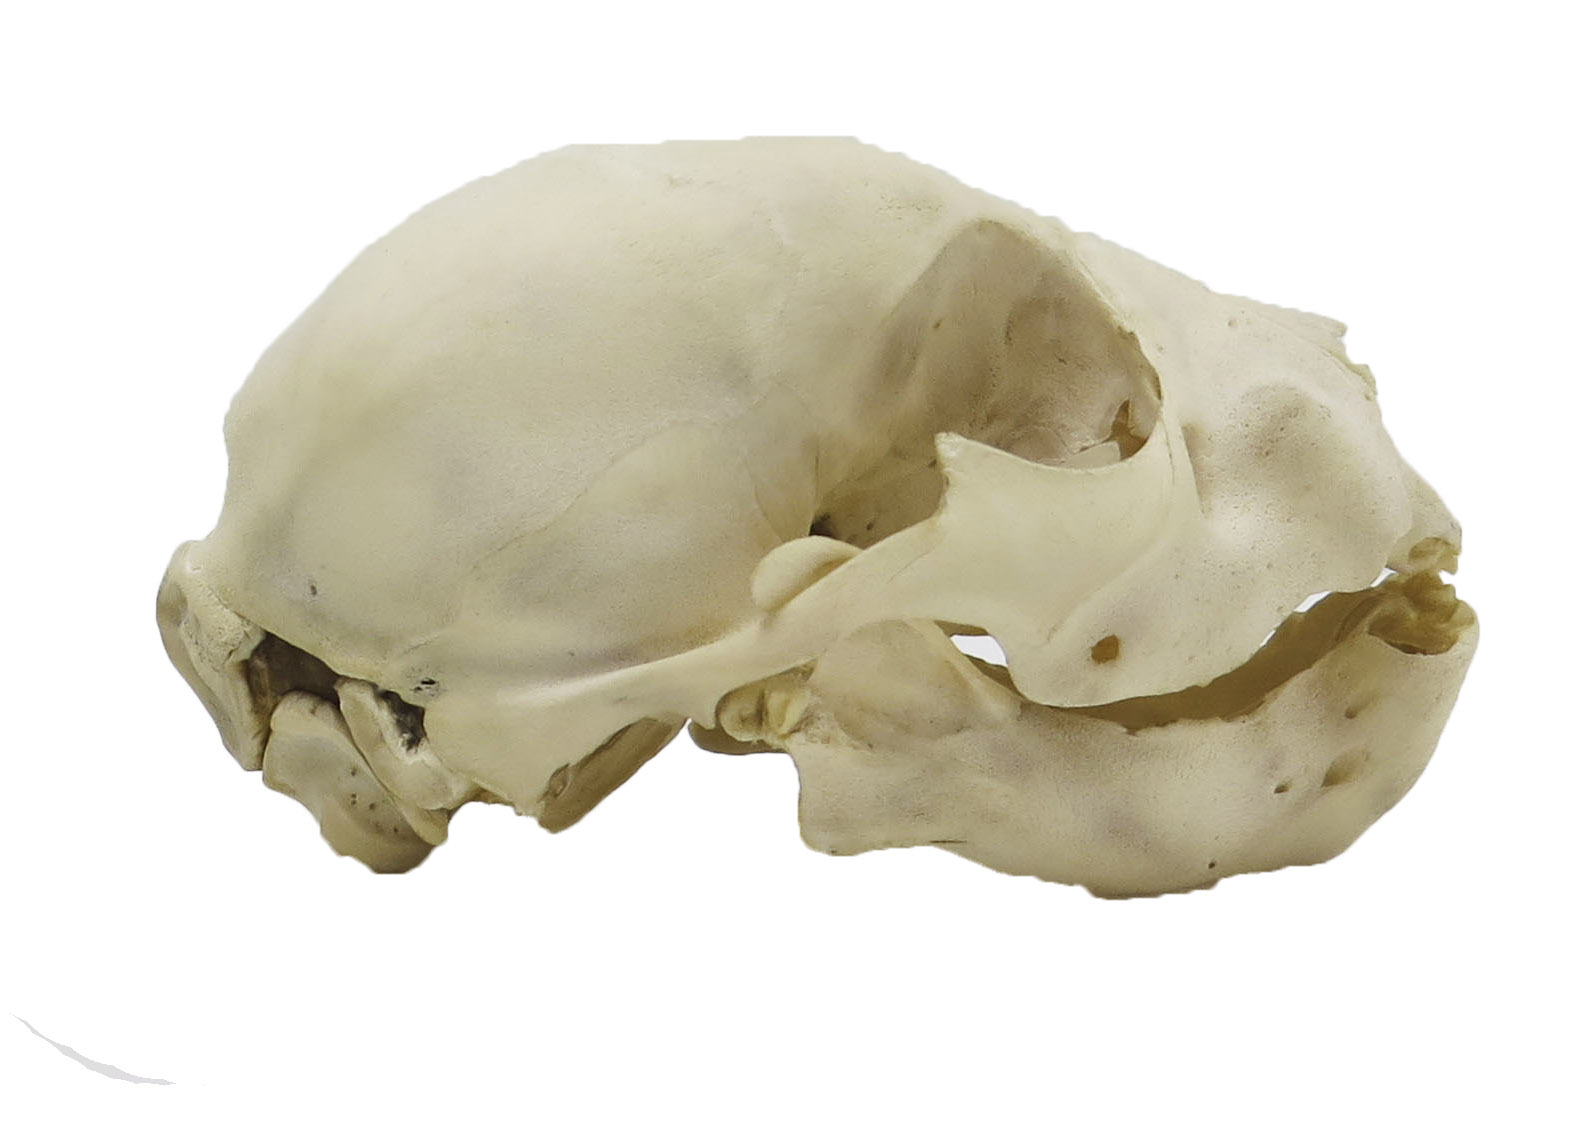

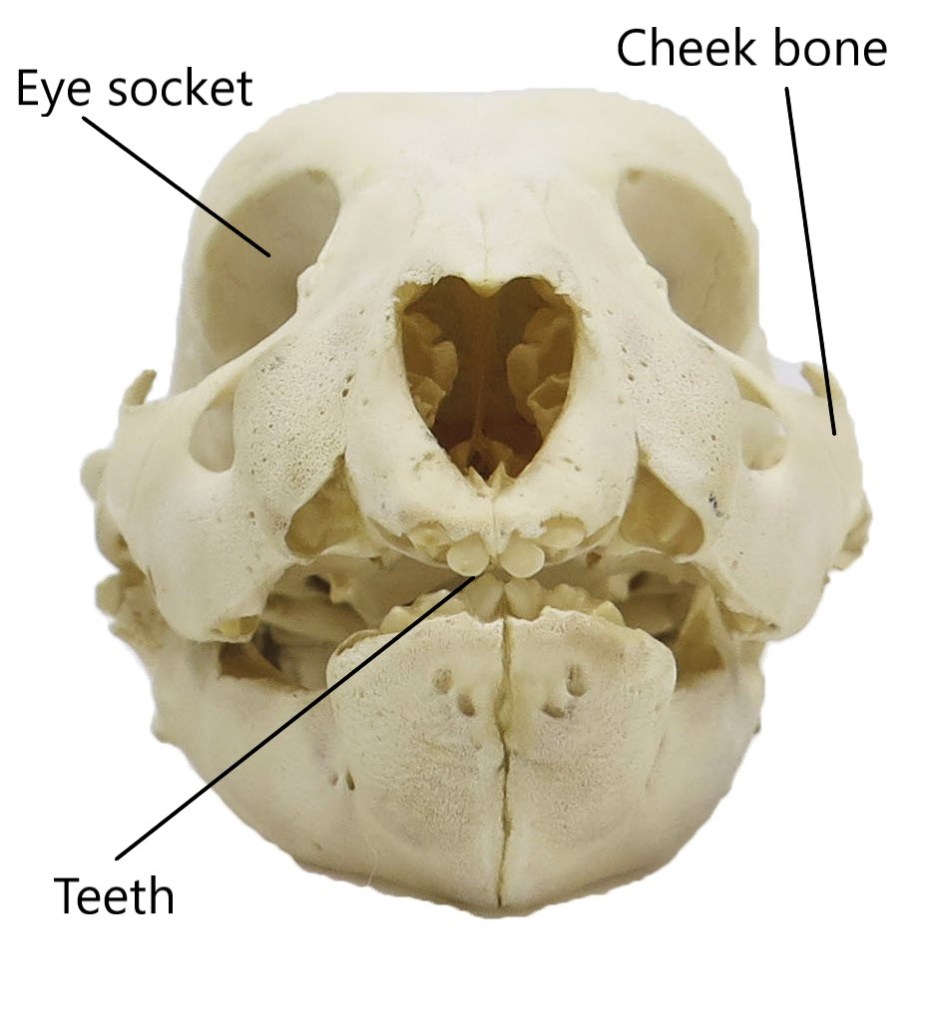
Here are a few differences to get us started. On the left is the skull of an adult tiger. Can you see it’s teeth are really long and it has huge cheekbones sticking out to the sides. On the right is the skull of a tiger cub only a few days old. Its cheekbones are much smaller, but the eye sockets are much bigger in relation to the size of the skull. Why is it that baby mammals aren’t just miniature versions of adults?

Life as a baby is very different to life as an adult. The tiger cub will be feeding on milk from its mother. It needs to be able to suckle – to suck to get the milk from the teet. We all know that this is not how adult tigers feed! Tigers are powerful predators. They have huge teeth and massive muscles that close the jaws so they can catch and kill their prey. The big cheekbones are where a lot of those muscles attatch, so stick out a long way to give the tiger a strong bite.
The difference in the eyes is because different parts of the body develop at different rates. When we are born, we are much smaller than our parents, but our eyes are already around around 75% (3/4) of their full size. This means that our eyes look a lot bigger in relation to the rest of the face. The same is true of tigers.
Task: find some pictures of baby mammals and their adults. Take a look at the eyes – do they look bigger in the babies?
This difference in the size of the eyes is called a difference in proportion. And it’s not the only difference we see when we compare young and adult mammals. We are going to explore this a bit further by looking at a mammal that you all have at home: you!
Get your tape measures out – its time to explore proportions!
Everybody is unique. We are going to be taking measurements of your proportions. If your measurements are not the same as someone elses, that shows us more of the wonderful diversity of life.
Equipment: you are going to need a tape measure and a calculator for this, and paper and a pencil to write down your results. If you want to draw a graph of your results, a piece of graph paper and a ruler are both really helpful.
Question: How do our proportions change as we grow? This is a BIG topic, so we are going to narrow it down a bit: how do our head to body proportions change as we grow?
Now let’s think of the type of information, the data, we want to collect to answer this question. We are going to want measurements of the size of the head and of the body for people of different ages.
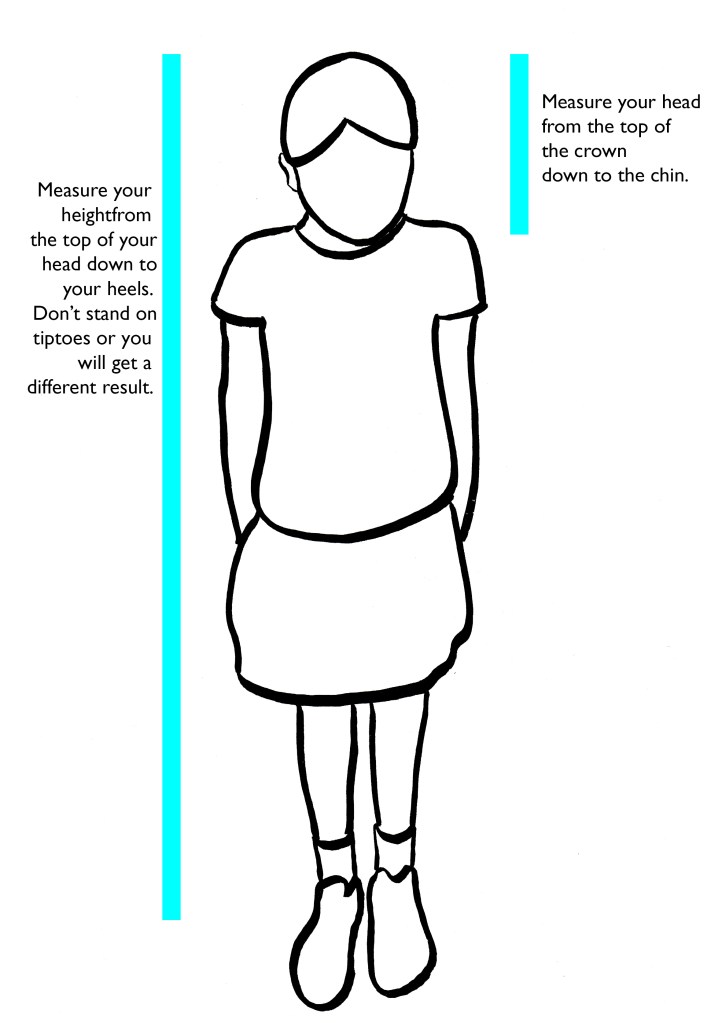
We want to make sure we measure everyone in the same way. We recommend using height as an easy thing to measure. How tall is the person, and how tall is their head (from the top of the head to the chin).
We measured a three-year old and an adult as an example. The three-year old was 99cm tall with a head height of 19cm, and the adult 175cm tall with a head height of 23.5cm. So the adult head is bigger than the toddler’s. To look at these measurements as proportions, we’re going to work out what percentage of our height is made up by our heads. (A percentage is a fraction out of 100 – so 20% is 20/100.) You’ll need a calculator for this one: divide your head height by your overall height. Then multiply by 100. In our example, the three-year old’s head makes up 19% of their overall height, but the adult’s head is only 13%.

Try plotting this data on a graph, with the percentages on the y axis (the vertical axis) and the age on the x axis (the horizontal axis). Here’s a graph we’ve put together with measurements from adults and children of different ages. If you can ask other people to send you their measurements, you may see a pattern emerging. Is there an age where we reach adult proportions (when the head is the same percentage of the height as seen in adults)?
Other Mammals
Marsupials: this group includes kangaroos, koalas, possums, wombats, and Tasmanian devils amongst other mammals. They are found in Australia and South America, with one species, the Virginia Opossum, found in North America as well. They have a pouch where they look after their young.
Marsupials give birth to live young, but their babies are born very early, when they are very small. A kangaroo will give birth to a baby about the size of a jelly bean, or even smaller. This baby, called a joey, then has to climb through its mother’s fur up to her pouch. Once inside it will find a teet and spend its time feeding on milk.
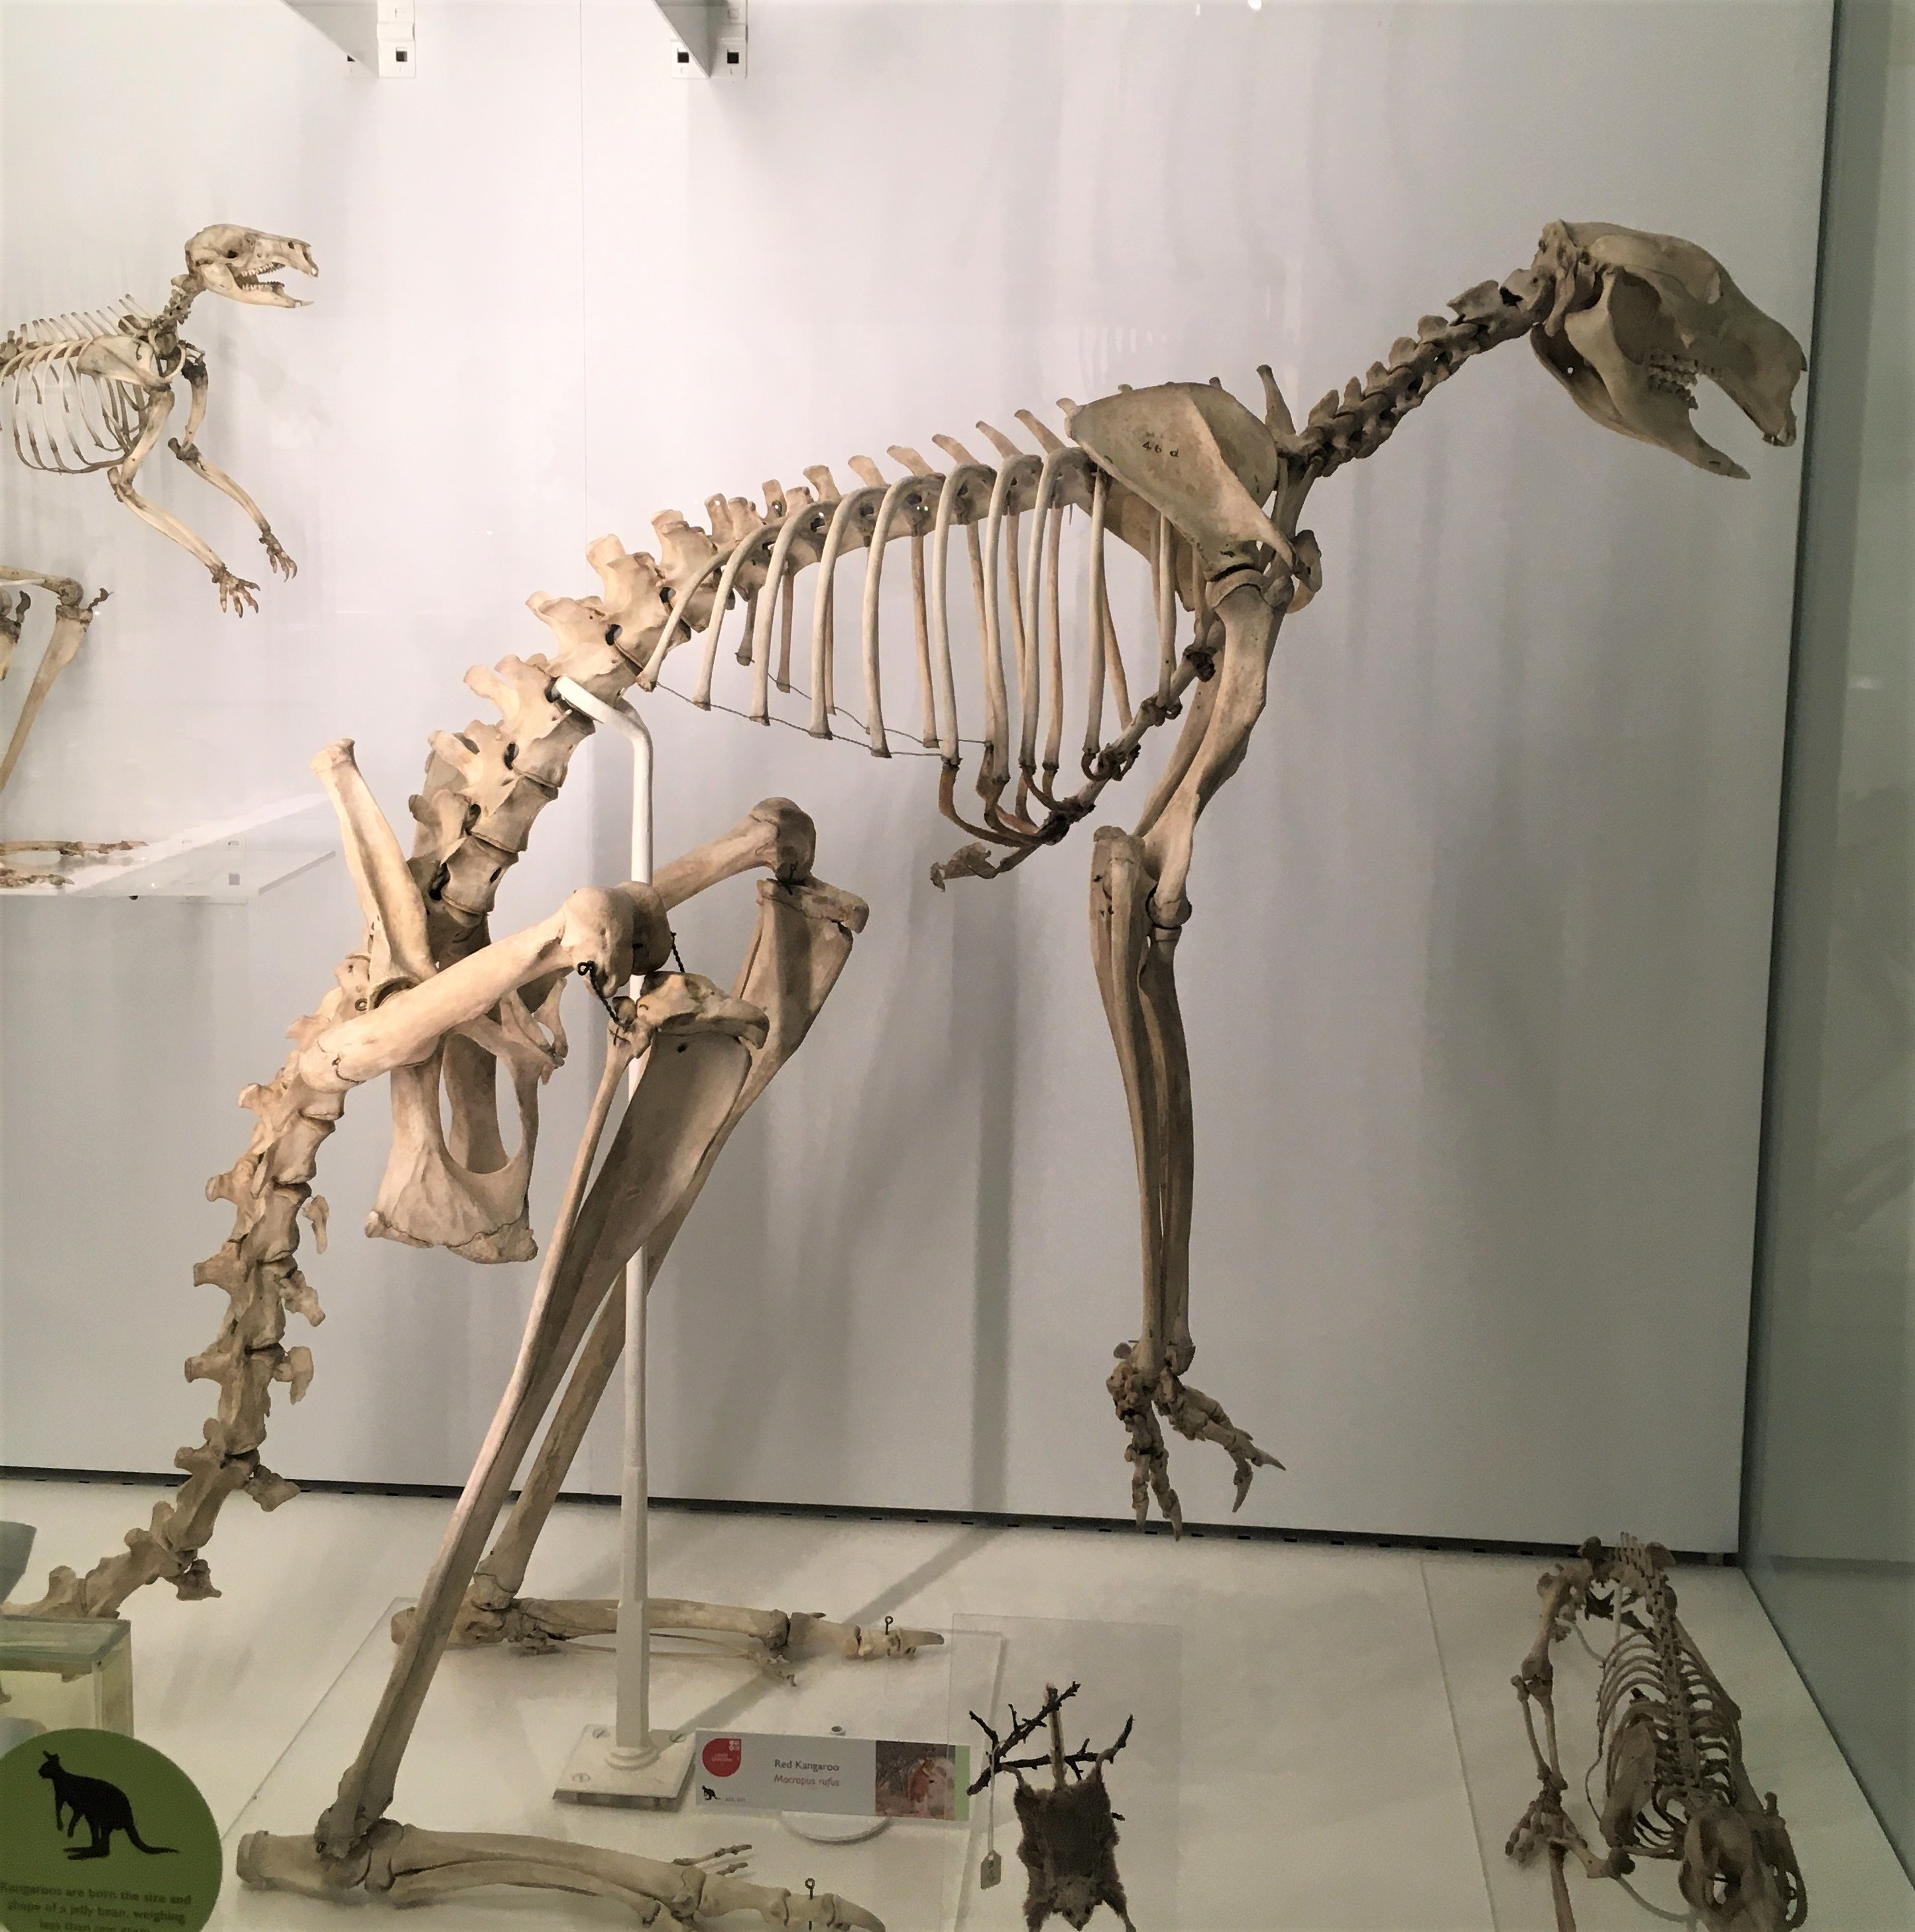
Take a look at this picture of a kangaroo skeleton. How long are its legs? If you measure around all of the joints, you’ll find that the back legs (the ones that do all the jumping) are much longer than the front legs. If you were to look at a newborn kangaroo, it would be a very different story. The front legs are much bigger then, as they help to pull the animal through mum’s fur to get to the pouch.

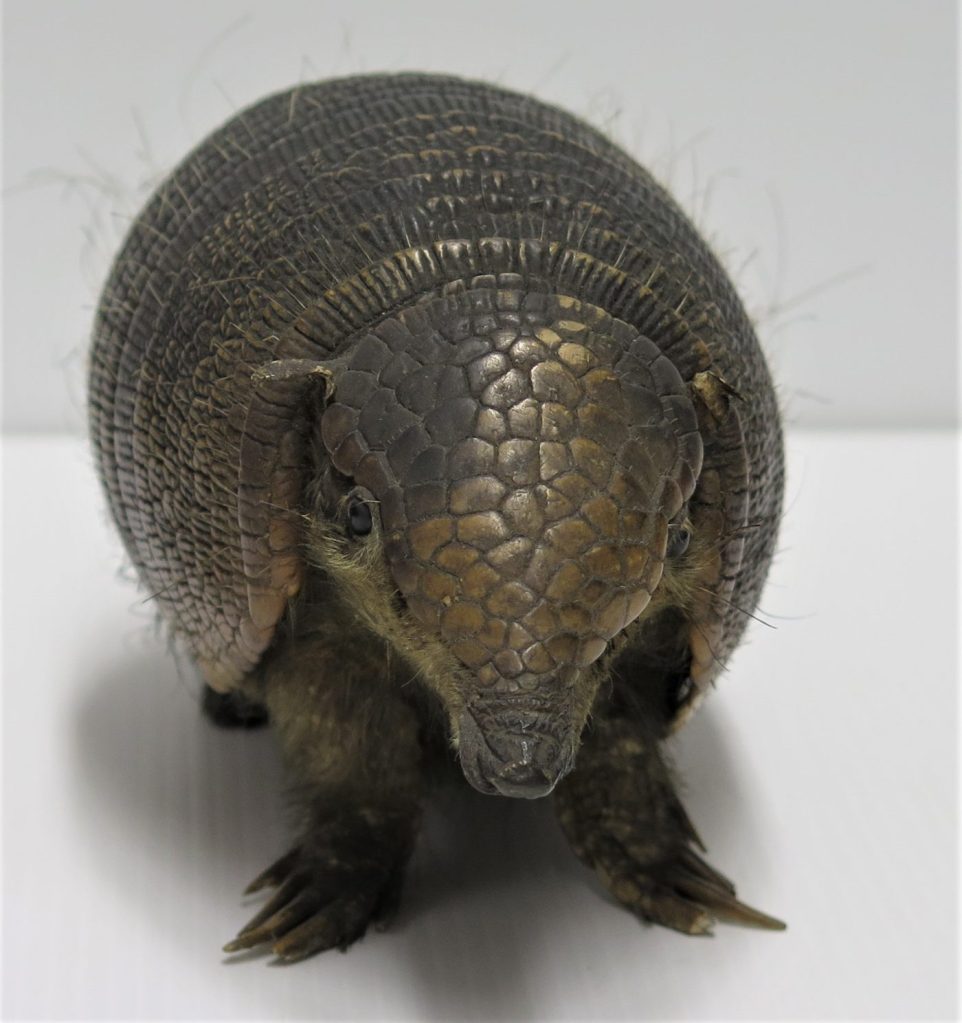
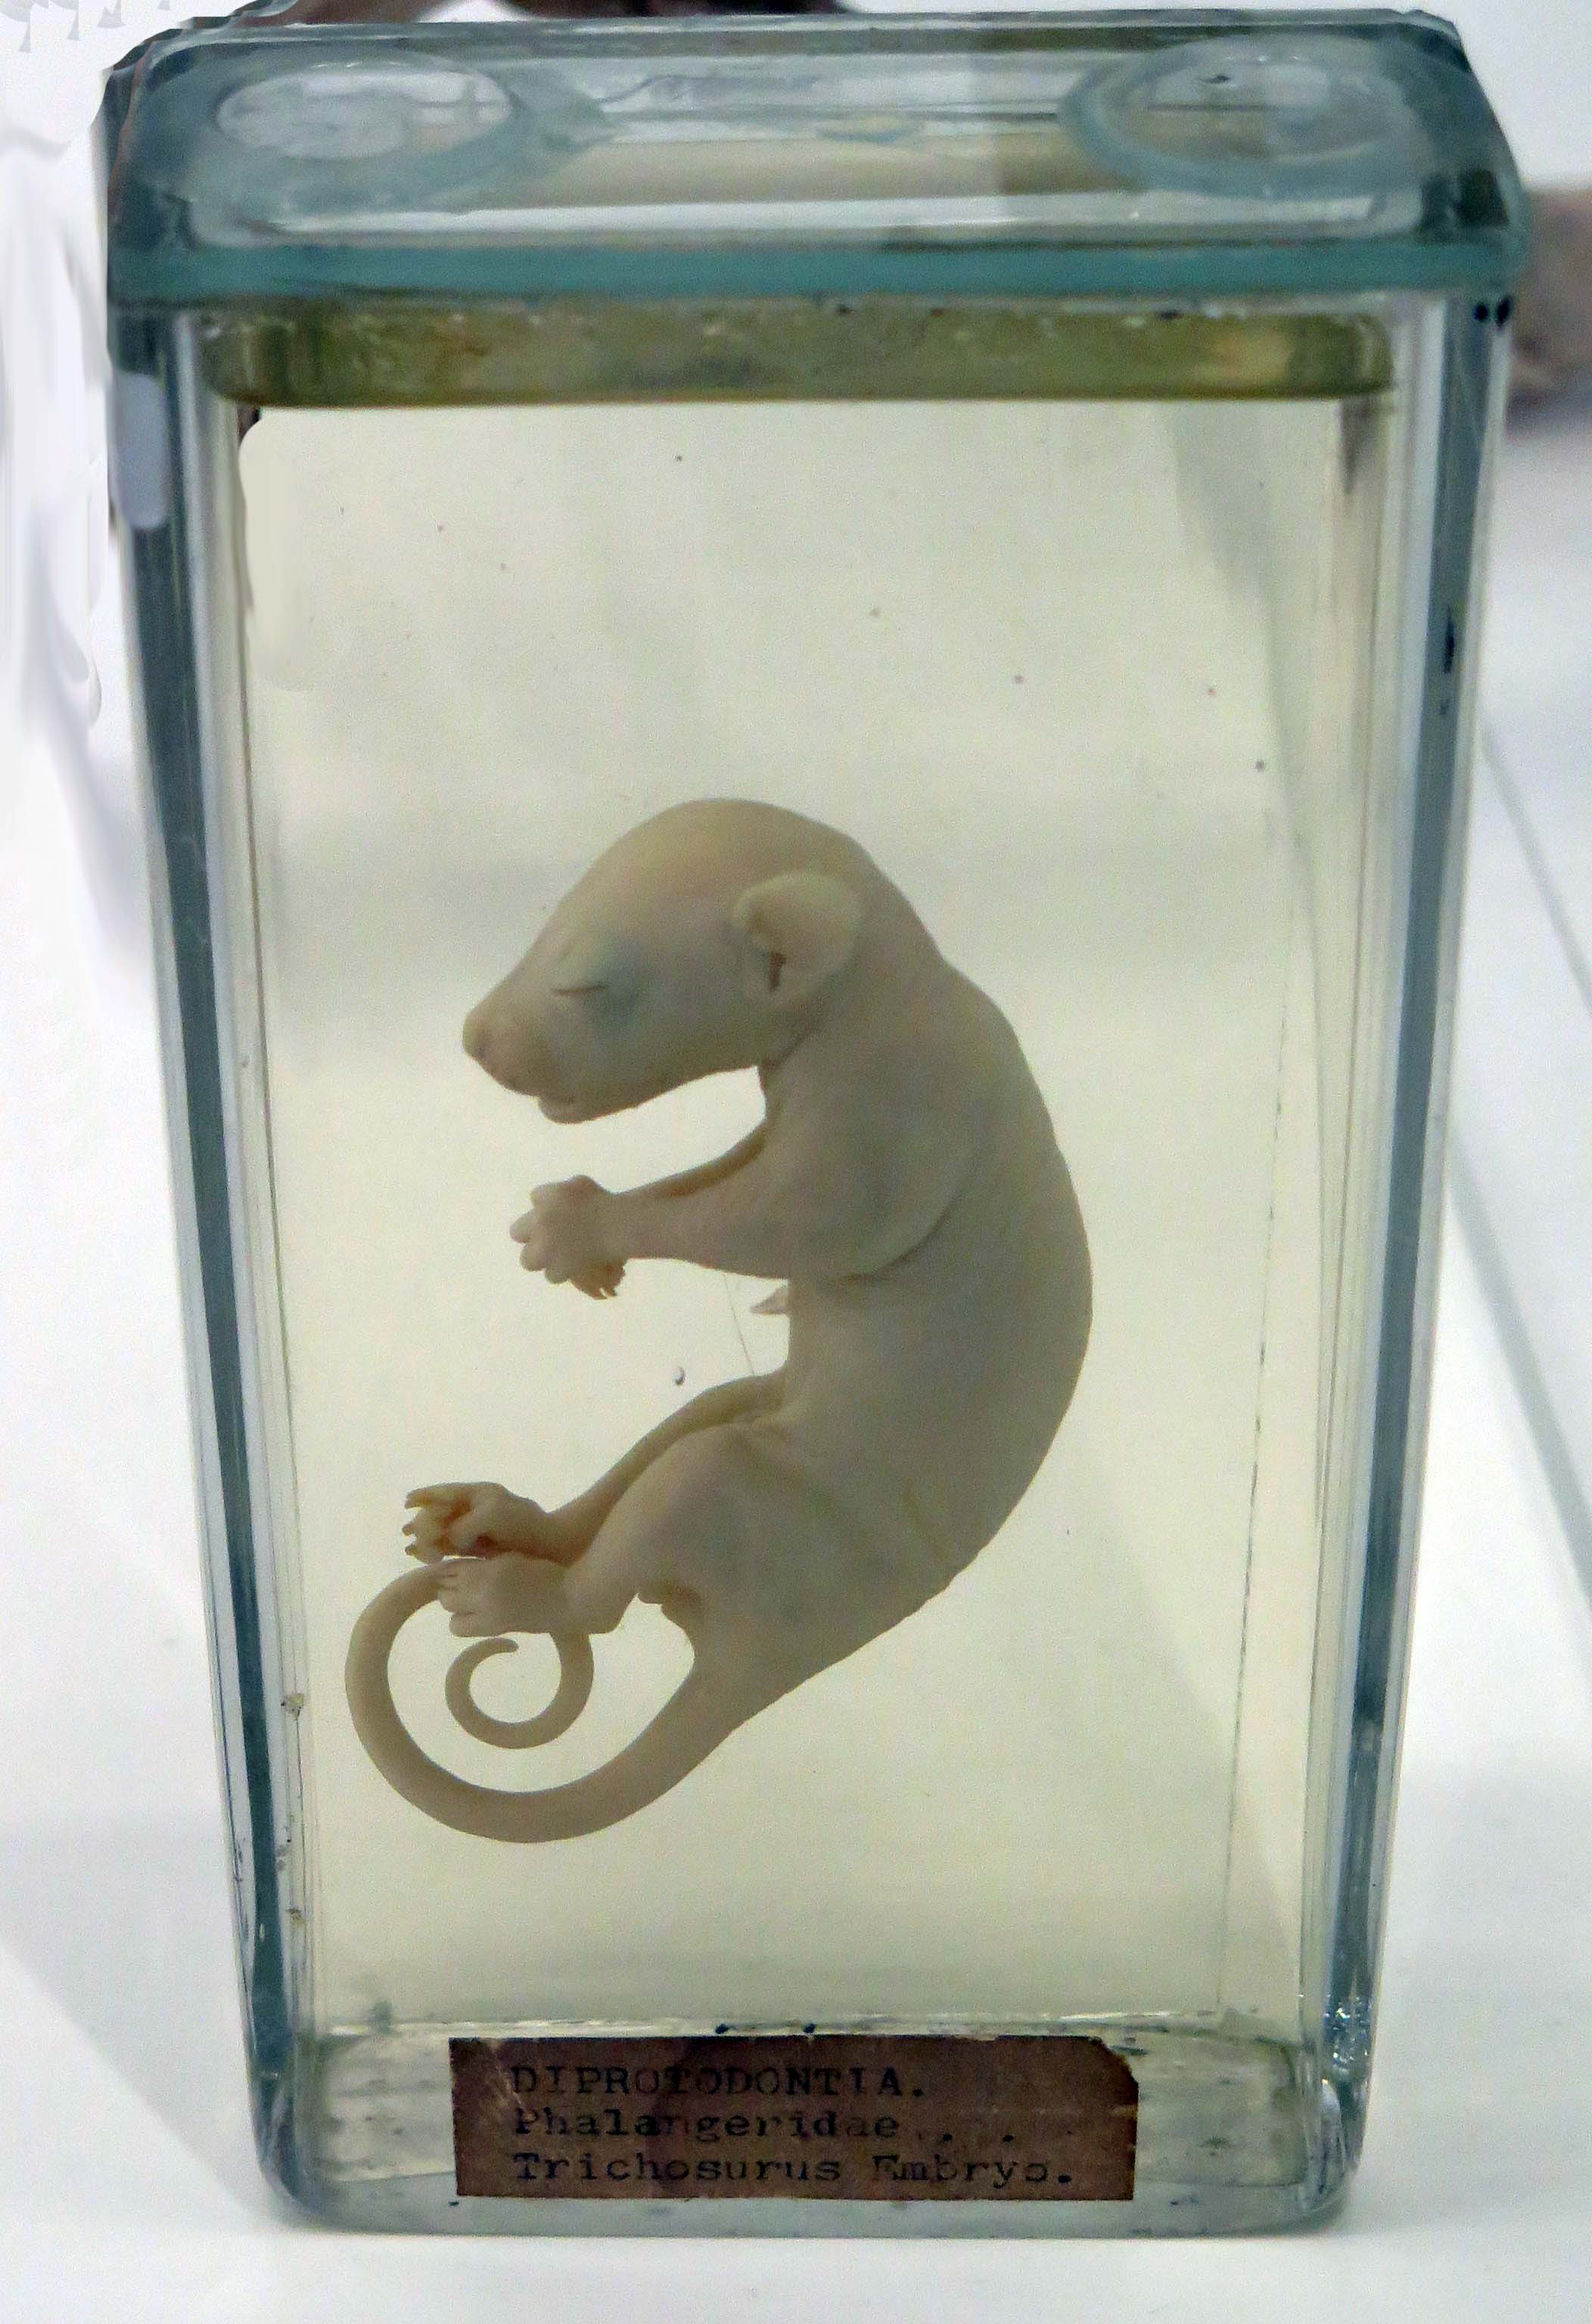
Monotremes: echidnas and platypuses are unusual for mammals in that the do lay eggs. Once the eggs have hatched, echidna and platypus mums make milk to feed their tiny young. You can see an echidna in the Puggle Club story above.
Did you know: baby echidnas and platypuses are called puggles.
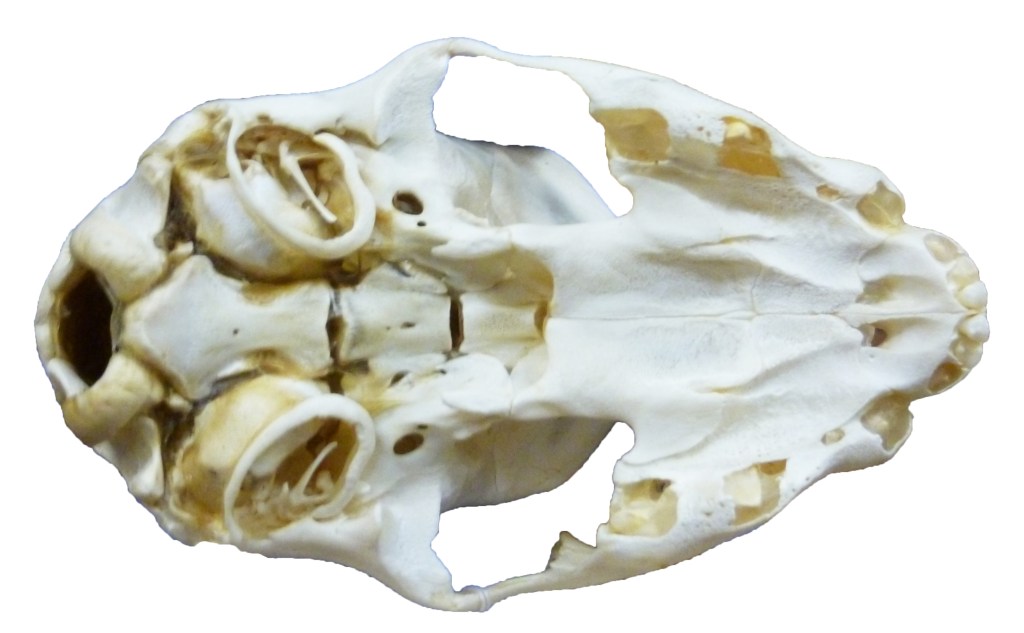
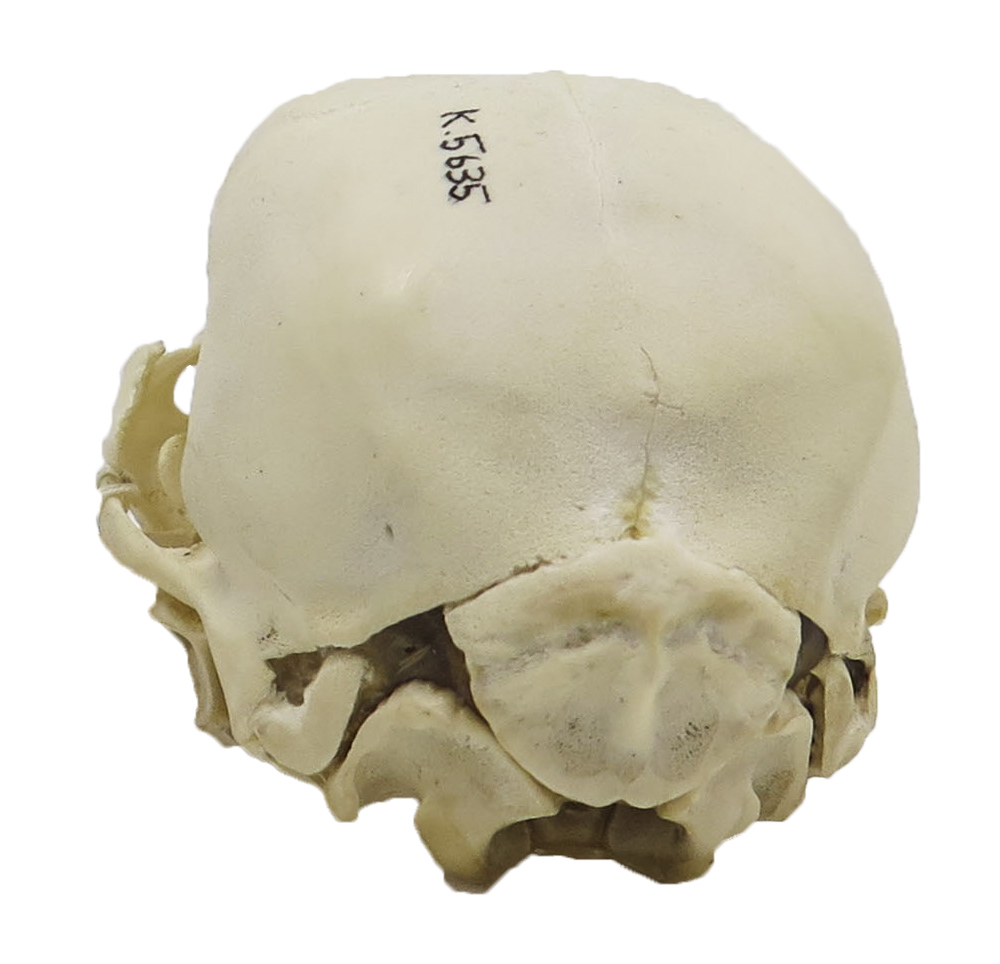
And finally from the mammals… take a look at these photographs of the tiger cub skull showing the roof of the mouth and the back of the skull. Can you see lots of cracks in it? These are actually gaps between the bones of the skull. We have similar gaps between bones when we are very young. They fuse up as we get older.
Amphibians
Frogs, toads and newts are all types of amphibian. This is a group of animals that live both on land and in the water. They lay jelly-like eggs (think of the frog spawn or toadspawn you may have seen in a pond) and in most species the young hatch out into larvae (tadpoles) that live in water and look very different to the adults. Download our Frog Lifecyle colouring in and take a look at the different lifestages of these animals:
Visit our Frogspawn Fun post for instructions on how to make ‘frogspawn’ from tapioca, and visit our Frog Crafts page for instructions on how to make an origami frog.
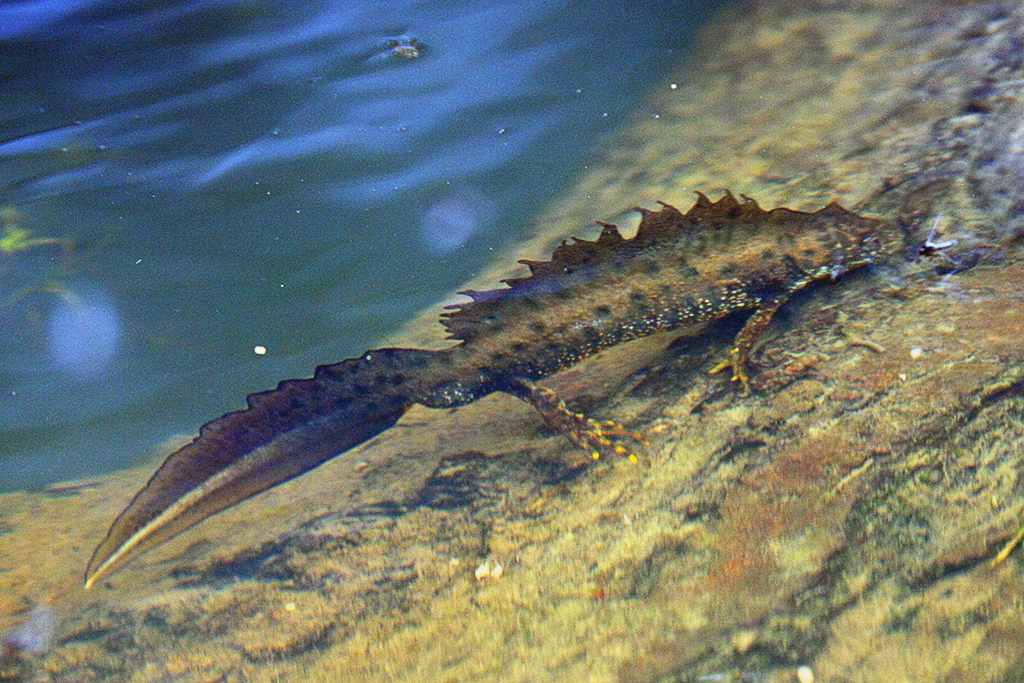
Common frogs lays clumps of frogspawn, but toads lay strings instead. Newts lay their eggs on the undersides of the leaves of water plants. Newt tadpoles have feathery gills on the outside, and their front legs develop before their hindlegs. Find out more about newts with our recent episode of Pondwatch, and keep an eye on our Wildlife From Your Window feed as we keep you updated on the progress of these little creatures living in the garden pond:
Animal Profiles: UK Amphibians.
Here’s a little more information about our native amphibians:
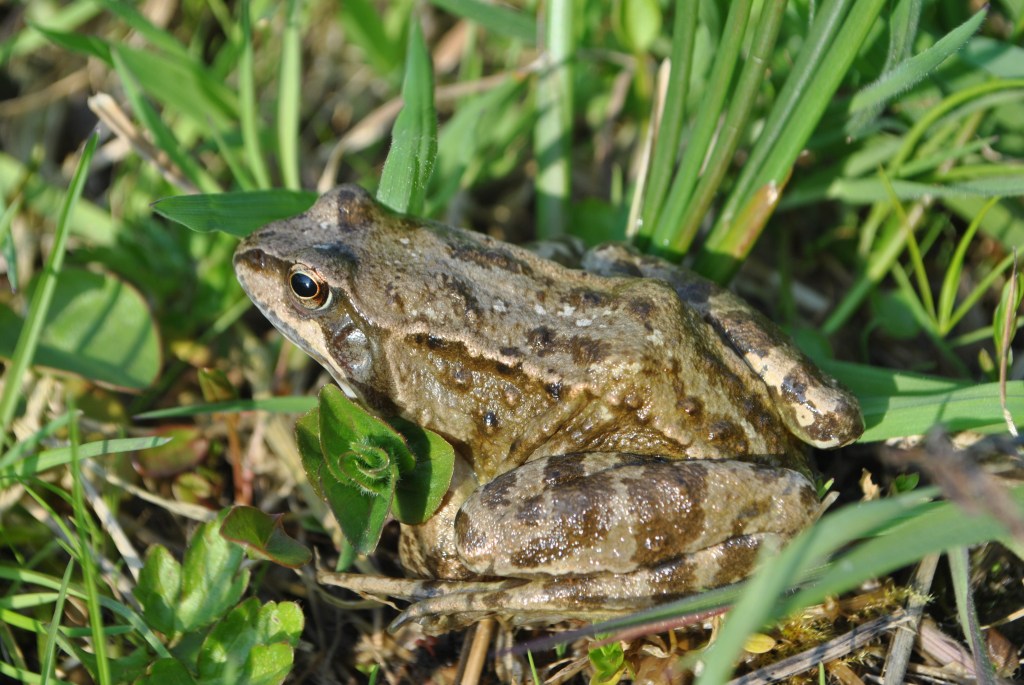
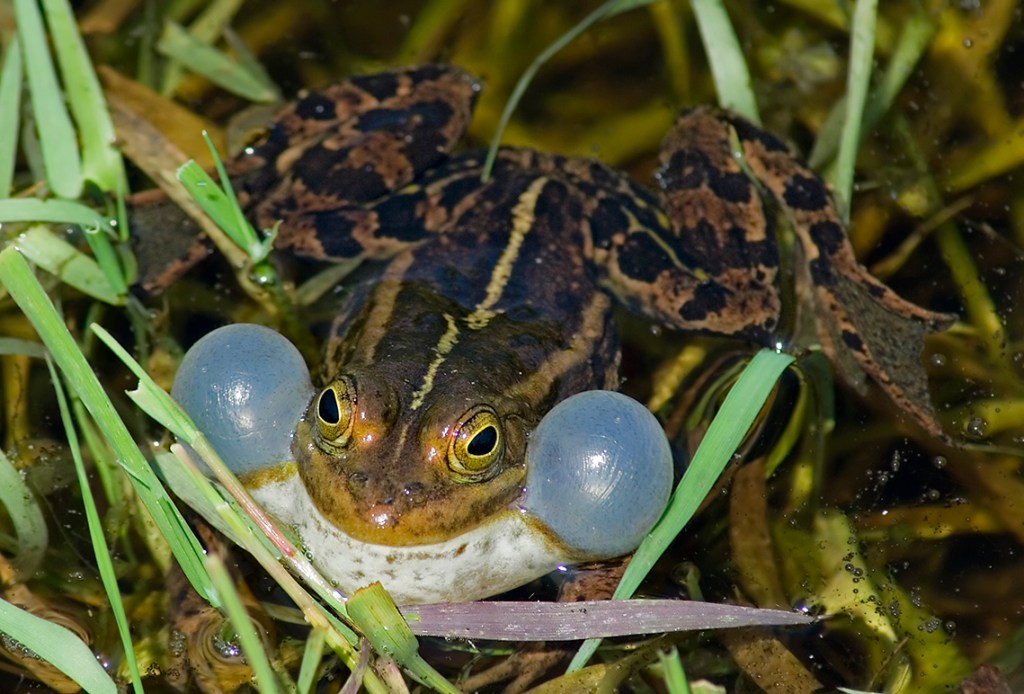
Common frog Rana temporaria. This is the most common amphibian in this country. It has a smooth, moist skin, and is usually green or brown in colour although some yellow, cream and black frogs have been seen. The common frog has a black-brown stripe running from the snout to behind the eye. Frogs lay their eggs as clumps of frogspawn. (image credit: Ed Shaw)
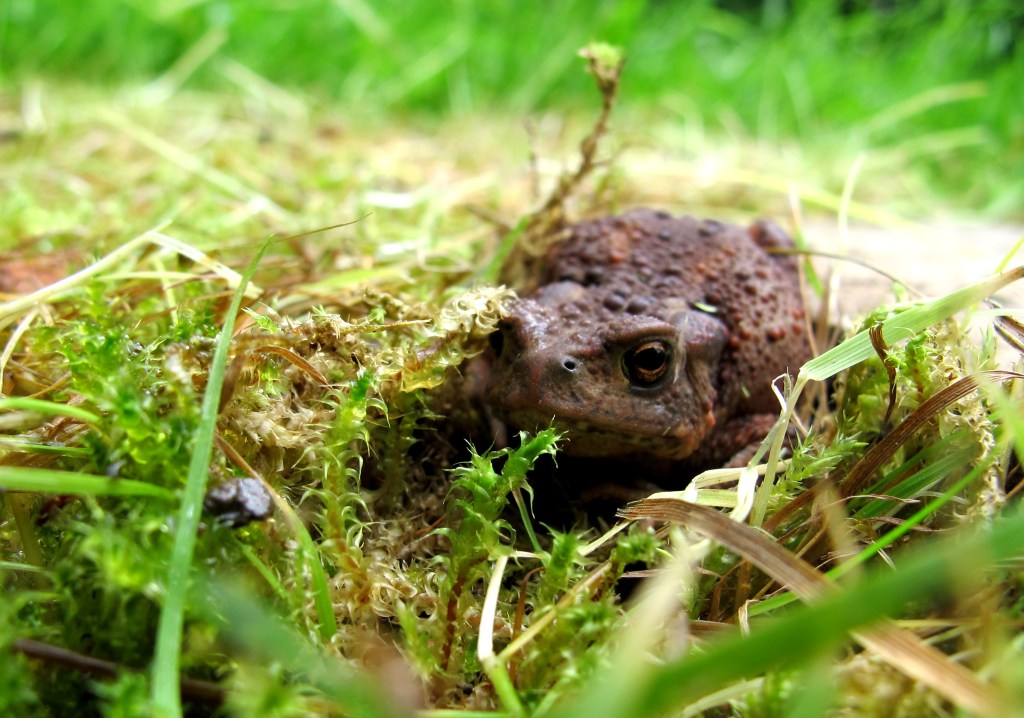
Common toad Bufo bufo. Common toads have a broad, squat body and dry, warty skin. They are usually brown or brown-green in colour. They have a gland behind each eye that produces a toxin, making these toads distasteful to predators. Toads lay their spawn in double or triple-stranded strings. (image credit: Kate Howlett)
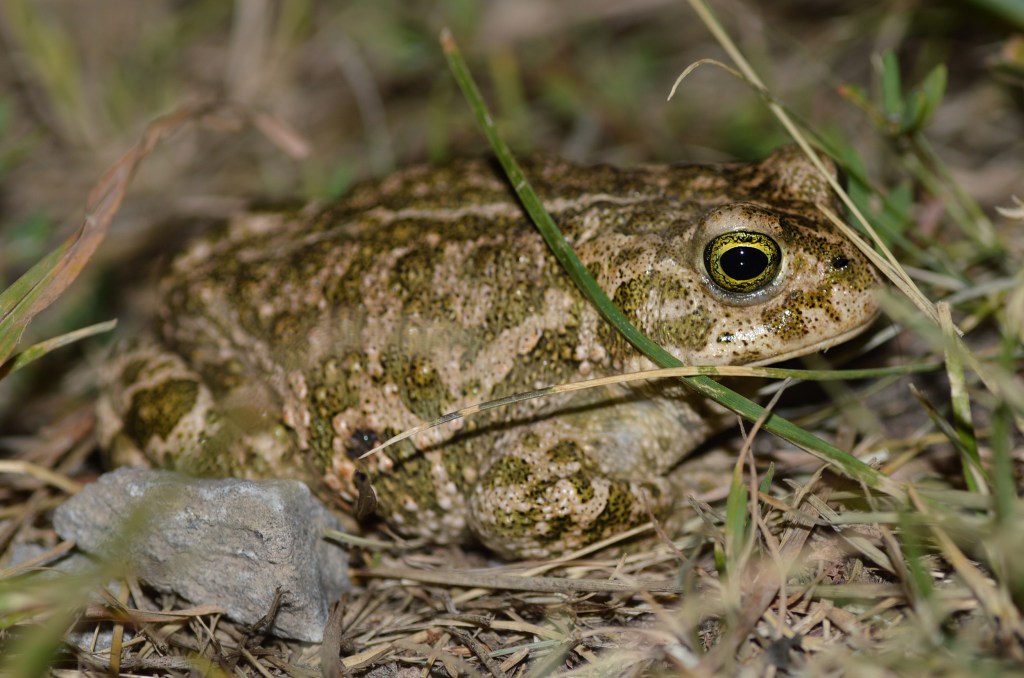
Natterjack toad Epidalea calamita. The natterjack toad is one of the UK’s rarest amphibians, and has the loudest call of any UK amphibian. They live in coastal dunes and lowland heath areas. They have a warty skin of a grey-brown to dark olive green colour, usually with a yellow stripe down the centre of its back. Natterjack toads lay their spawn in a single string. (image credit: Alexandre Roux)
Pool frog Pelophylax lessonae. This species was presumed extinct in the wild in the UK in the 1990s, but has been reintroduced at a couple of sites in Norfolk using frogs from Sweden. They are brown or green with dark spots and a cream or yellow strip running down the back. (image credit: Dave)
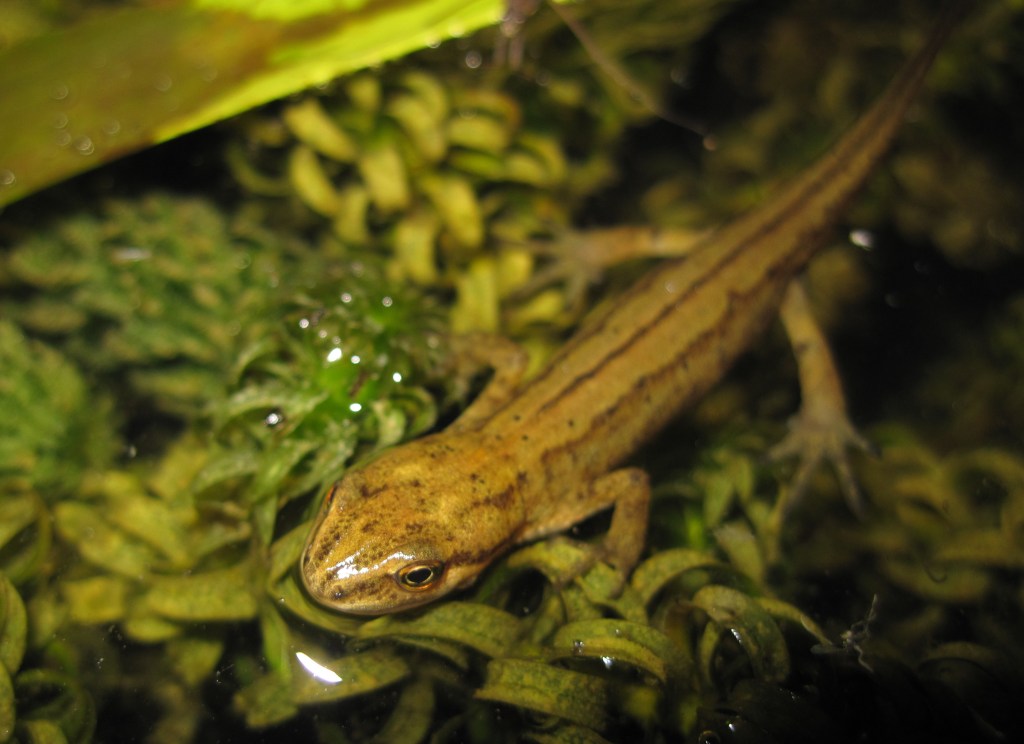
Smooth newt Lissotriton vulgaris. Also known as the common newt, smooth newts have a green-brown body with dark spots, pale sides and throat, and a pale orange belly with black spots. The orange streak on the belly is more marked in males. Breeding males also have a crest running from head to tail. Adult smooth newts can grow to 11cm in length. (image credit: Ewan Pearce)

Palmate newt Lissotriton helveticus. This is the smallest UK amphibian, with adults growing up to 9cm in length. Palmate newts have a brown-green back and pale yellow belly, both with dark spots. The throat is a pinkish colour and not spotted. Males develop strongly webbed hind feet during the breeding season, along with a low, smooth crest along the back. (image credit: Todd Pierson)
Great crested newt Triturus cristatus. This is the UK’s largest newt, growing up to 16cm long. It is also one of our rarest amphibians. Great crested newts have a dark brown or black skin with white-tipped warts. The belly is bright orange with large black spots, and their toes have black and orange stripes. A large, jagged crest is seen on the backs of breeding males. (image credit: Mark Kilner)
You can find out more about our native amphibians on the Froglife website.
Insects
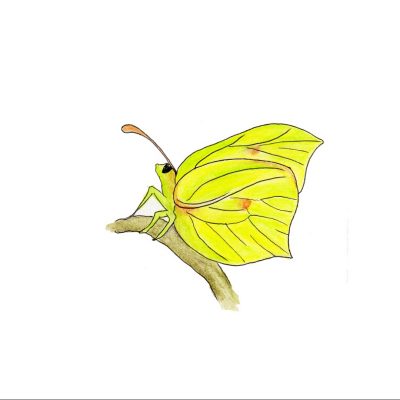
The life cycle of a butterfly or moth includes one of the most amazing transformations of any animal.


An adult female butterfly or moth usually lays eggs on a carefully chosen plant.
These eggs quickly hatch, and the butterfly’s young emerge. The name given to this life stage is a caterpillar and a caterpillar’s main job is to eat food. Caterpillars eat huge amounts, normally feeding on the plant they were laid on, and they can grow to be 100s if not 1000s of times heavier then when they first emerged from their eggs.
Once they have fed and grown large enough, it is time for them to enter their next life stage and become adult butterflies. First, the skin begins to harden and form a protective casing called a chrysalis. Within this protective case, the caterpillar then starts its transformation into an adult butterfly: a process called metamorphosis. Instead of simply growing wings, the caterpillar’s body begins to break down and forms a kind of lumpy soup. This soupy stage then re-forms into the shape of an adult butterfly. Here’s a video by Museum Research Assistant Matt Hayes demonstrating how this happens.
When fully formed the adult butterfly breaks out of the chrysalis, and after opening its wings for the first time flies off in search of a mate. After mating, the adult female butterfly will lay her eggs on a carefully chosen plant and restart the cycle.

Many insects go through these dramatic changes, from a larva to an adult that looks very different. Here’s another example: ladybirds.
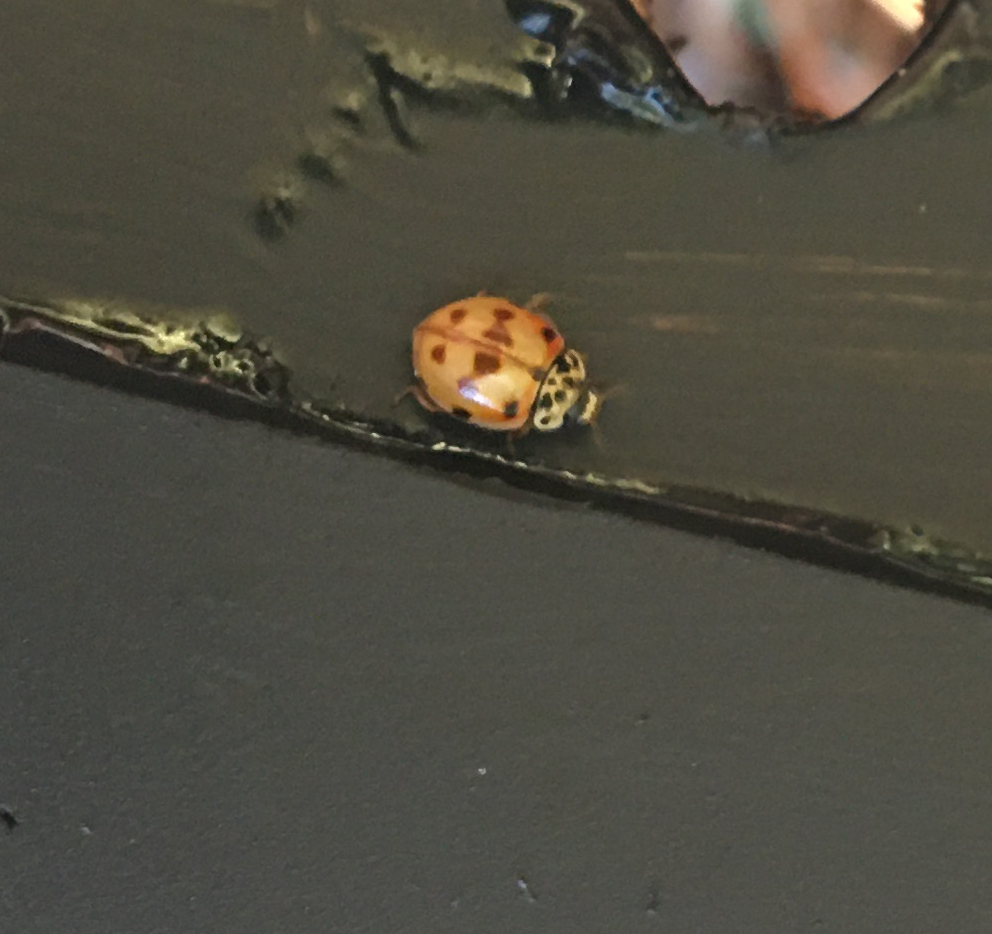
There are 46 species of ladybird in Britain, with only 26 of these being bright coloured and spotty. You are most likely to see the 7-spot ladybird in your garden. Named for the seven black spots on its red back. Can you count the spots of this ladybird?

The different patterns you see on a ladybird can help you to identify which species they belong to. (The number of spots won’t tell you how old it is.)
10-spot ladybird. Image credit: Sara Steele 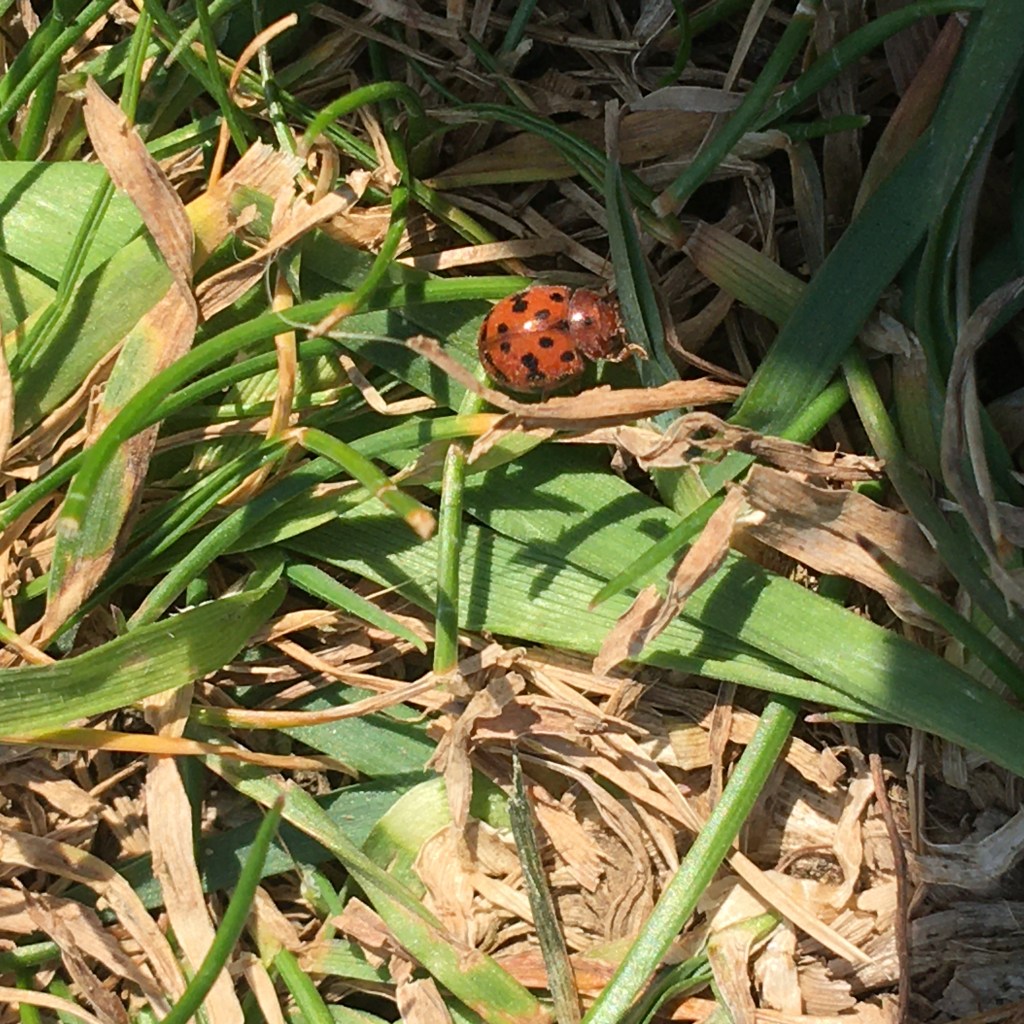
20-spot ladybird. Image credit: Sara Steele 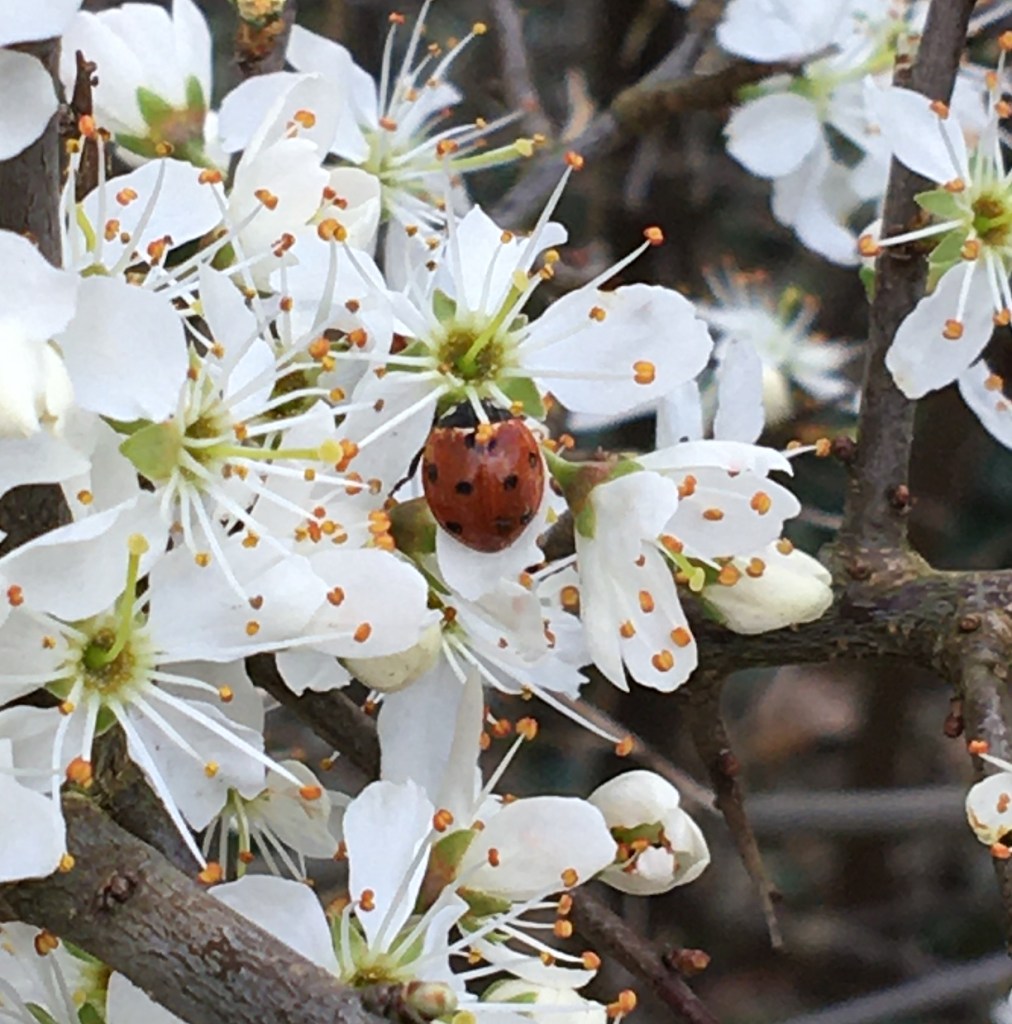
7-spot ladybird. Image credit: Sara Steele
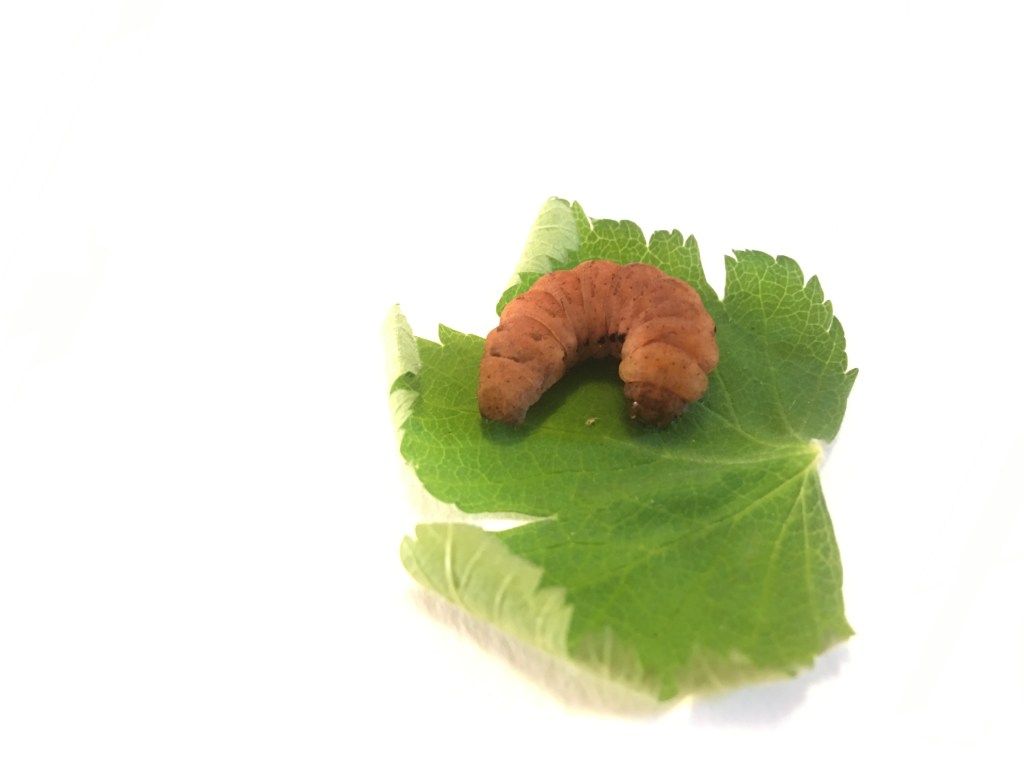
Ladybirds are types of beetle and go through the same life stages as many other beetles. They begin as an egg and hatch into a larva that looks quite different from the adult ladybird.You’ll start seeing ladybird larvae in your garden in June-July. Once the larva has eaten its fill of aphids and other small insects, it attaches itself to a leaf. Their outer ‘skin’ hardens and they undergo metamorphosis just like the butterflies and moths.
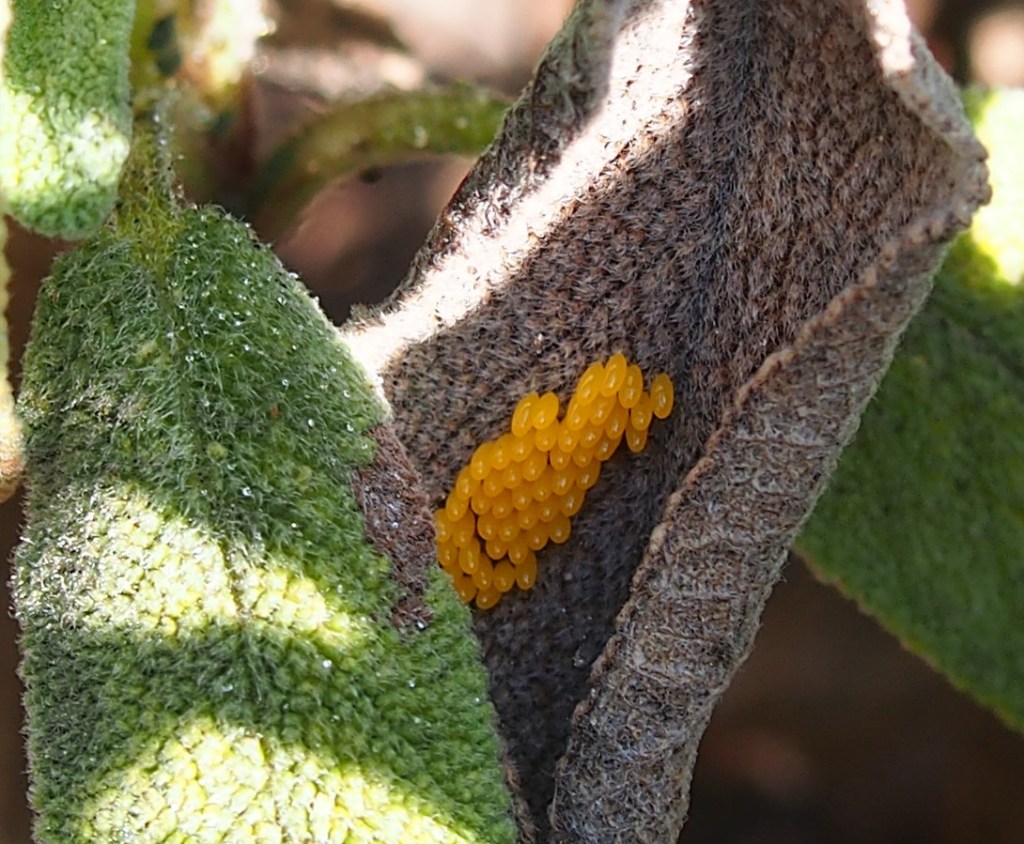
Ladybird eggs. Image credit: Lalanti Venkatasubramanian 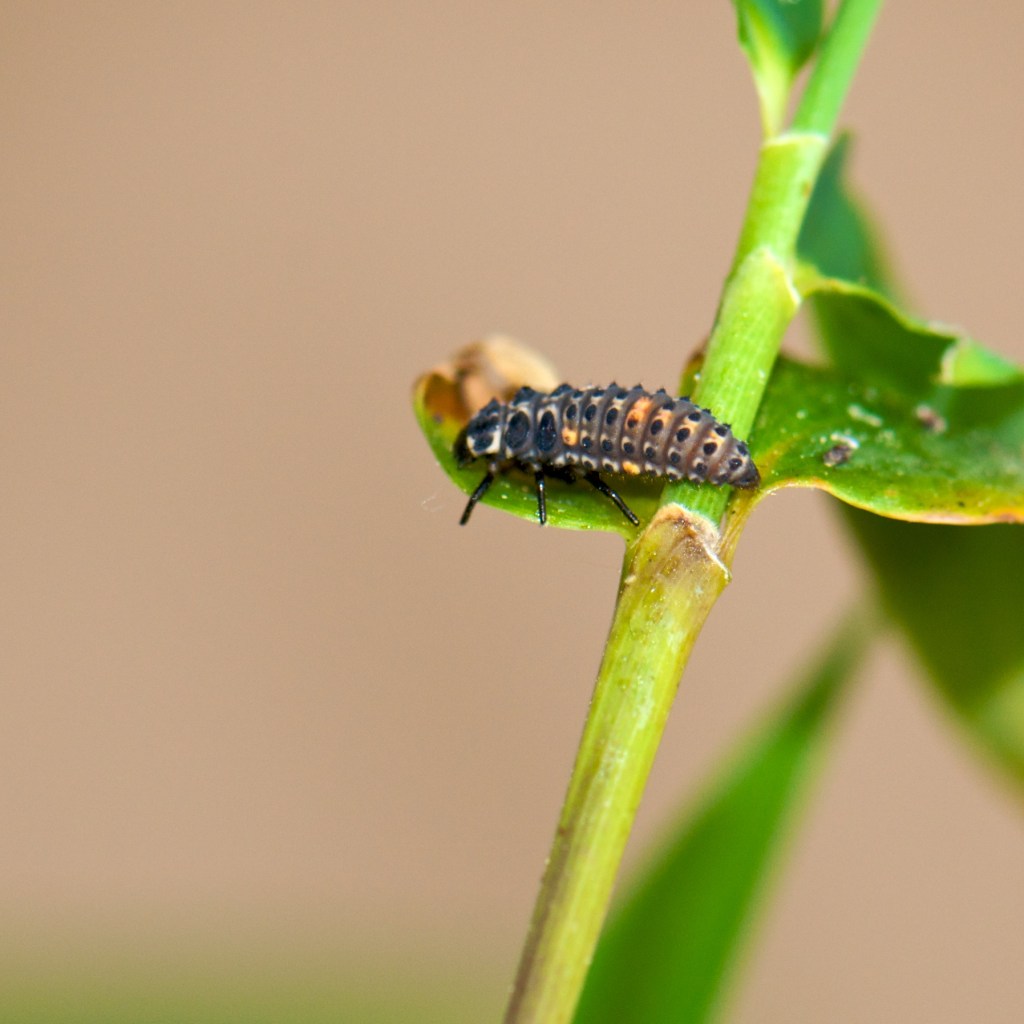
Ladybird larva. Image credit: Nuno Barreto 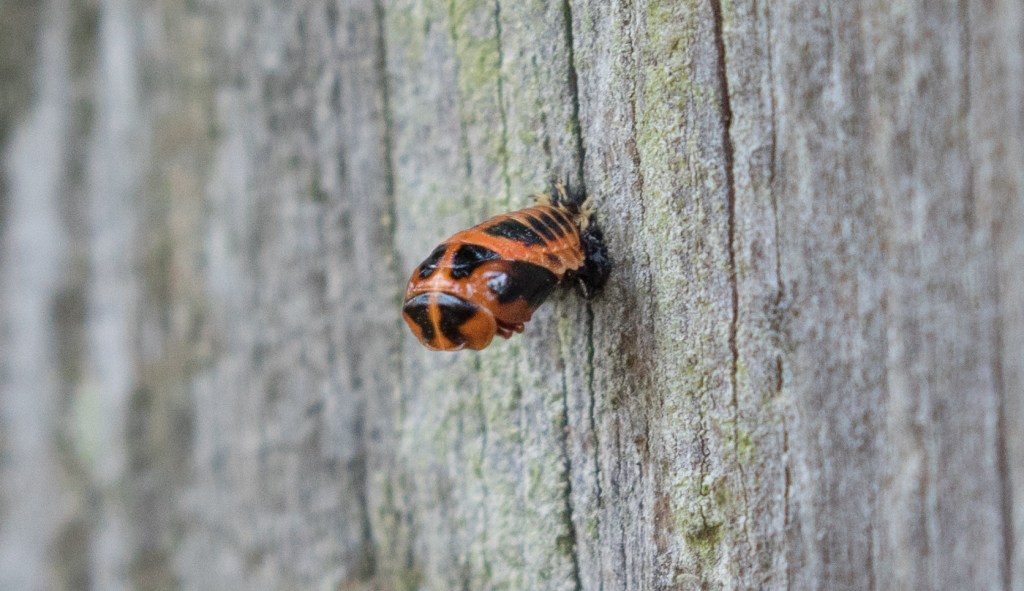
Ladybird pupa. Image credit: John Howlett 
7-spot ladybird. Image credit: John Howlett
After a while the adult ladybird that we are familiar with emerges and begins to chomp on more aphids and to search for a mate.
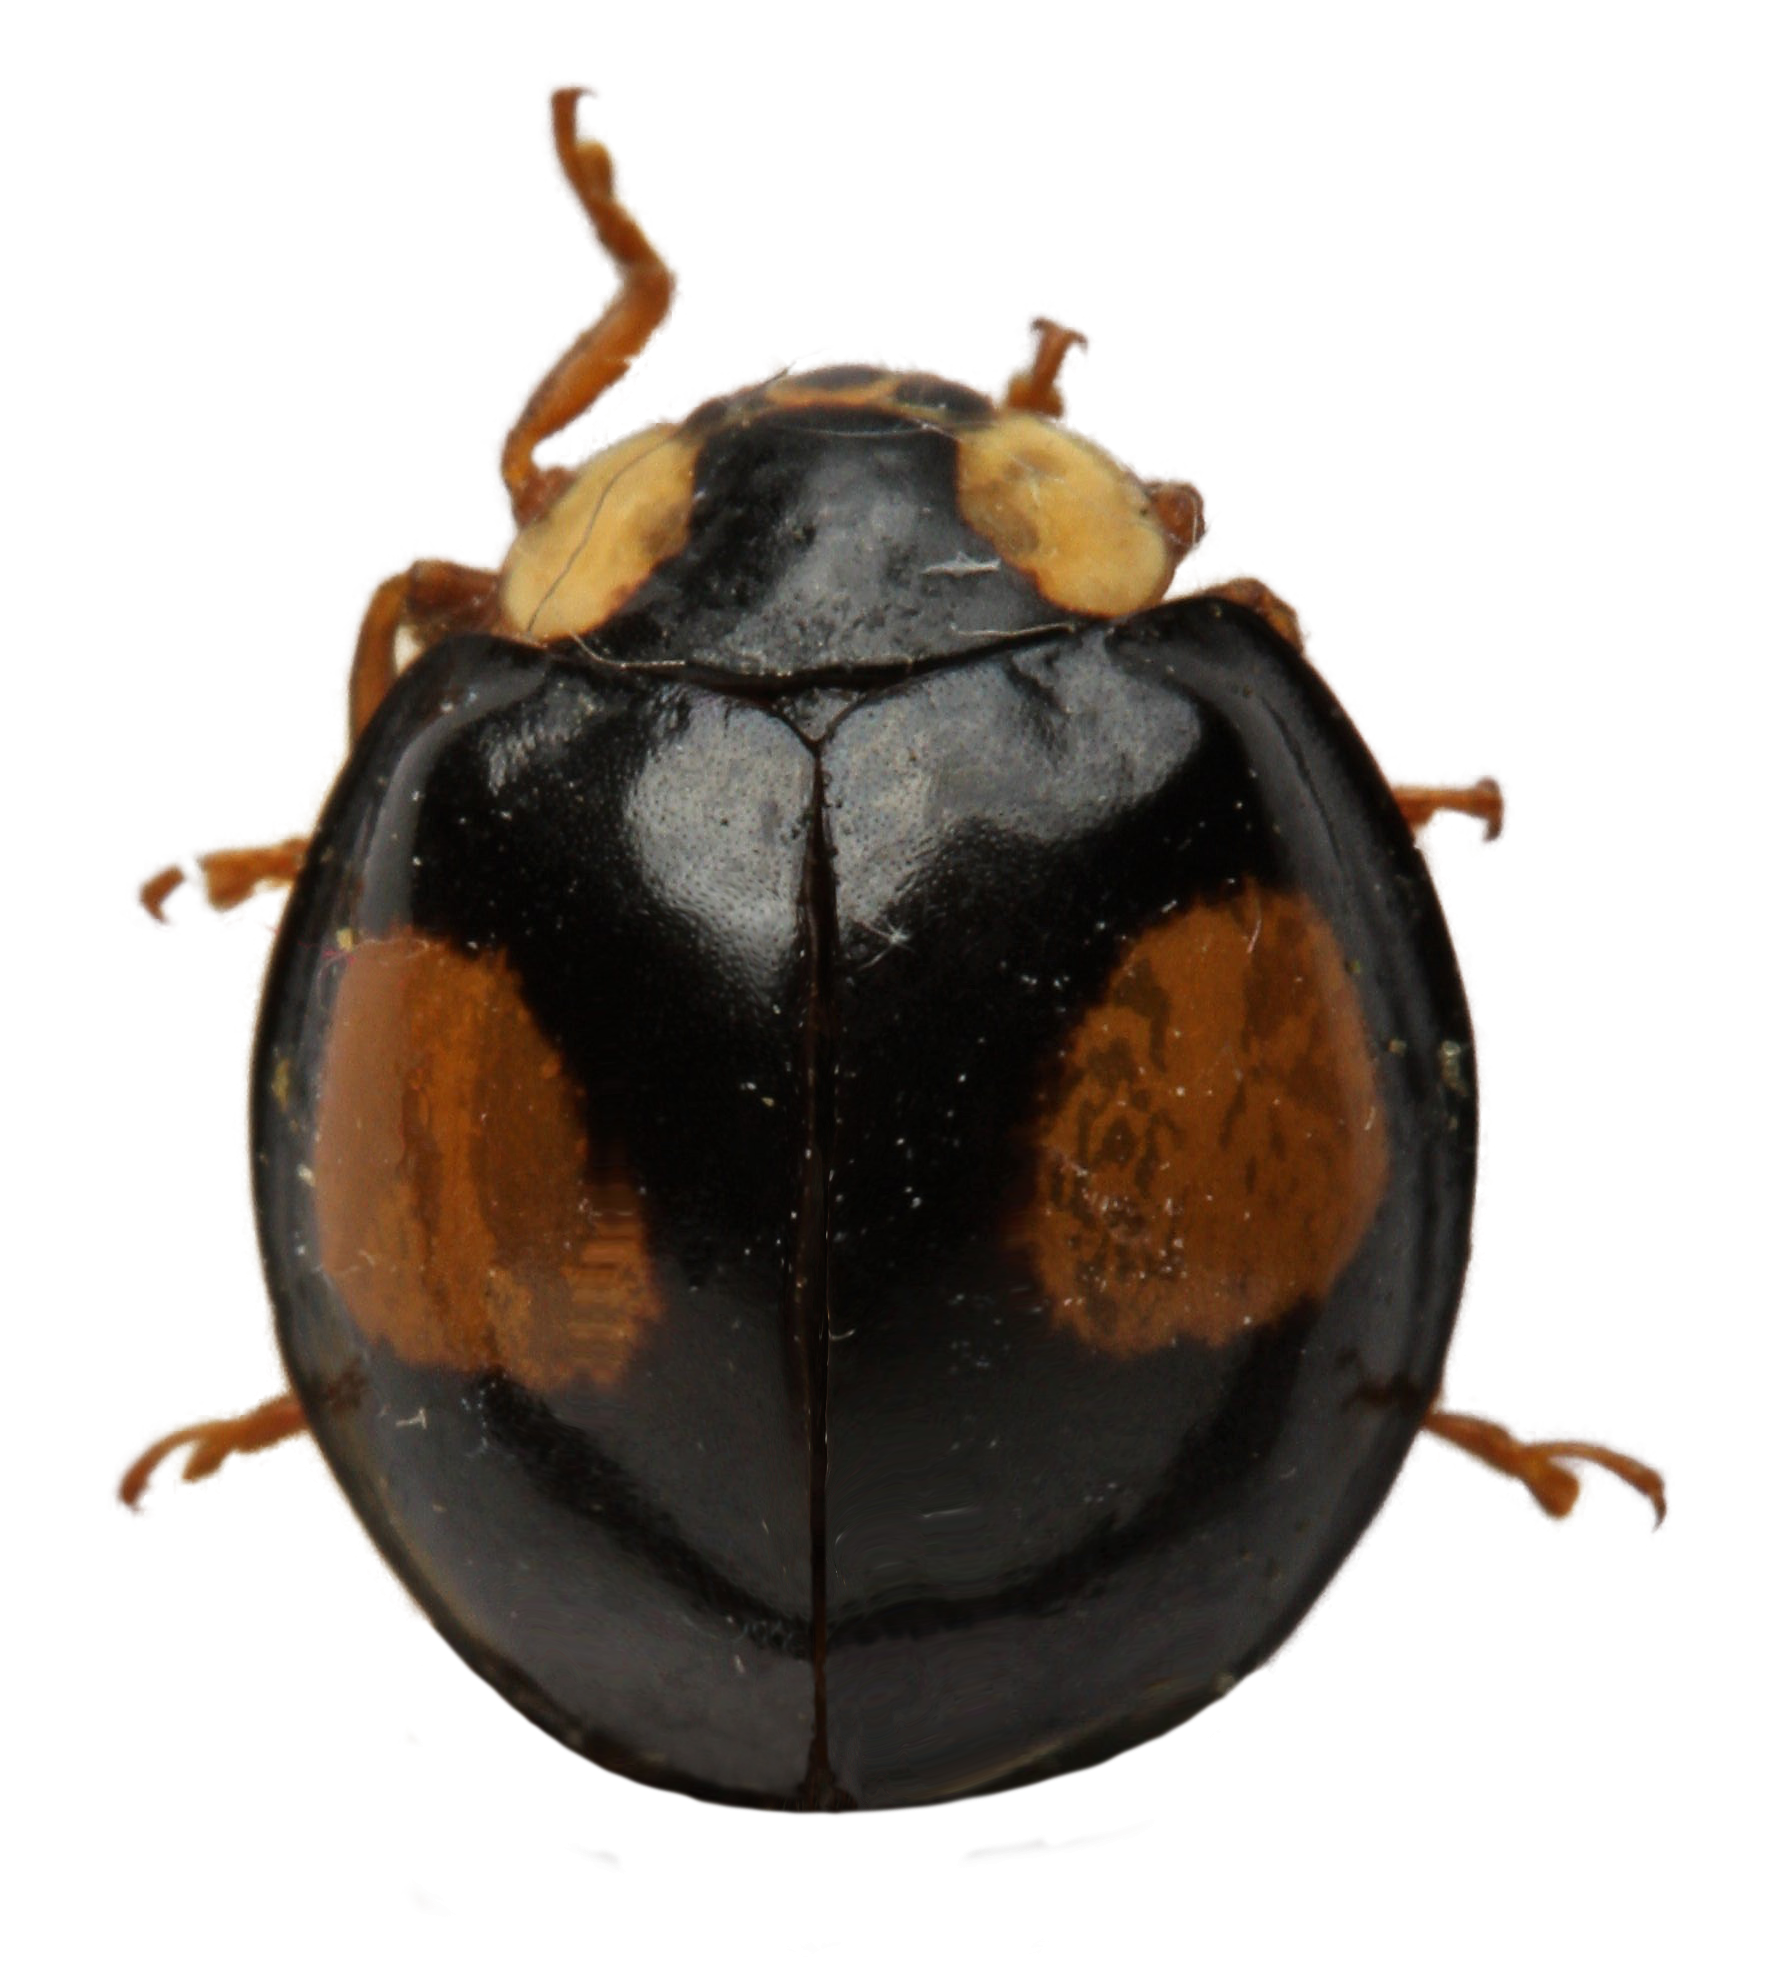
Another common ladybird is the harlequin ladybird. This species is not native to the UK and has been called the most invasive ladybird on Earth. When it can’t find aphids to eat, it will eat other ladybird eggs and larvae. This means that not only does it compete for the same food as our native ladybirds, it eats them too! Harlequin ladybirds can be difficult to identify as they can often look very different from each other. The different pattern and colour groups are called ‘morphs’. This is a black harlequin ladybird from the Museum’s collection, but there are many other colours that belong to the same species. Find out more on the UK ladybird survey website.

2 thoughts on “Animal Lifecycles”